Creating a Connection Between N8N and Mentortools (Inbound)
In this tutorial, you will learn how to establish a connection between N8N and Mentortools where data is sent from N8N to Mentortools. You can fulfill many use cases with this. In this example, we will use N8N to create a course.
Last updated 9 months ago
This tutorial focuses on sending information from N8N to Mentortools. This works via the settings in the "AI Interface" area.
You need an N8N account for this. If you don't have one yet, you can create a free N8N account here.
Setting Up the Connection
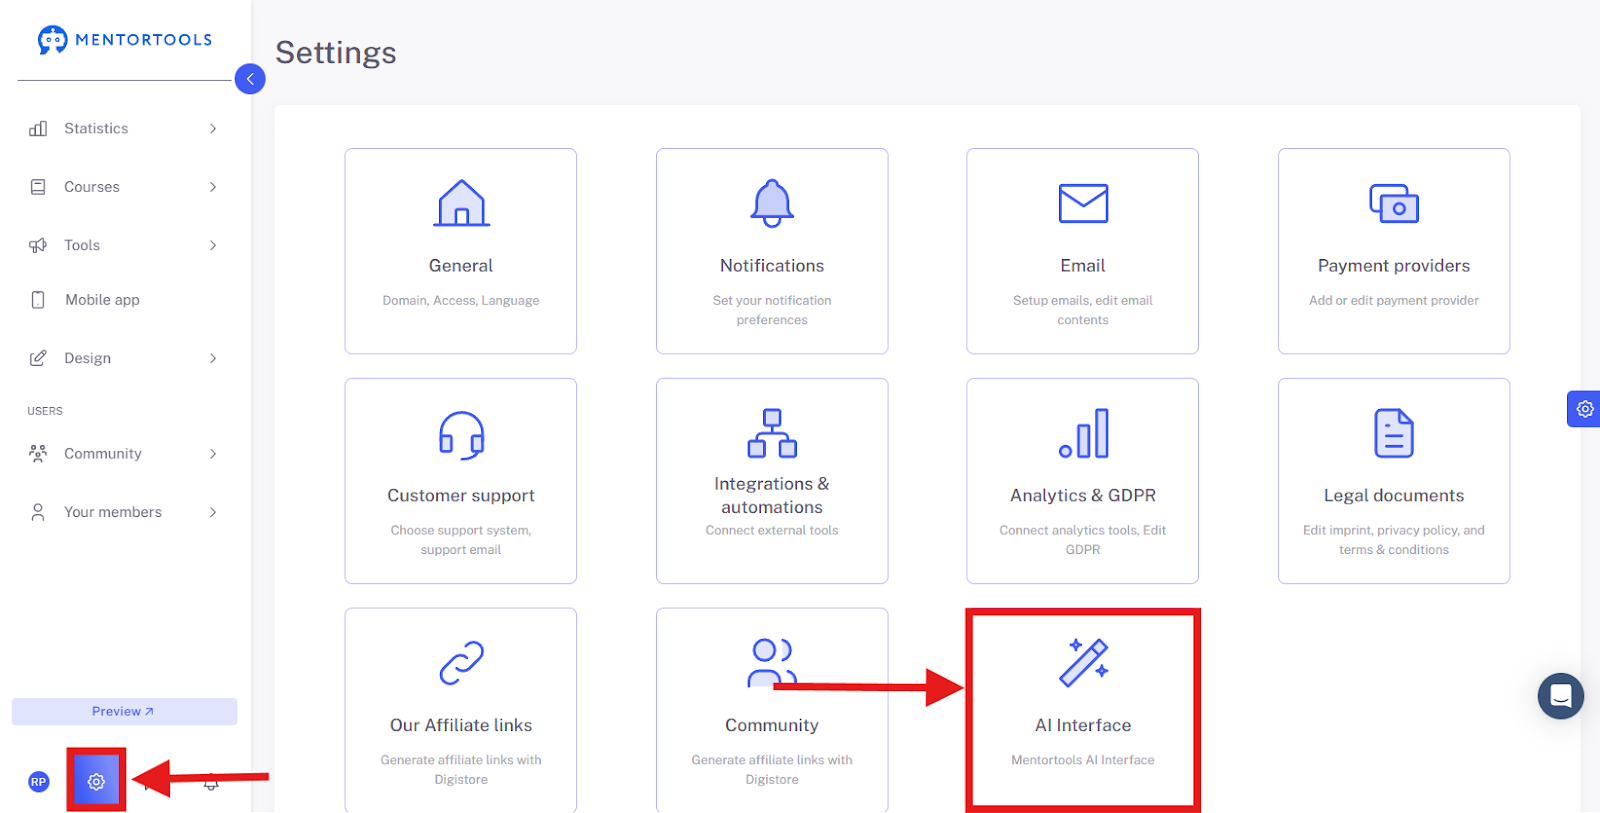
Go to "Settings" and "AI Interface."
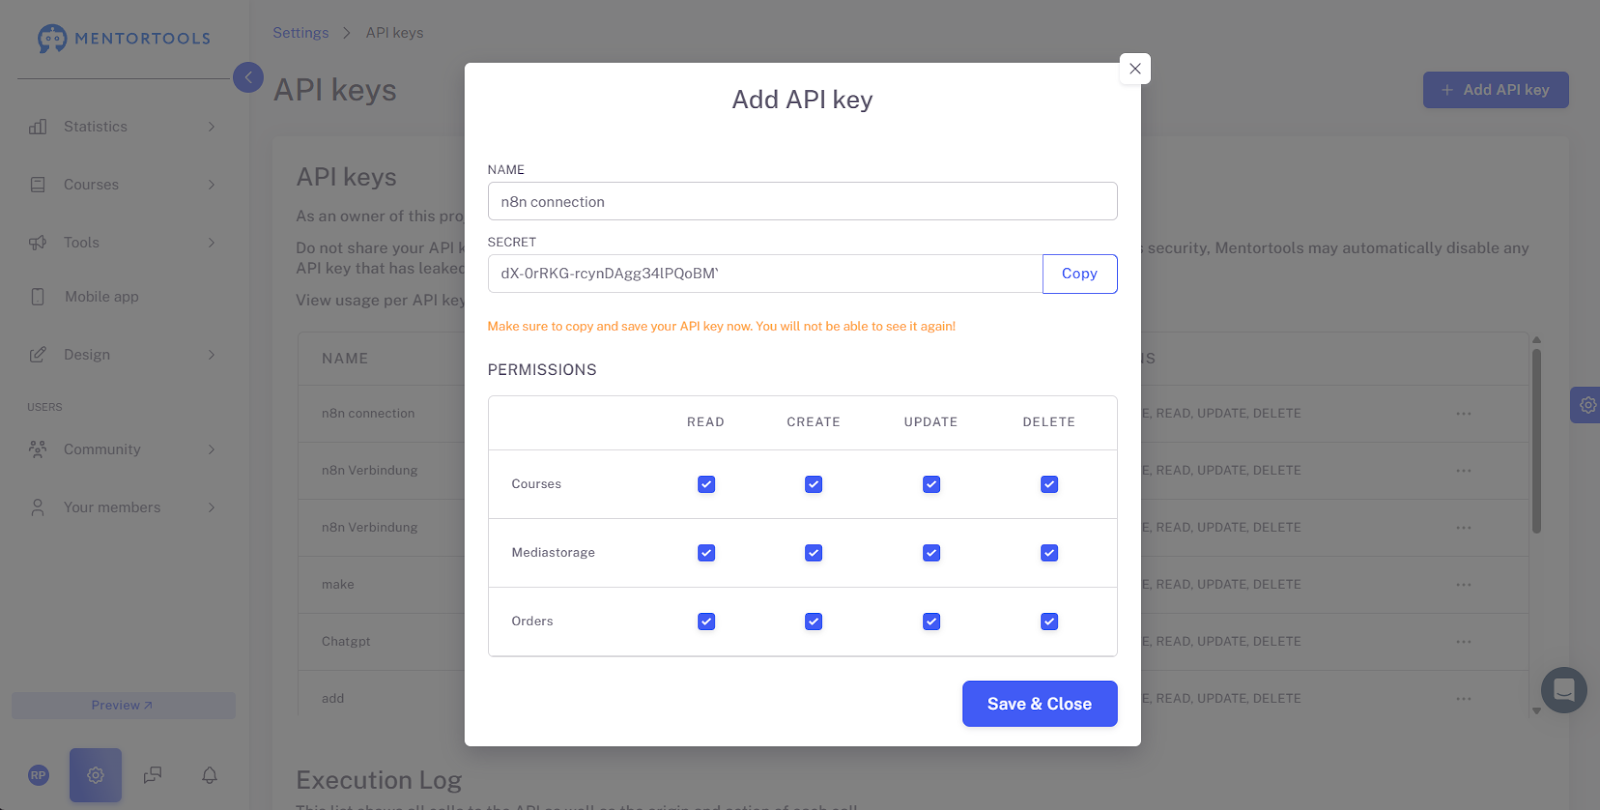
Create API Key
Create an API key by clicking the button in the top right, giving the key a name (e.g., "N8N Connection"), then selecting all the options you need. After that, you can Save the key.
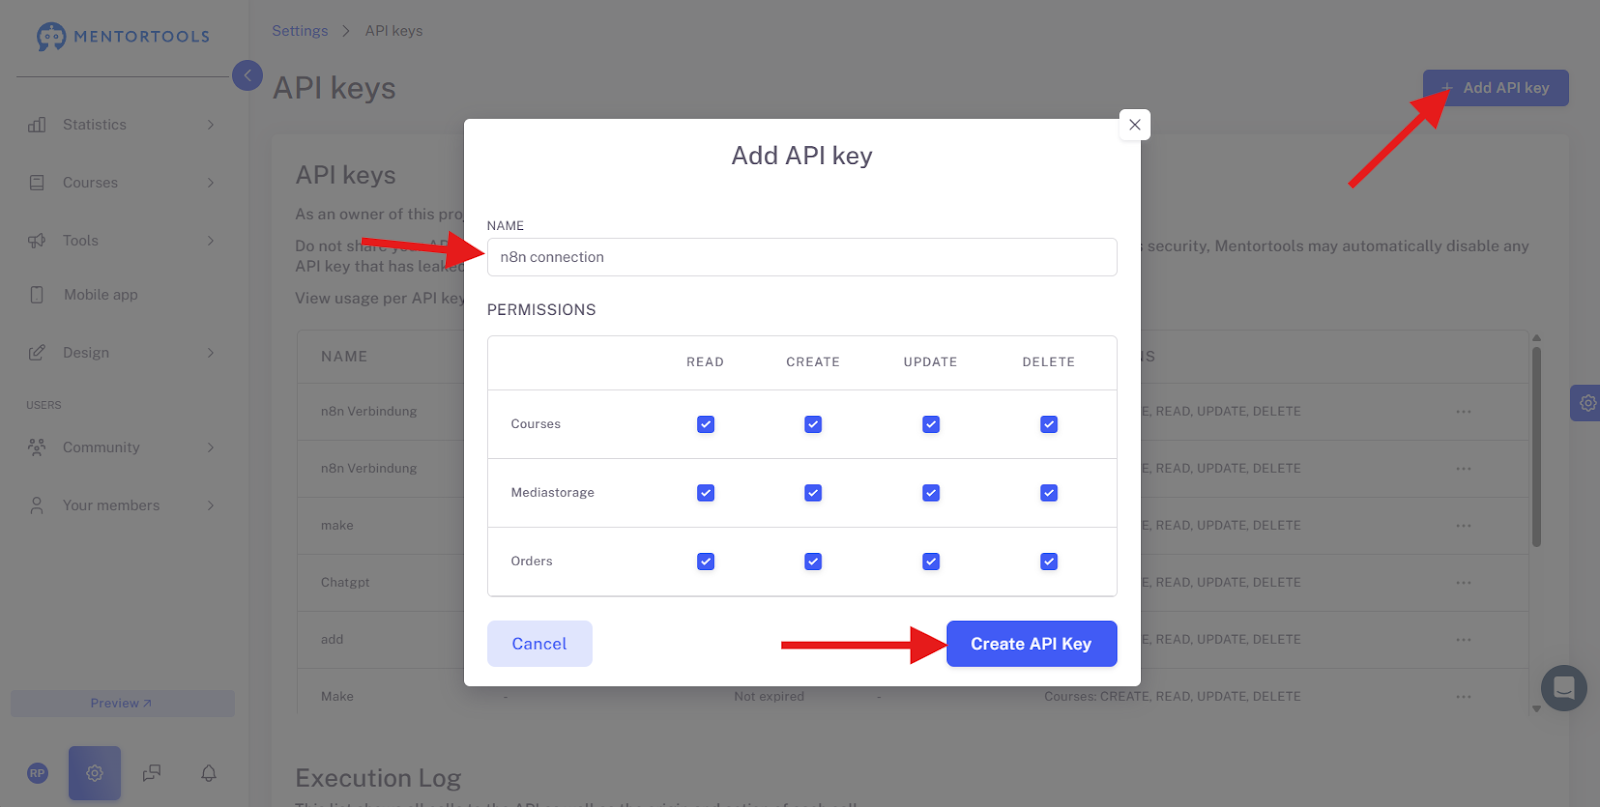
Attention: The key is only visible now. For security reasons, it will no longer be displayed later. However, you can create a new one at any time if you lose a key.

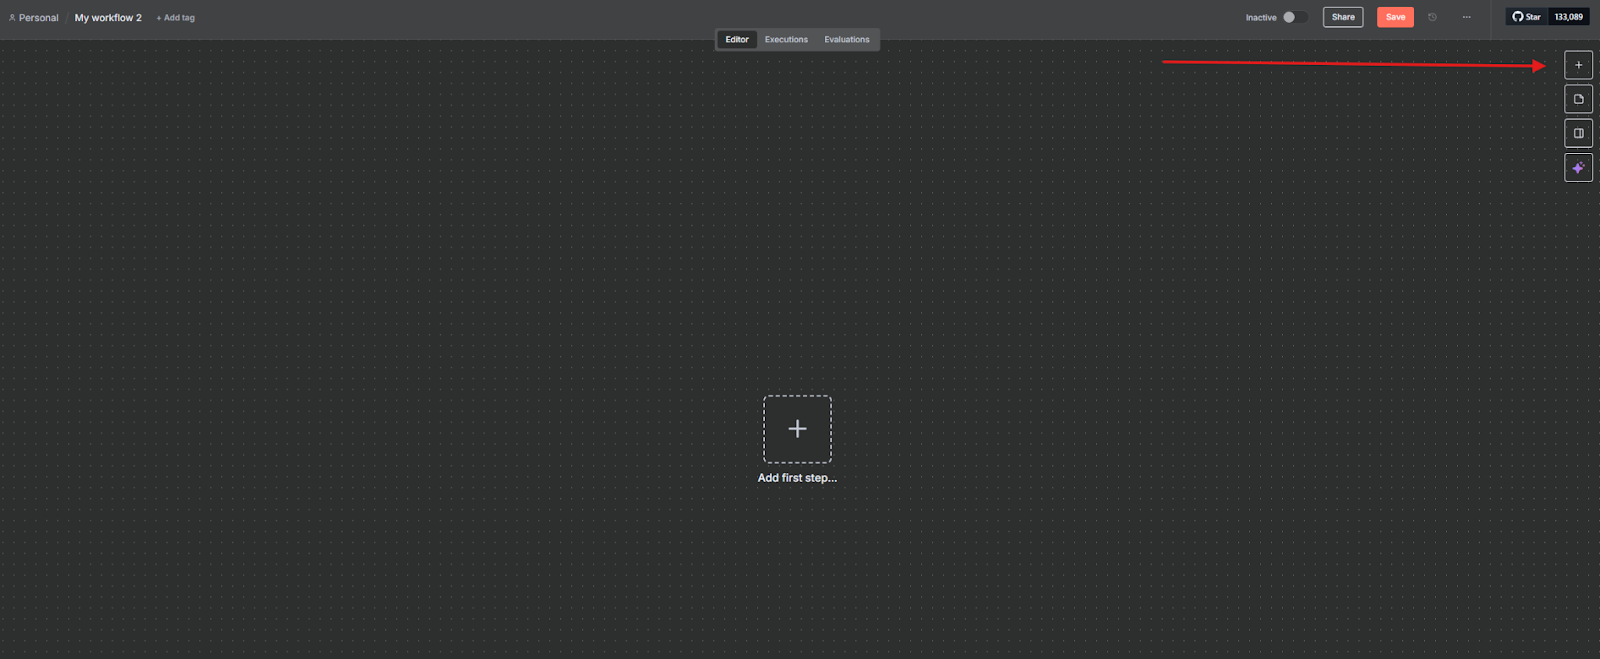
Leave the page with the key open in Mentortools or copy the key into a text document (temporarily). Switch to N8N, click "create workflow," and create a new workflow:

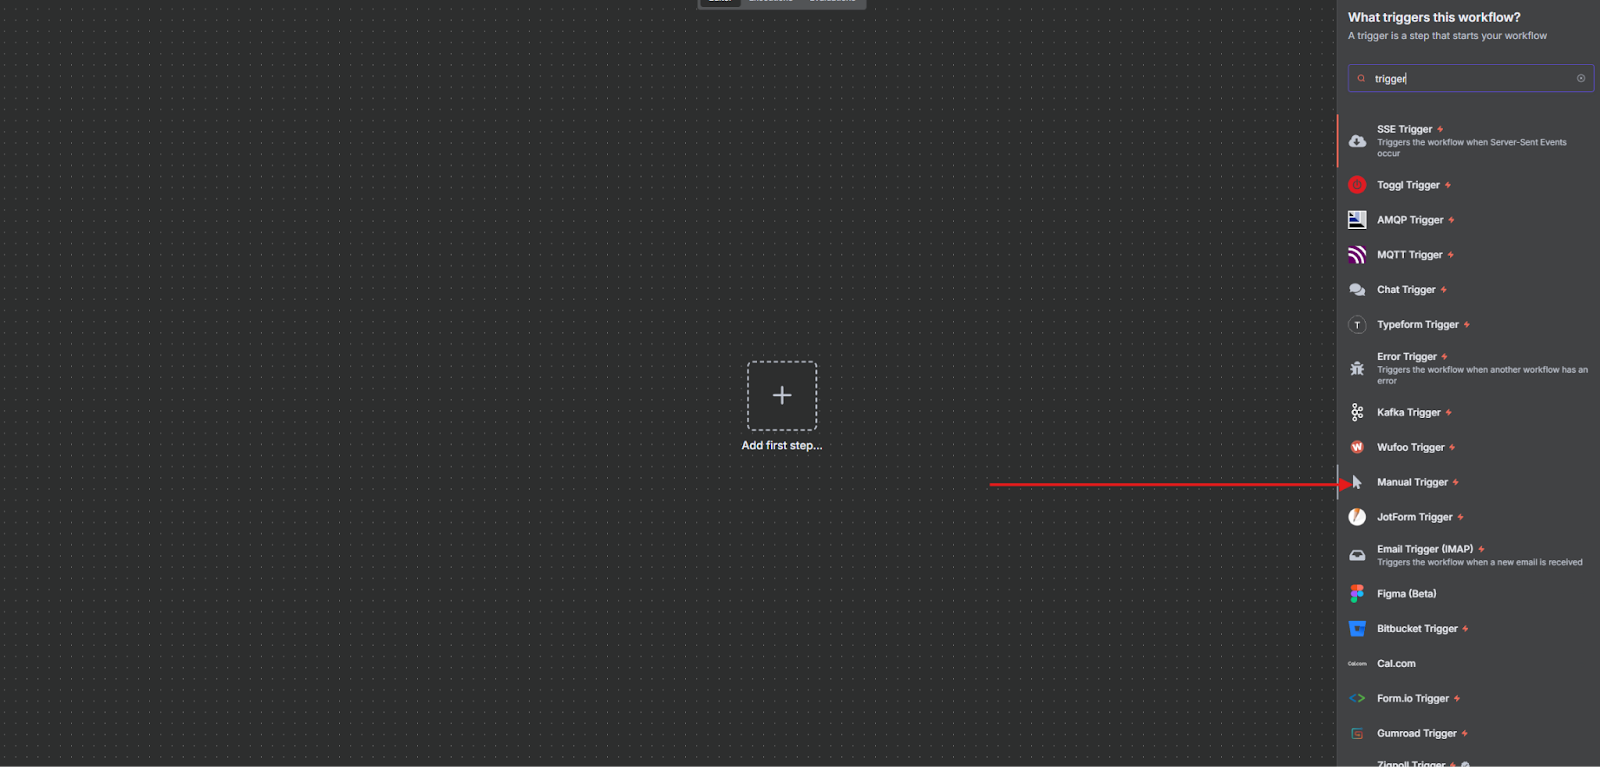
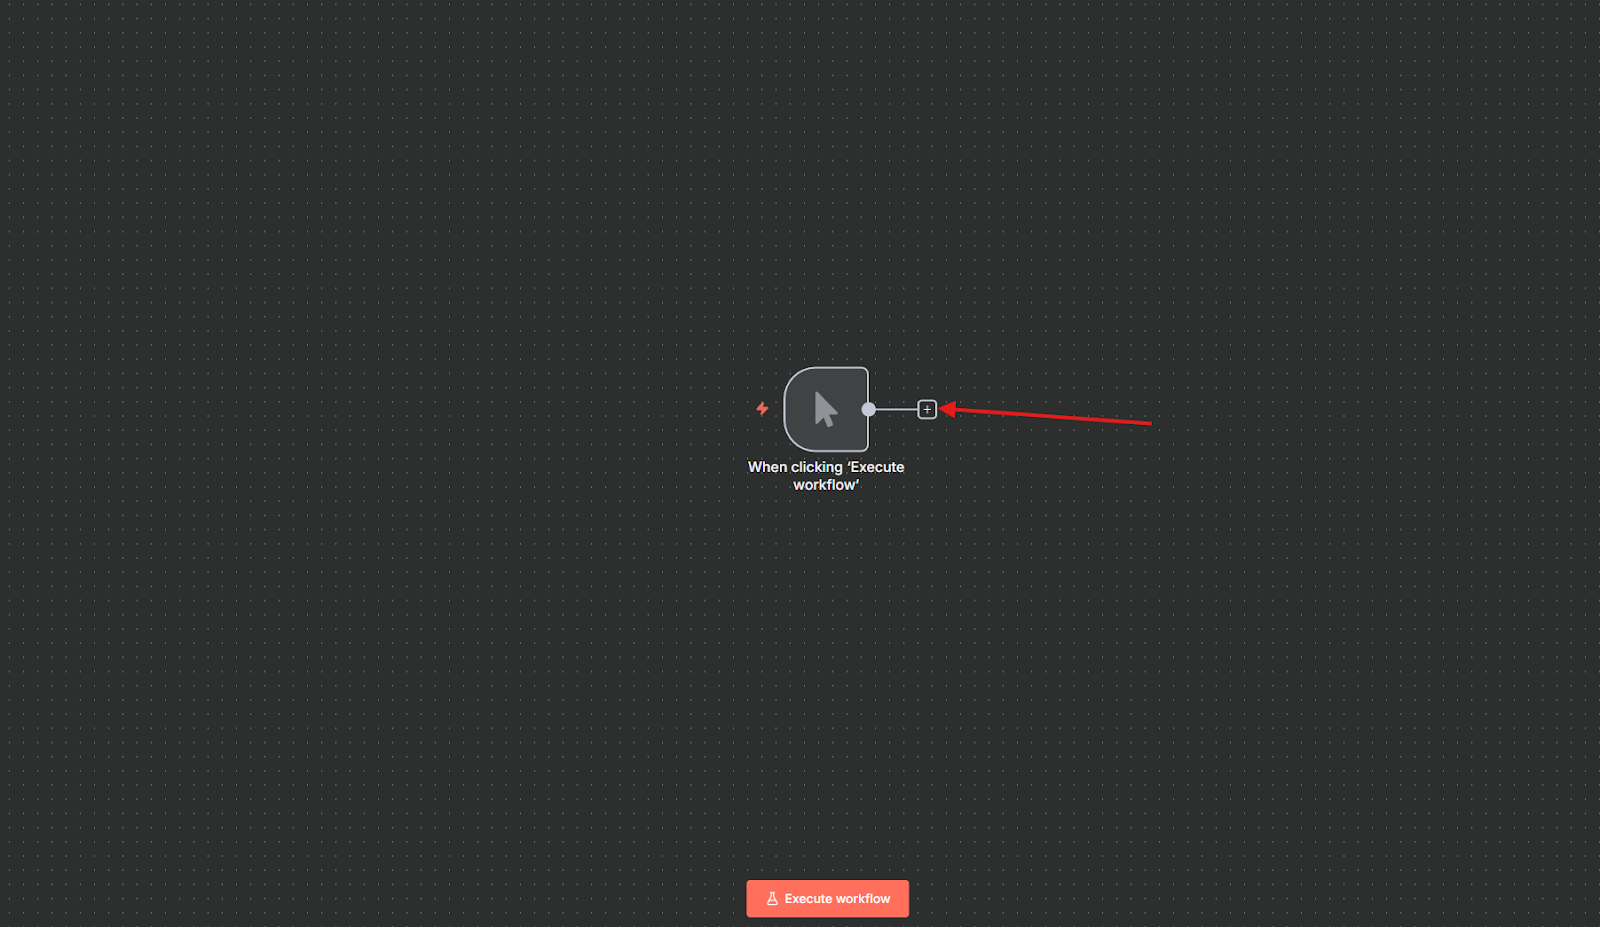
Step 1: Define a Trigger
A Trigger is the first step in every n8n workflow and starts the entire process. This could be a webhook that receives data from an external application, or another trigger that starts your workflow. In this example, we will use a manual trigger.
Click the + symbol in the top right of the screen
Search the bar for "Trigger" to get a list of all triggers and select the desired one. In this case, we select "Manual Trigger."
After the trigger is selected, it appears on your workflow in the center of the screen.

Step 2: Configure the HTTP Request Node
This node establishes the connection to the Mentortools API and sends the course data.
The HTTP Request node is one of the most versatile nodes in n8n. It lets you make HTTP requests to query data from any app or service with a REST API. You can use the HTTP Request node as a regular node or as a tool attached to an AI Agent.
When you use this node, you are essentially creating a REST API call.
Add an HTTP Request node after the Trigger by clicking the small + next to the Trigger.
Search the search bar for "HTTP request" and select it.

The HTTP Request node is now connected to your Trigger, and the user interface for entering the parameters of this node appears.
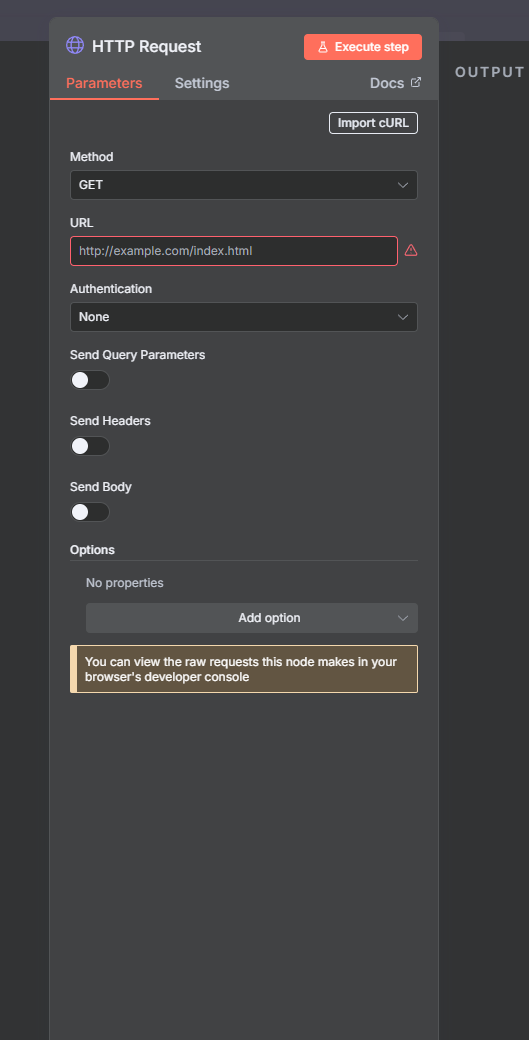
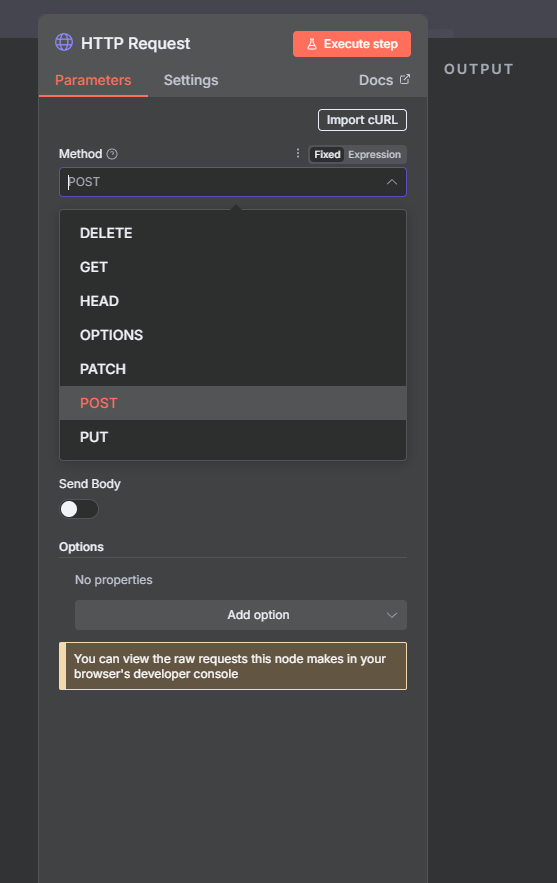
To create a course with the HTTP Request, select "POST" from the drop-down menu under "Method."
Then, enter the necessary Endpoint URL under the "URL" tab.
An Endpoint URL (or simply "endpoint") is the specific internet address to which a client (such as an app or a web browser) sends a request to an API (Application Programming Interface) server to get or send information.
To create a course, the endpoint must be: https://app.mentortools.com/public_api/courses/v1/. This allows you to create a course. All endpoints that allow you to use all Mentortools resources can be found here. Endpoint URLs allow you to access different resources or perform different actions for the same resource.
The screenshot shows where the endpoint must be entered.

The "Authentication" and "Send Query Parameters" fields do not need to be changed here.
Step 3: Add Authentication and Course Data
Under Headers, add a new header for authentication by clicking the switch and filling in the fields.
Name: Authorization
Value: Bearer YOUR_API_KEY (Replace YOUR_API_KEY with your personal API key from Mentortools).
Here is the screenshot of the API key area as a reminder and a screenshot of the HTTP Request user interface:

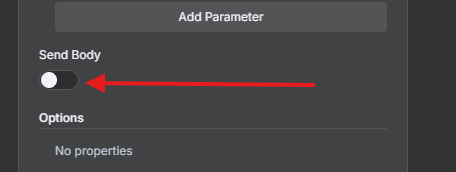
Under "Send Body," toggle the switch again so you can change the settings.
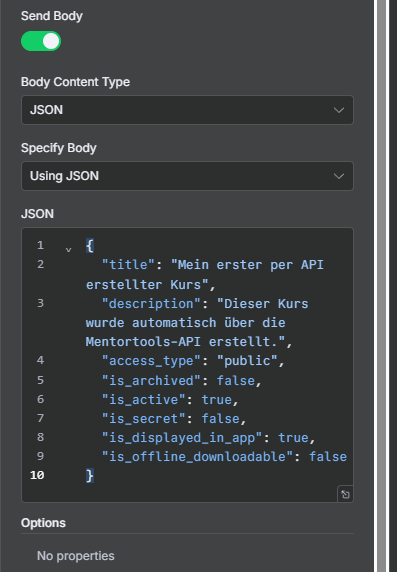
Under Body Content Type, select JSON, and under Specify Body, select "Using JSON."
Insert the required course data in the JSON Body. The API expects the fields: title, description, access_type, is_archived, is_active, is_secret, is_displayed_in_app, and is_offline_downloadable.
Information about what the API expects can also be found here.
Here is a complete example for the JSON Body:
JSON
{
"title": "Mein erster per API erstellter Kurs",
"description": "Dieser Kurs wurde automatisch über die Mentortools-API erstellt.",
"access_type": "public",
"is_archived": false,
"is_active": true,
"is_secret": false,
"is_displayed_in_app": true,
"is_offline_downloadable": false
}
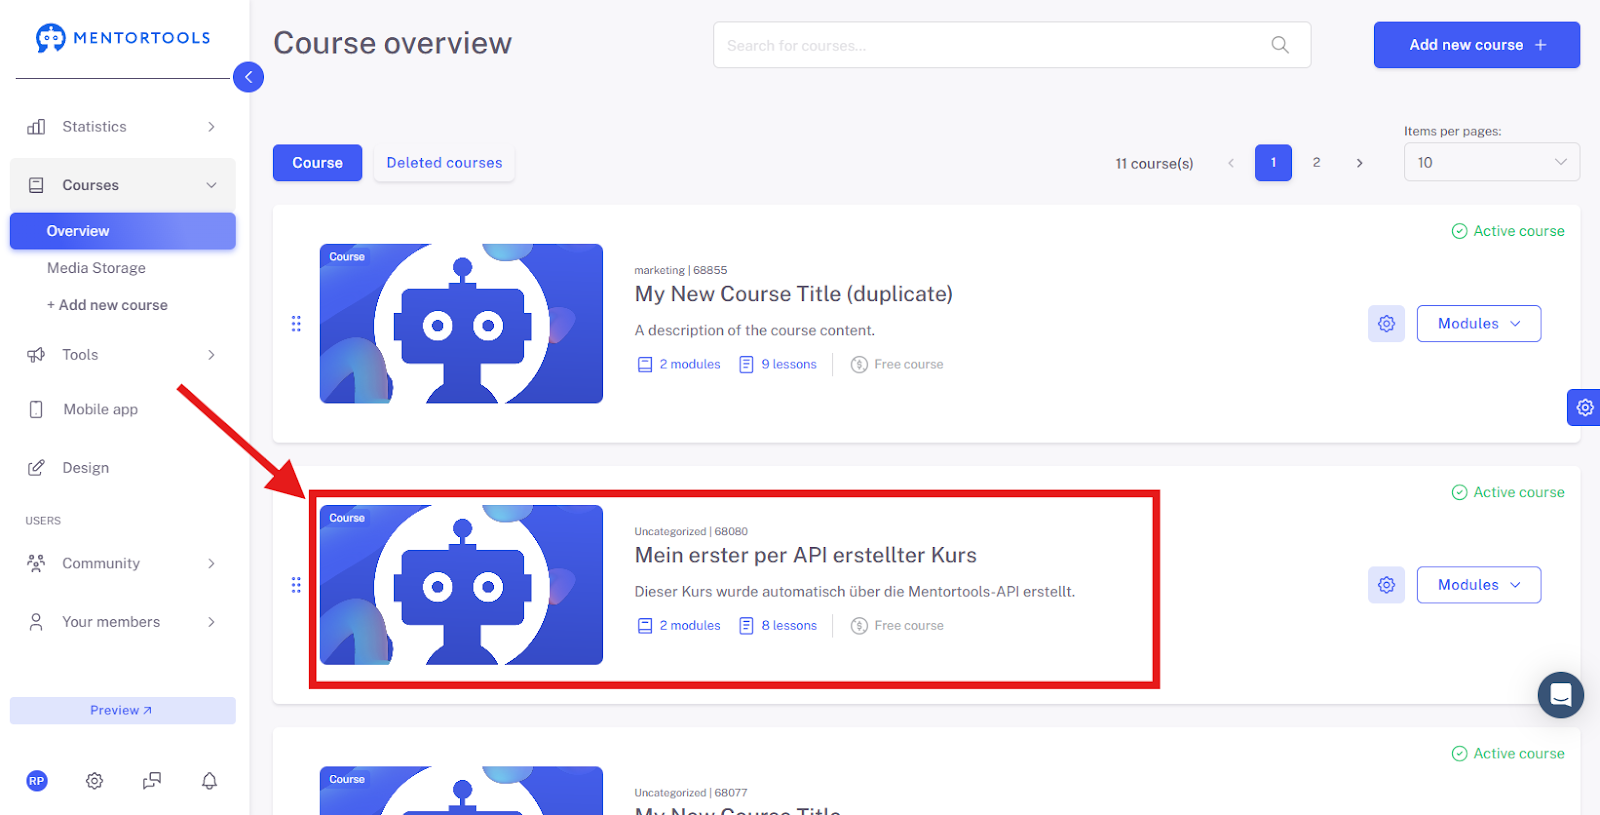
When you execute this workflow, a new course will be created in your Mentortools account.
There are unlimited possibilities here to create business automations in combination with Mentortools and N8N.
We wish you much fun and much success!