Create and Edit a Chat Group (Manage Settings)
You already know that the Messaging function is the central tool for your customer communication. But it's only with Chat Groups that you unlock its full potential—whether you want to set up a read-only group for undisturbed course updates or start a lively discussion forum. In this tutorial, we will show you step-by-step how to create a new group, select the right participants, and define all the important settings, such as access permissions and writing rights.
Last updated 9 months ago
To create a chat group, first open Messages. If you haven't set up Messages yet, please follow our guide here.
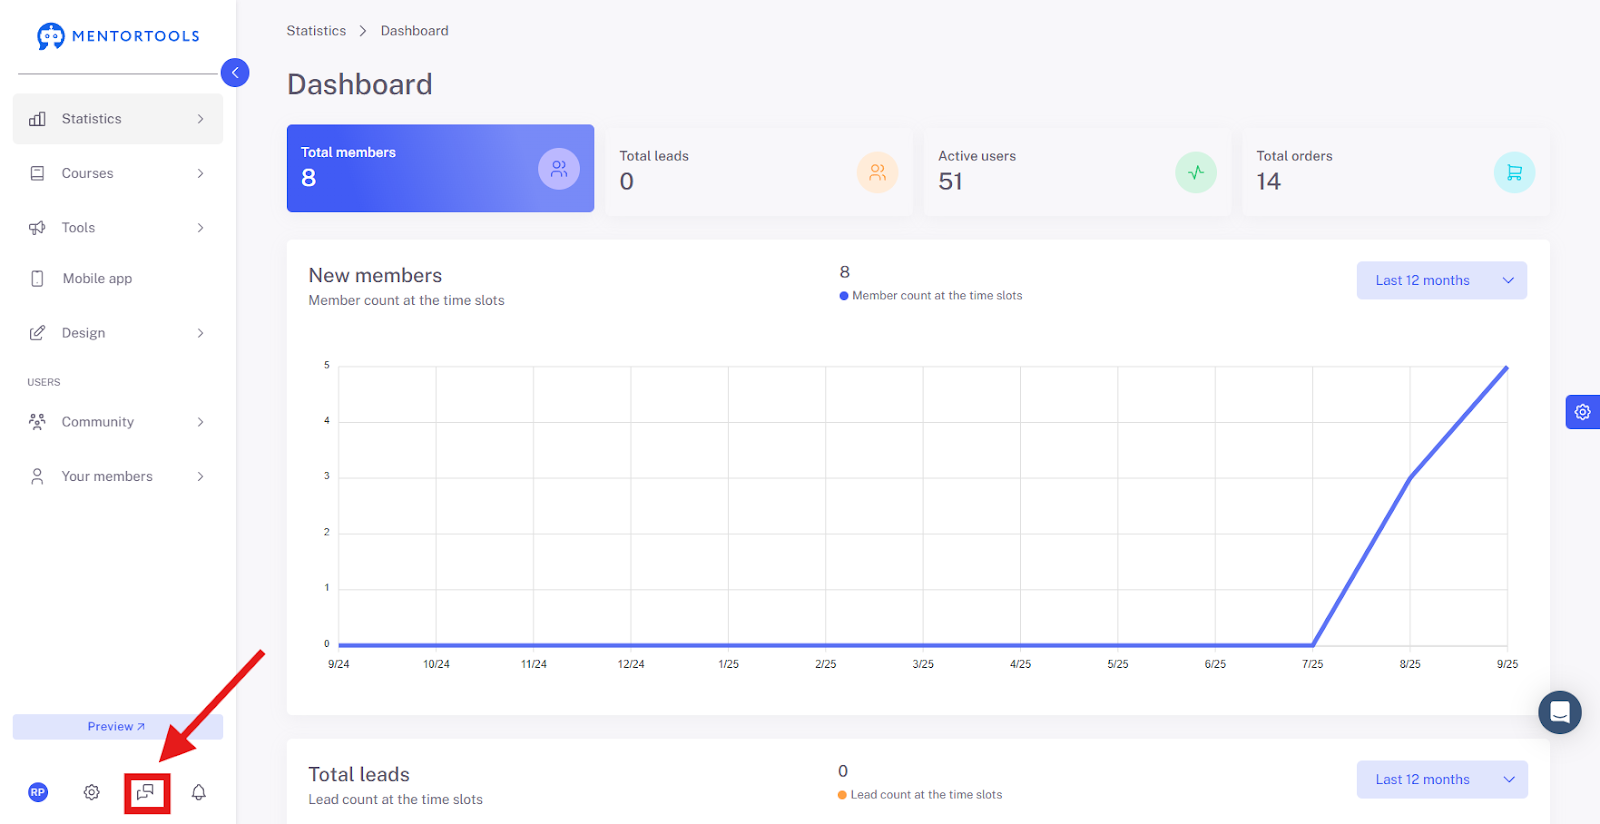
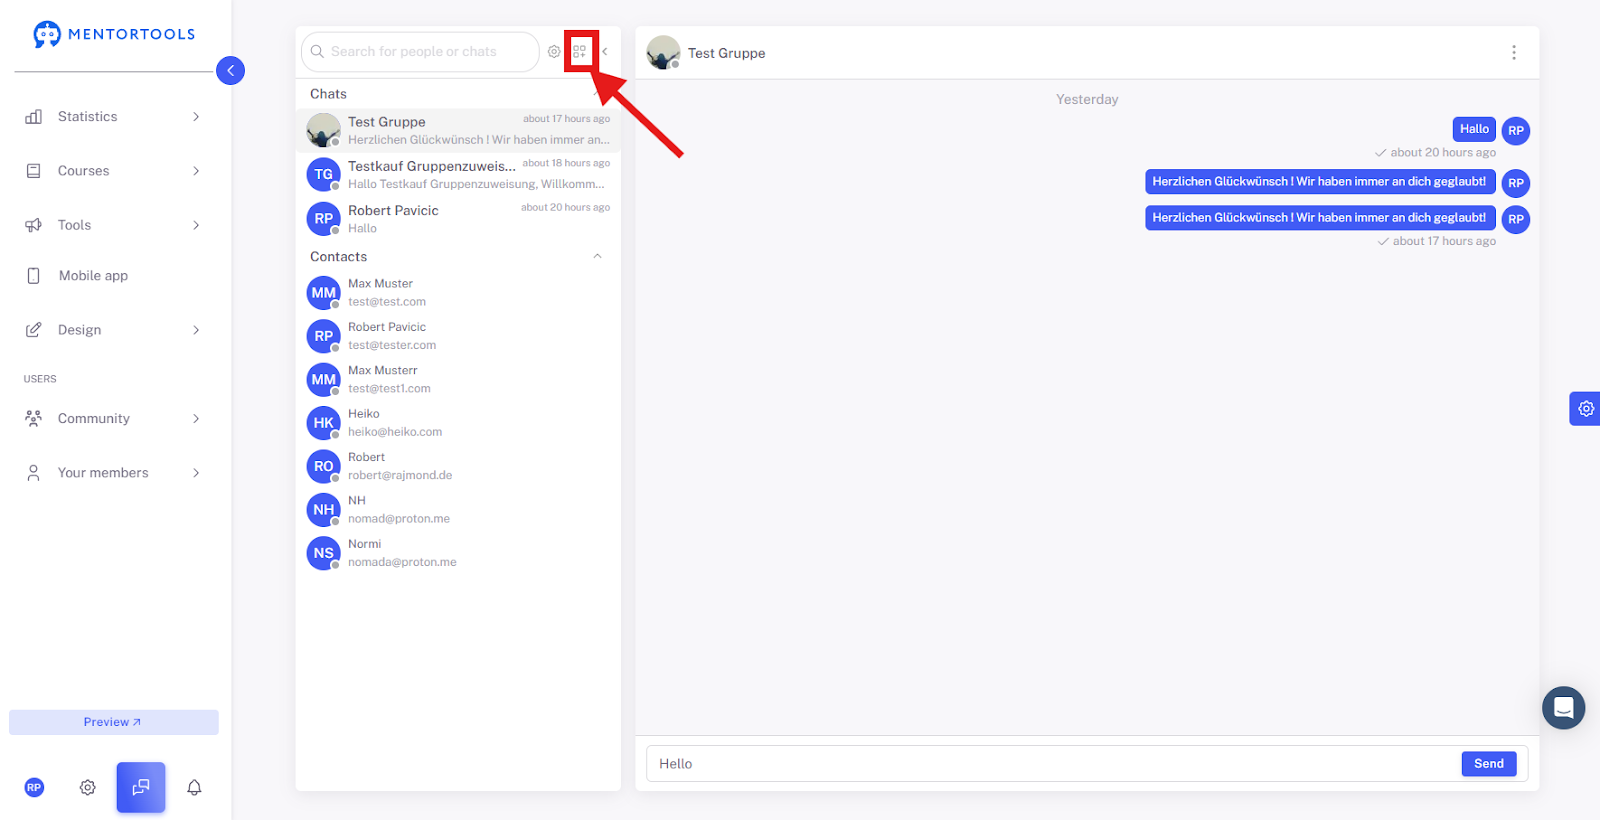
Now, click on the button to set up Chat Groups.
How do I create a new group? – Fields and Options
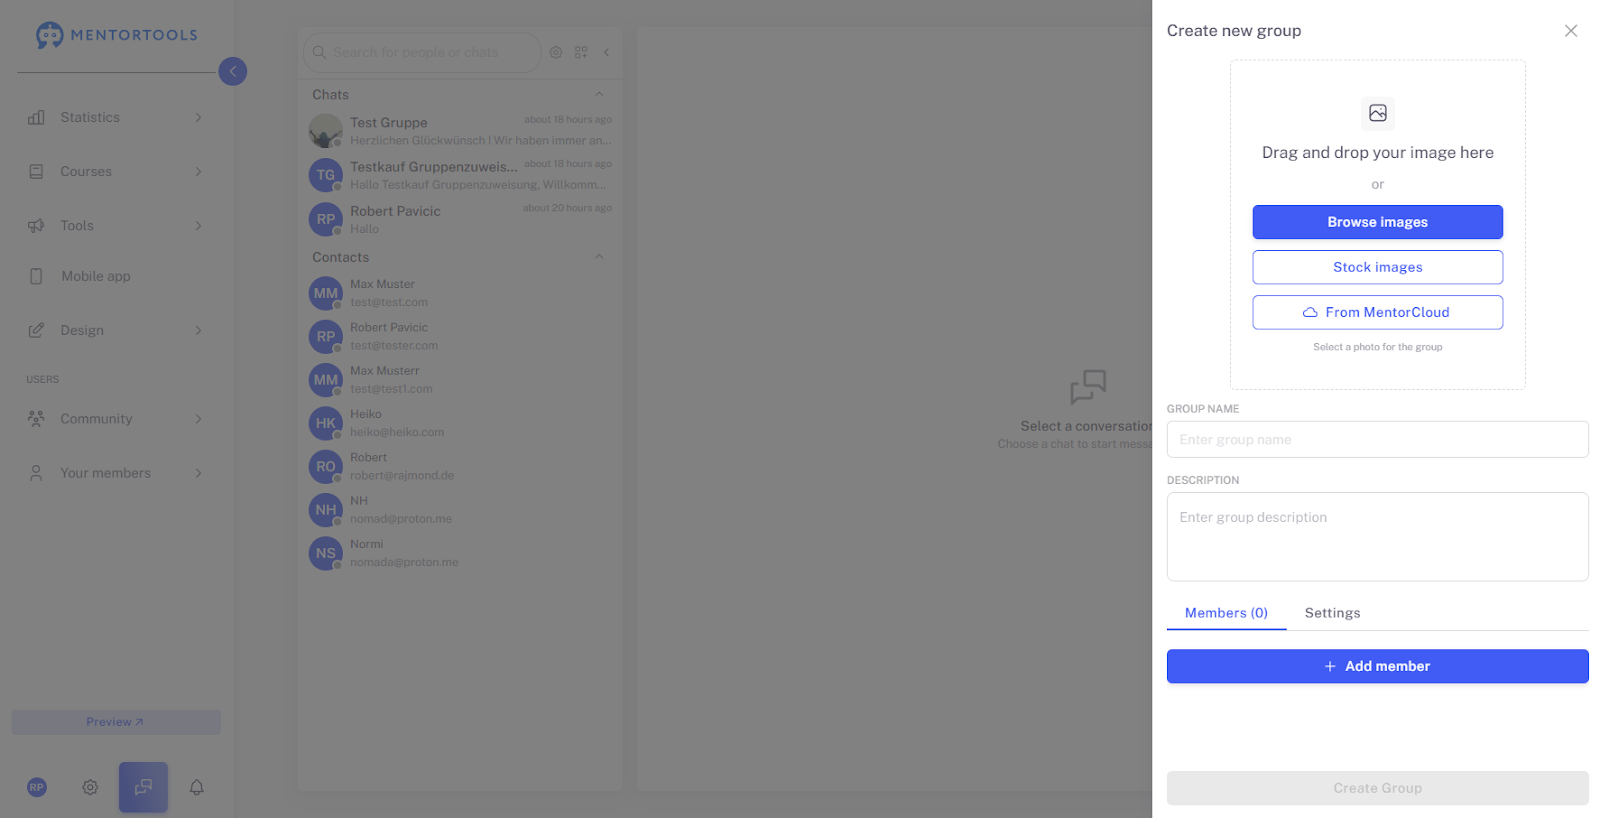
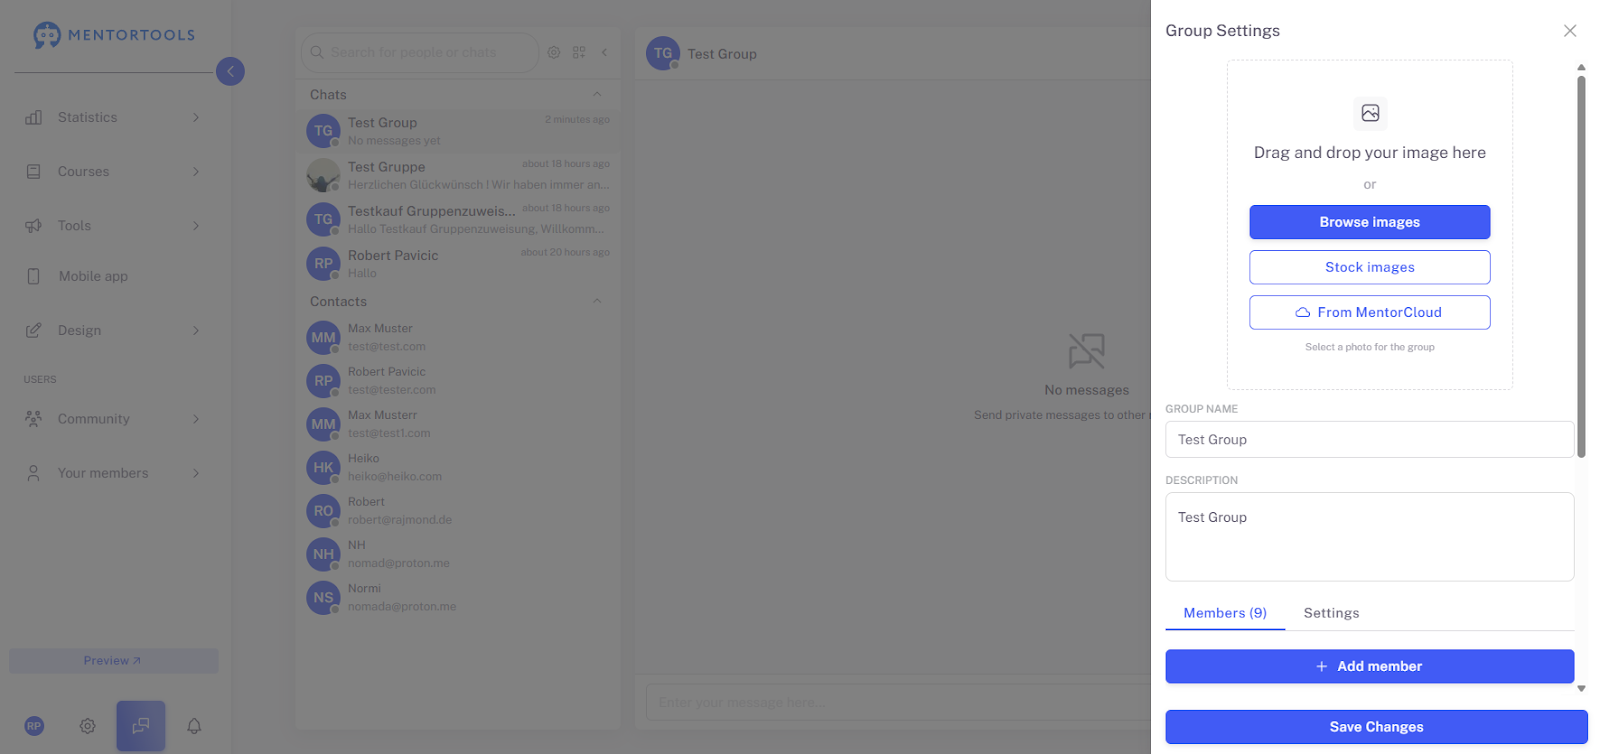
This window is your central location for setting up a new chat group for your members. Here, you can define the appearance, name, description, and participants.
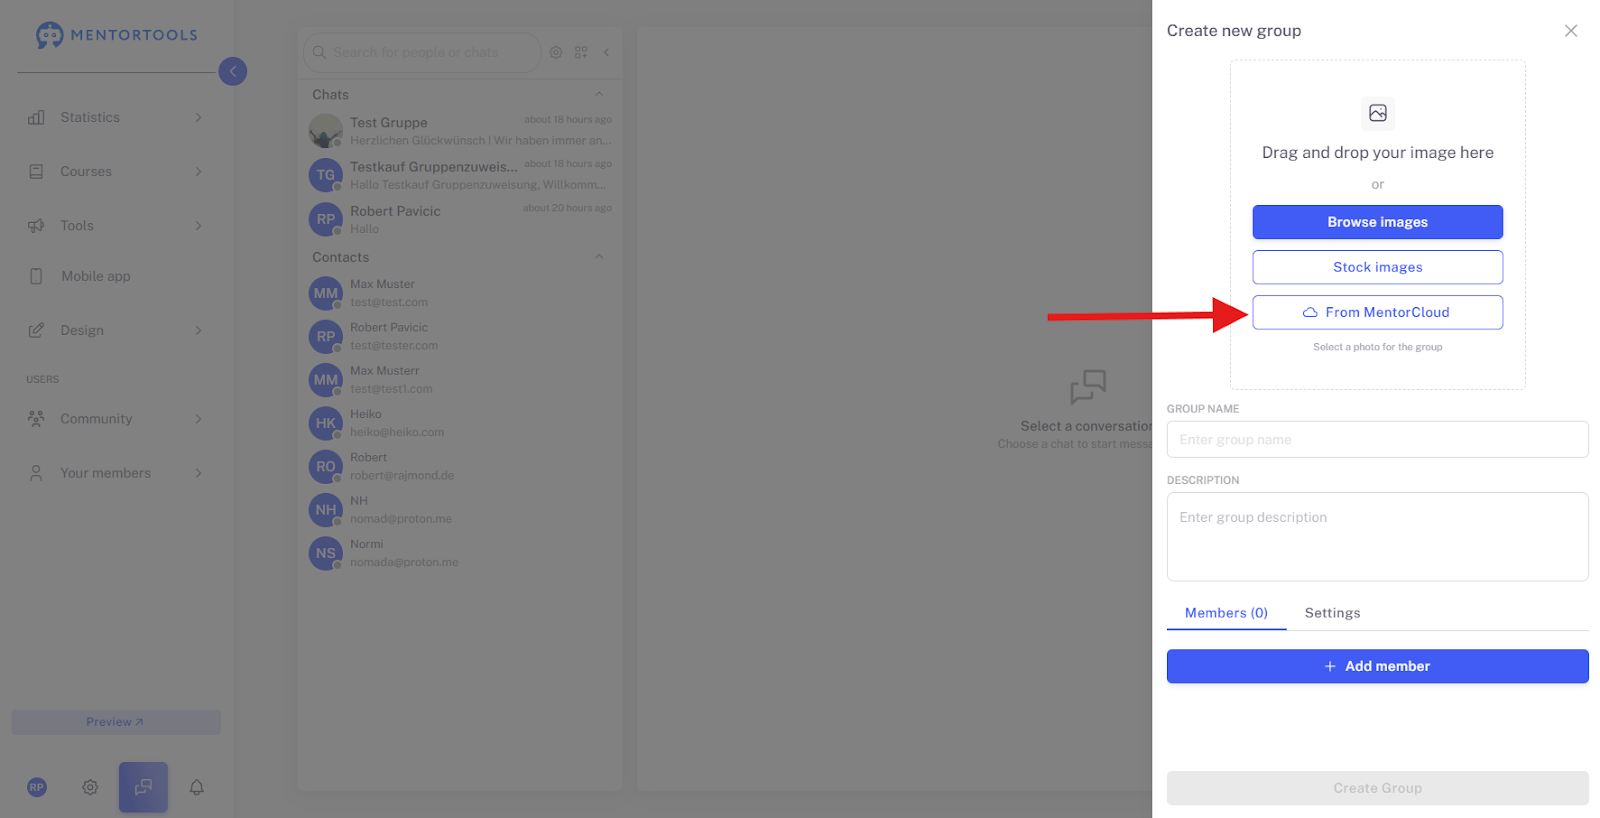
Upload Group Image
This area at the top is for the visual design of your group:
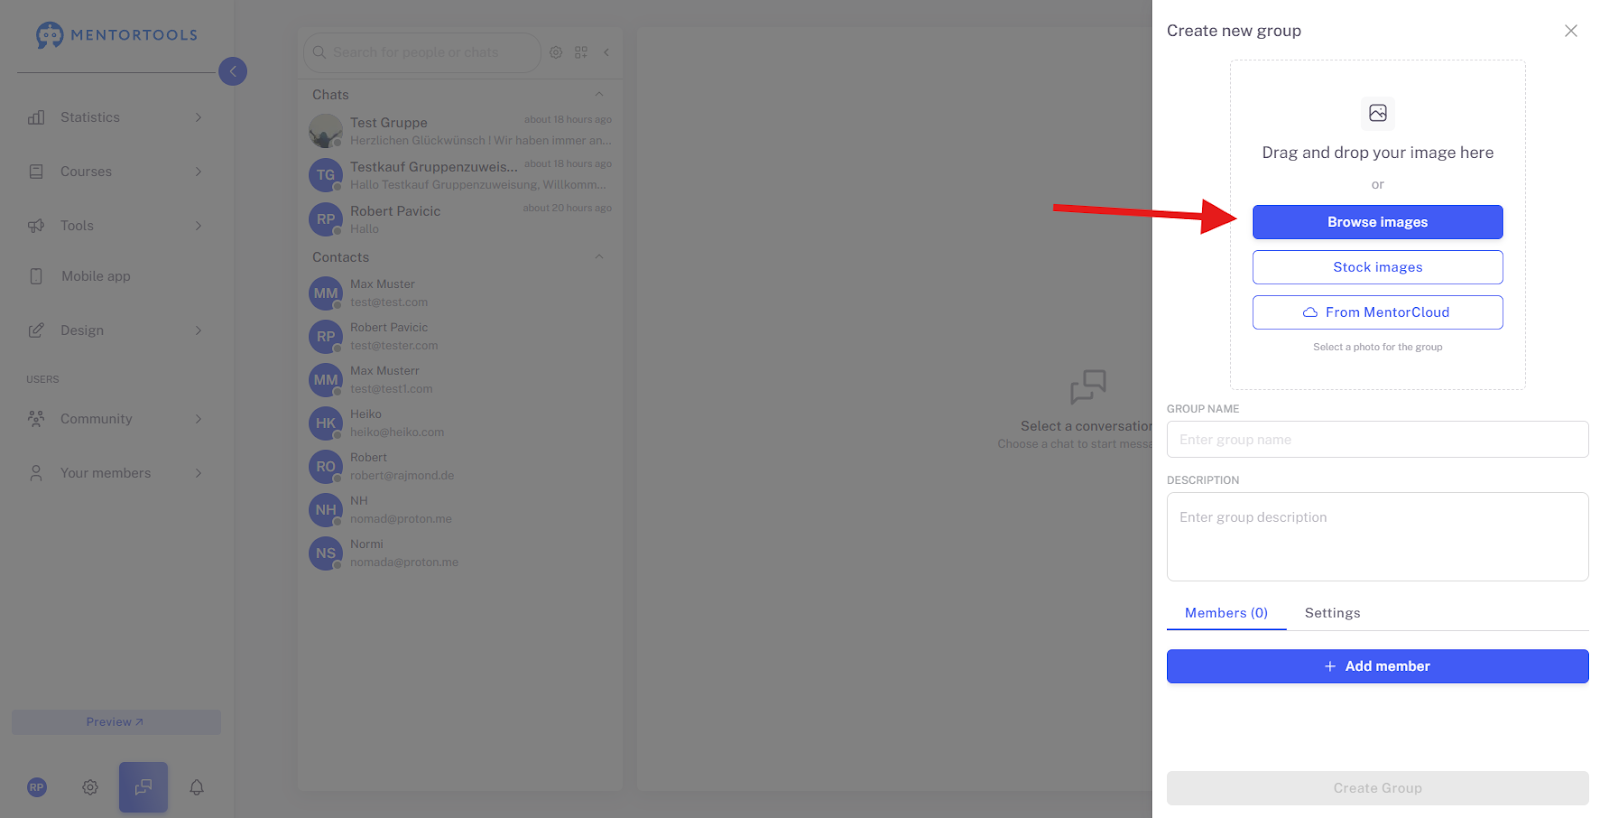
Upload Image: Click here to choose an image directly from your computer to use as the group icon.
License-Free Images: Access a selection of free, license-free images that you can use immediately.
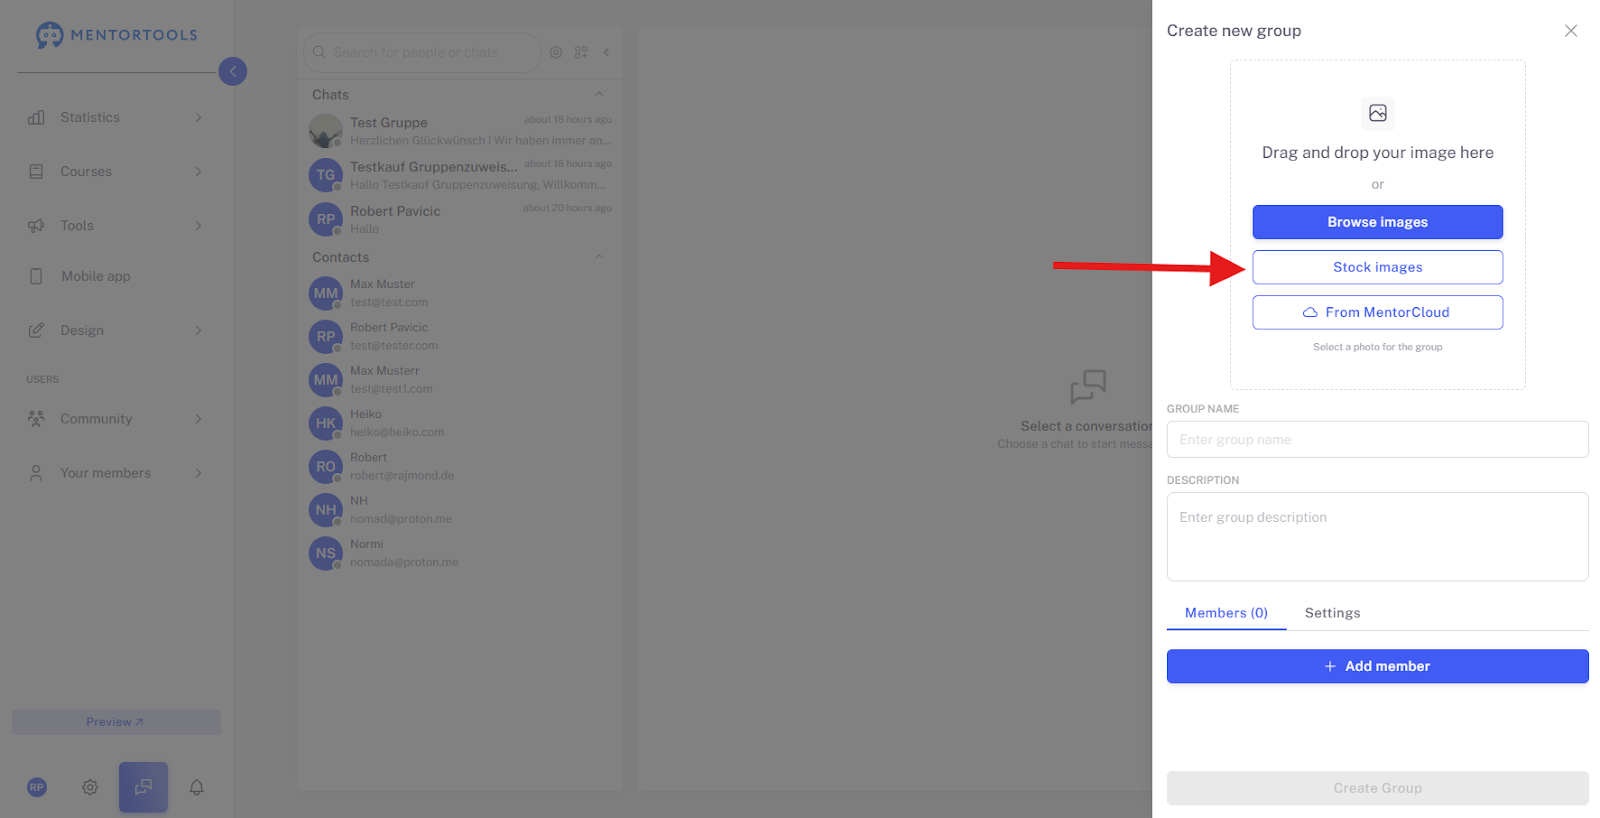
From MentorCloud: Use images you have already saved in your MentorCloud library.
Group Name
Enter group name: Here, you enter the name of your group (e.g., "Start Group Q3" or "Q&A for Course X"). This name will be displayed in the chat interface.

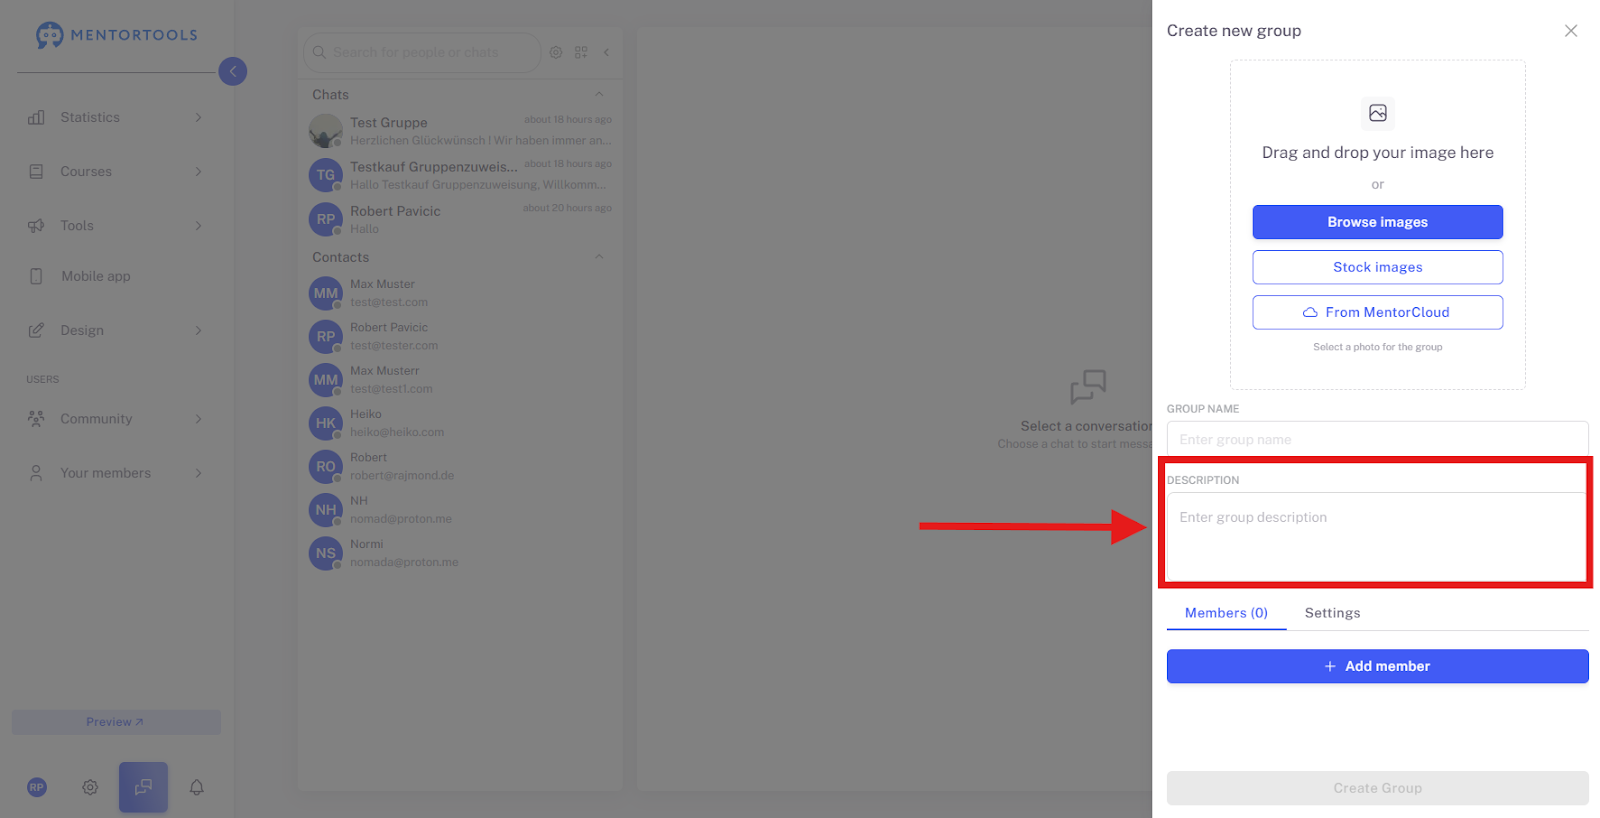
Description
Enter group description: Add a short description (e.g., "In this group, we discuss lessons 1-5"). The description helps members understand what the group is about.
Members (0) / Settings
These are the two main tabs for configuring the group:
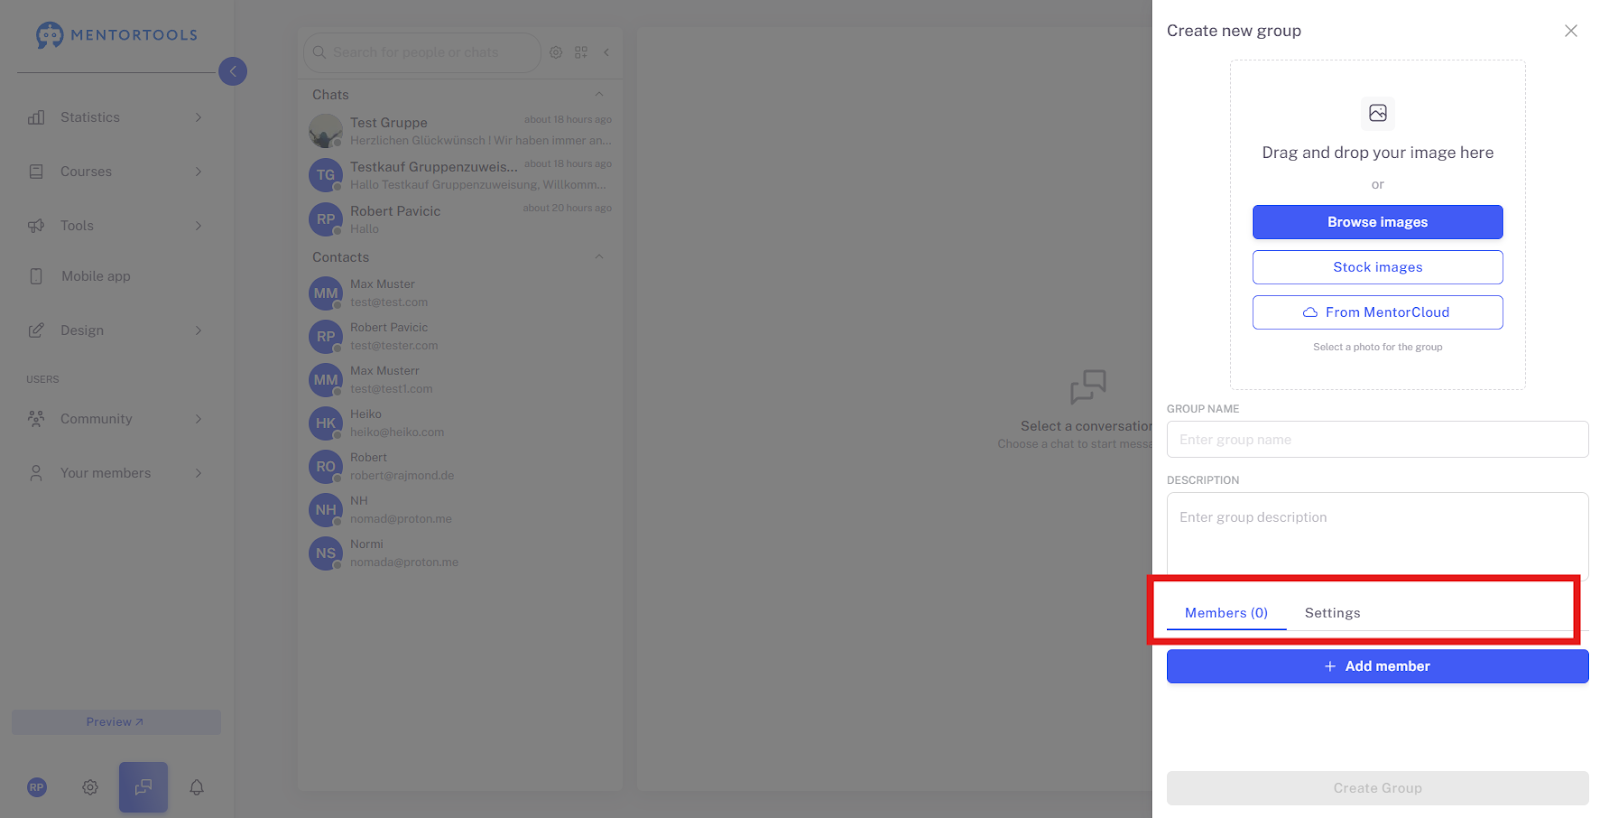
Members
Add Member: Click this button to select the members you want to add to the group. The number in parentheses always shows you the current count of group members.
How do I add members? – Options for Group Invitation
This window opens when you click "Add Member" and allows you to specifically select participants for your new chat group.
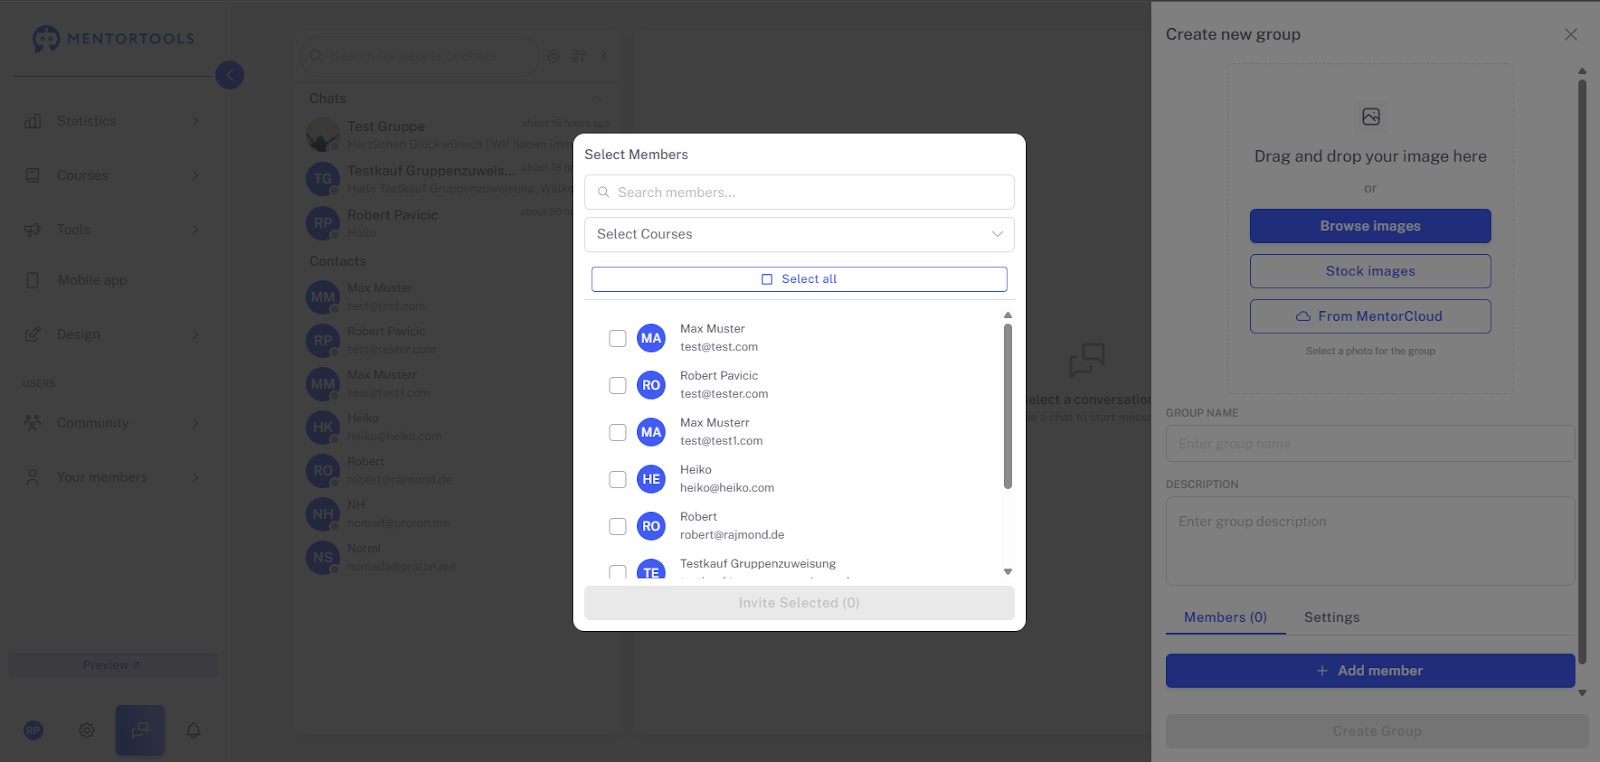
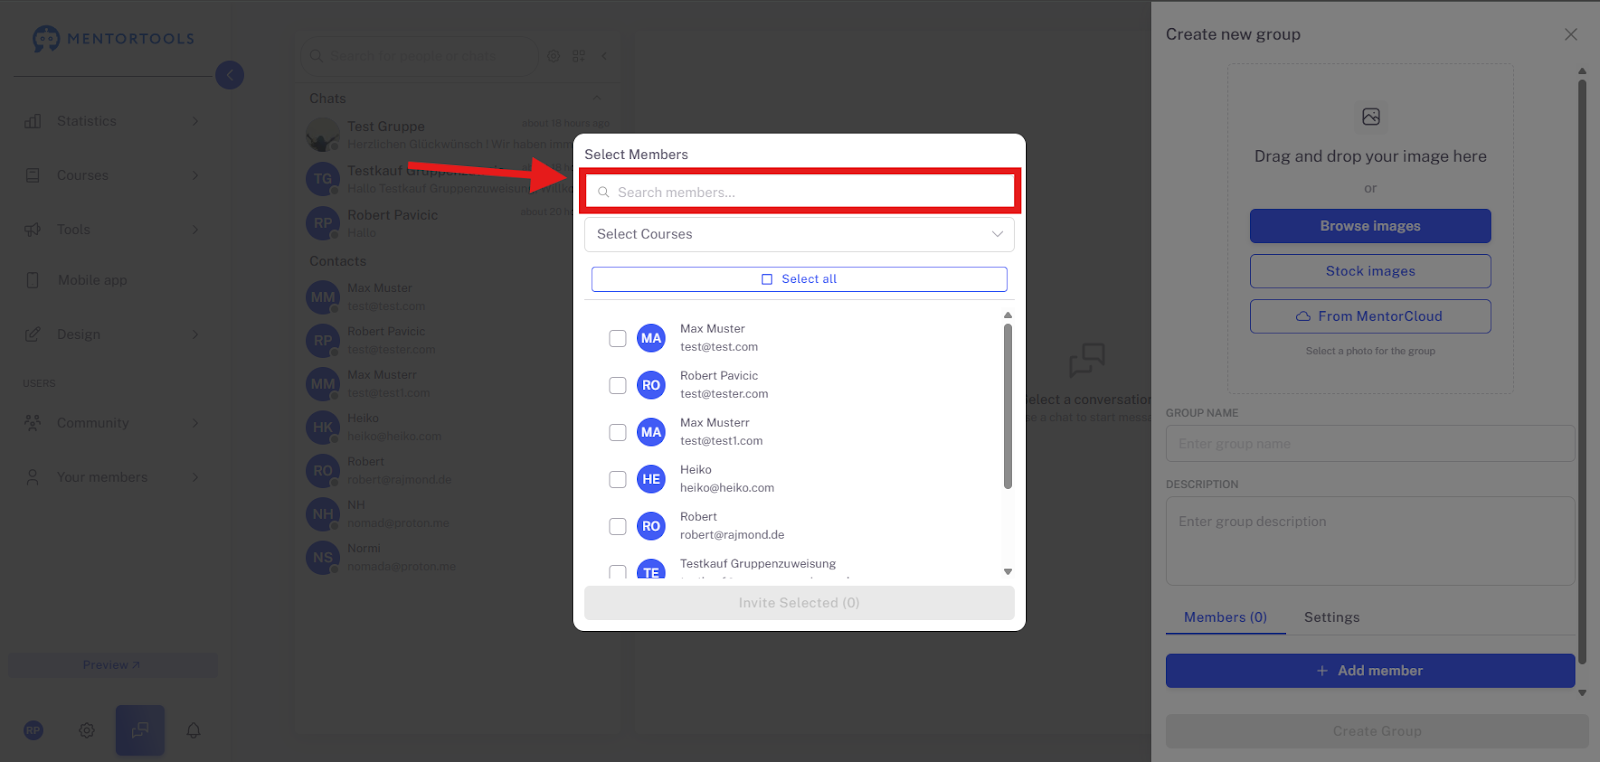
Top Search and Filter Functions
Search members: Use the search bar to quickly look for a specific member. You can enter the name or the email address here.
Select Courses: This is the most important filter. Click the drop-down menu to display only members who are enrolled in a specific course. This is extremely useful if you are creating a course-related group and don't want to manually search for all members.

Select All: If you activate this checkbox, all currently visible members (either all platform members or all members of the selected course) will be selected for invitation with one click.

Member List
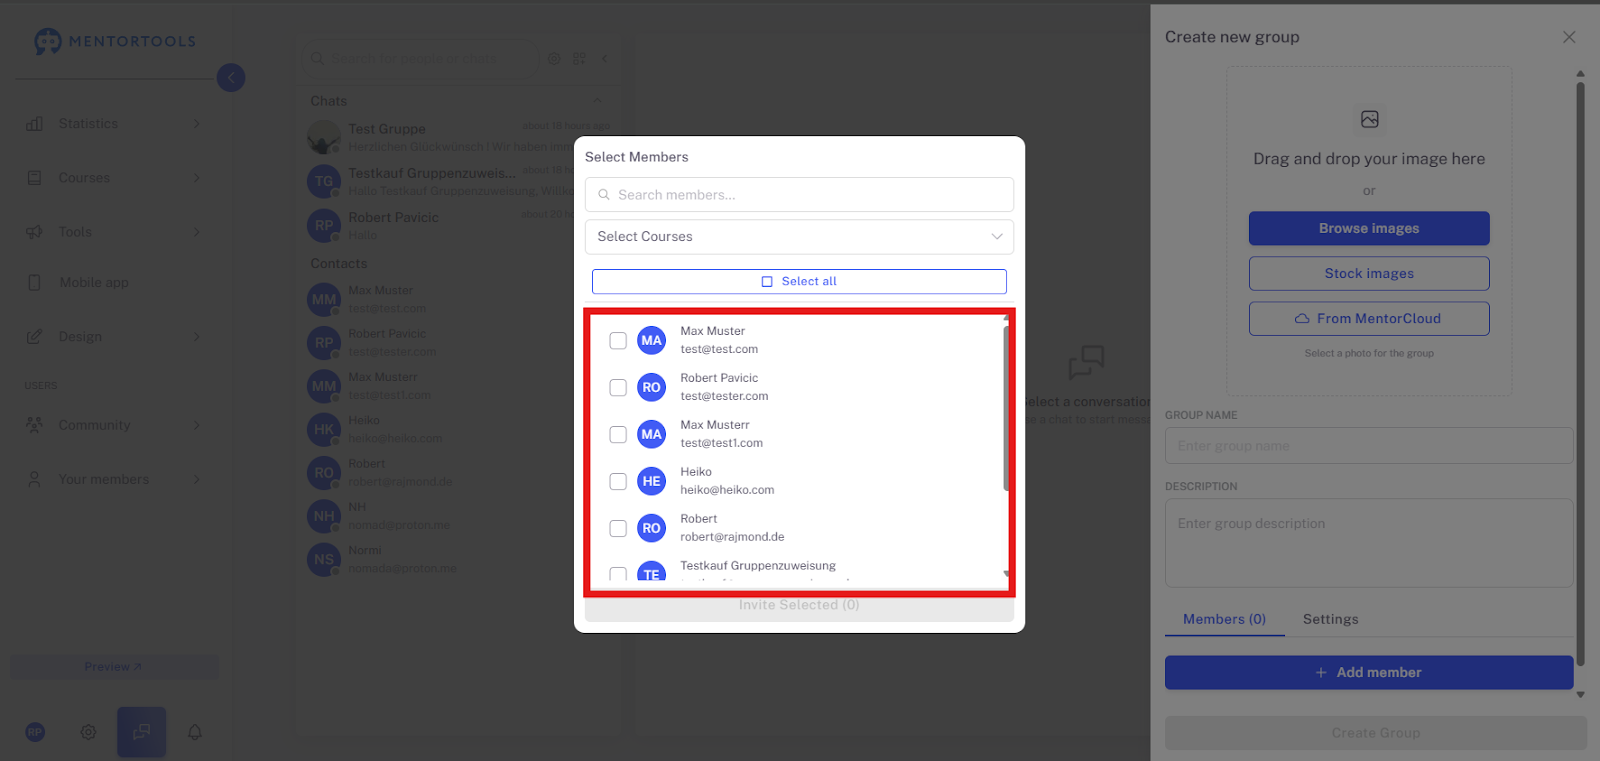
List: Below, you will see all available members. Each row shows the member's name and email address.
Checkbox: Tick the checkbox next to a name to invite that person to the group.
Invite Selected
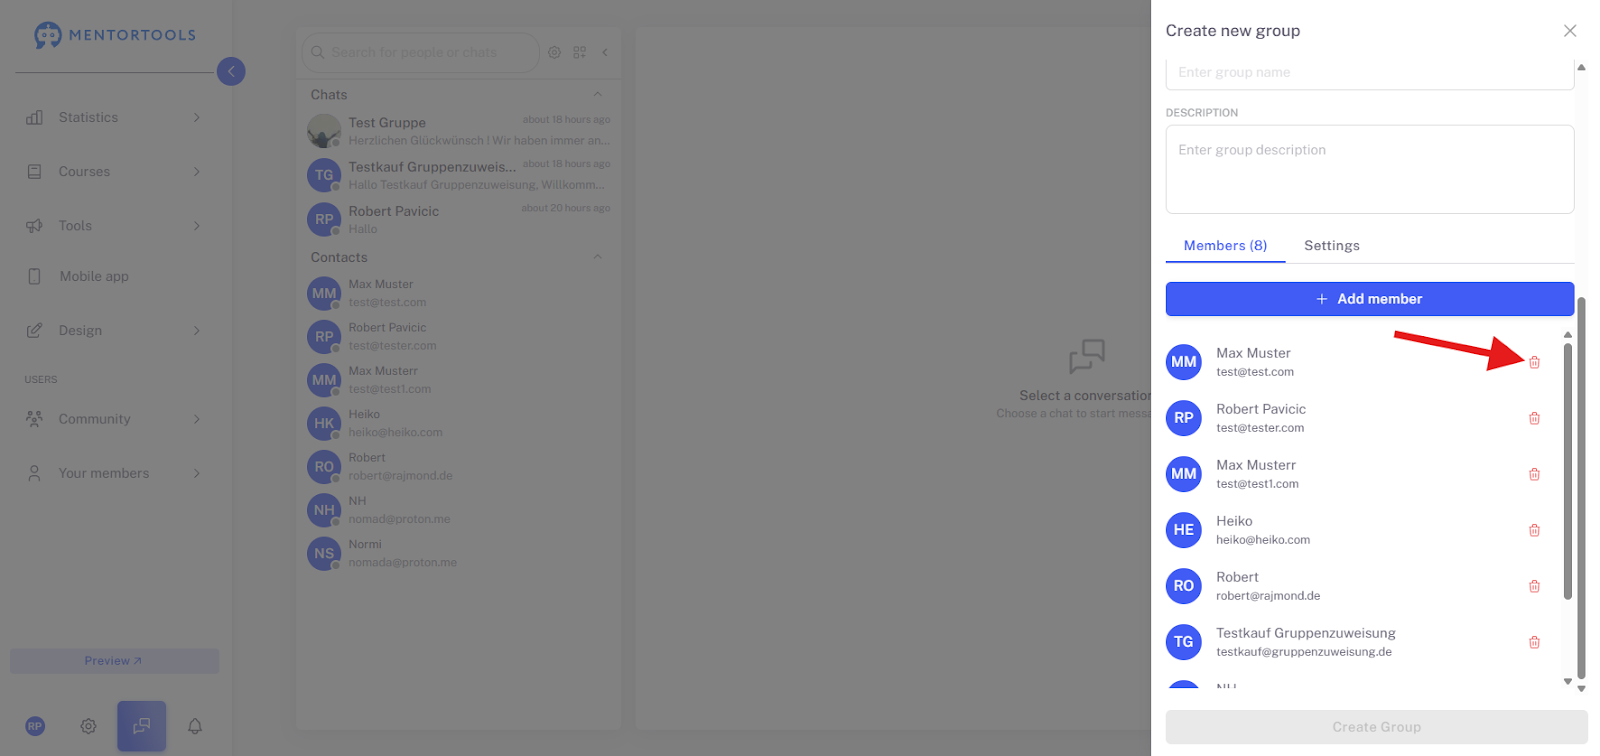
After you have marked all the desired members, click the "Invite Selected" button. The number in parentheses indicates how many people you have currently selected. Once you click, these members will be added to the group.
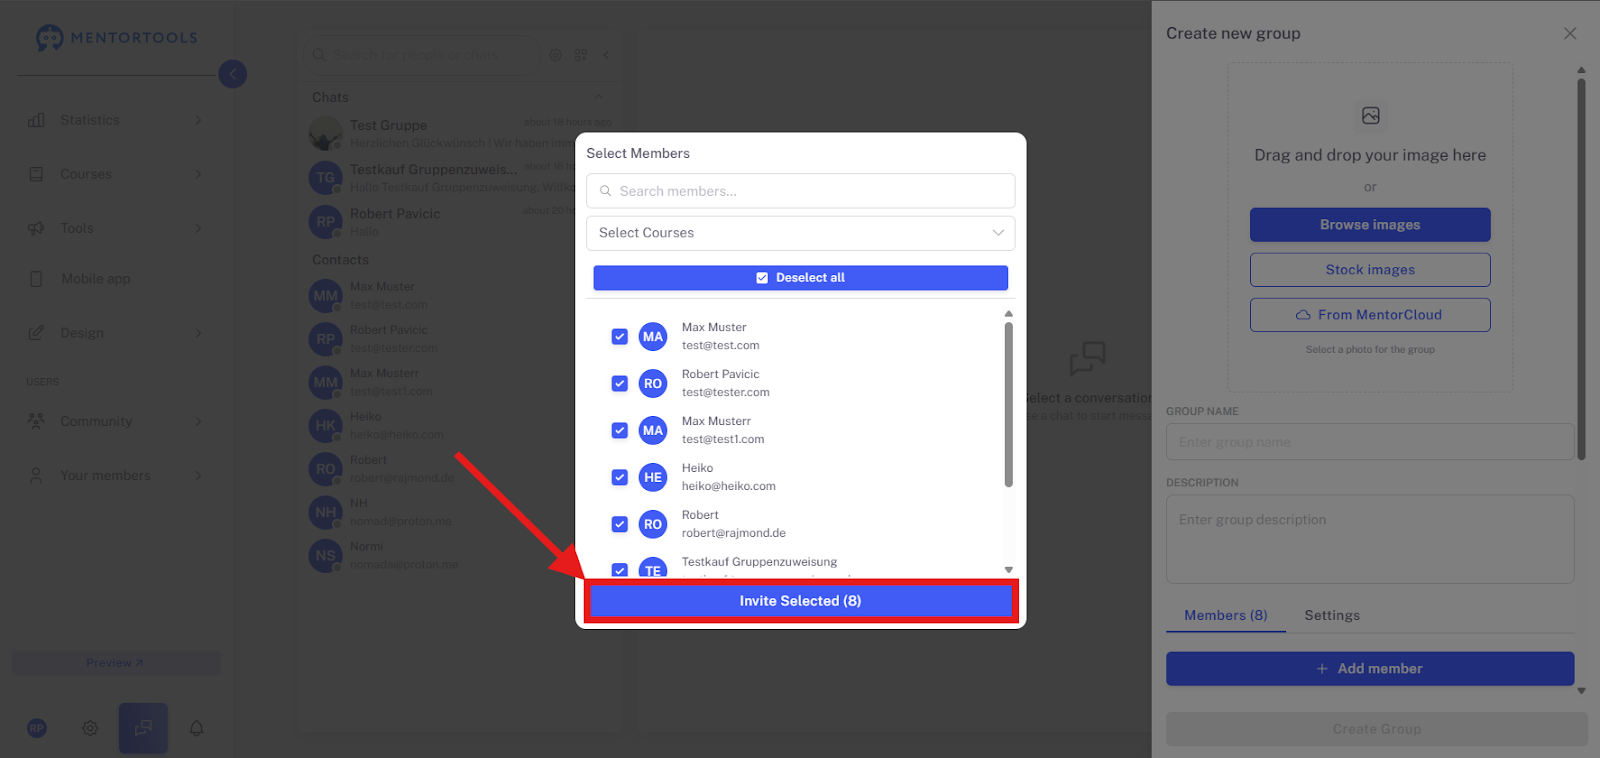
The members will still be displayed to you before you create the group; here, you can remove individual members if necessary by clicking the red trash can icon.
Group Settings – How do I set access and permissions?
In the "Settings" tab, you define who can join the group and what rights members have within the chat.

Access
All members of the member area can join:
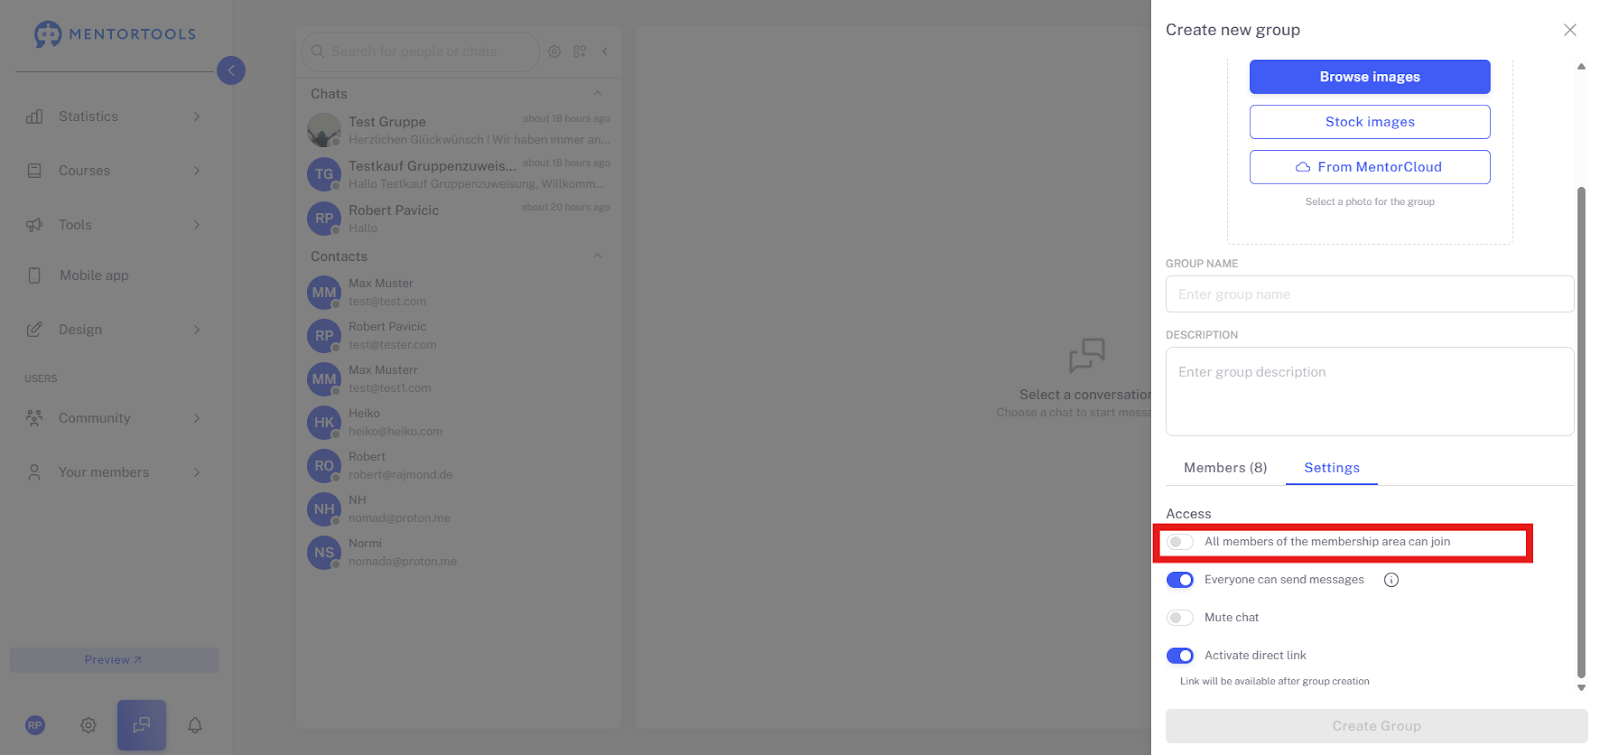
Activated: The group becomes a public group within your member area. Every registered member can see the group and join it.
Deactivated (Default): The group is private. Only members manually added by you or invited via a direct link receive access.
Everyone can send messages:
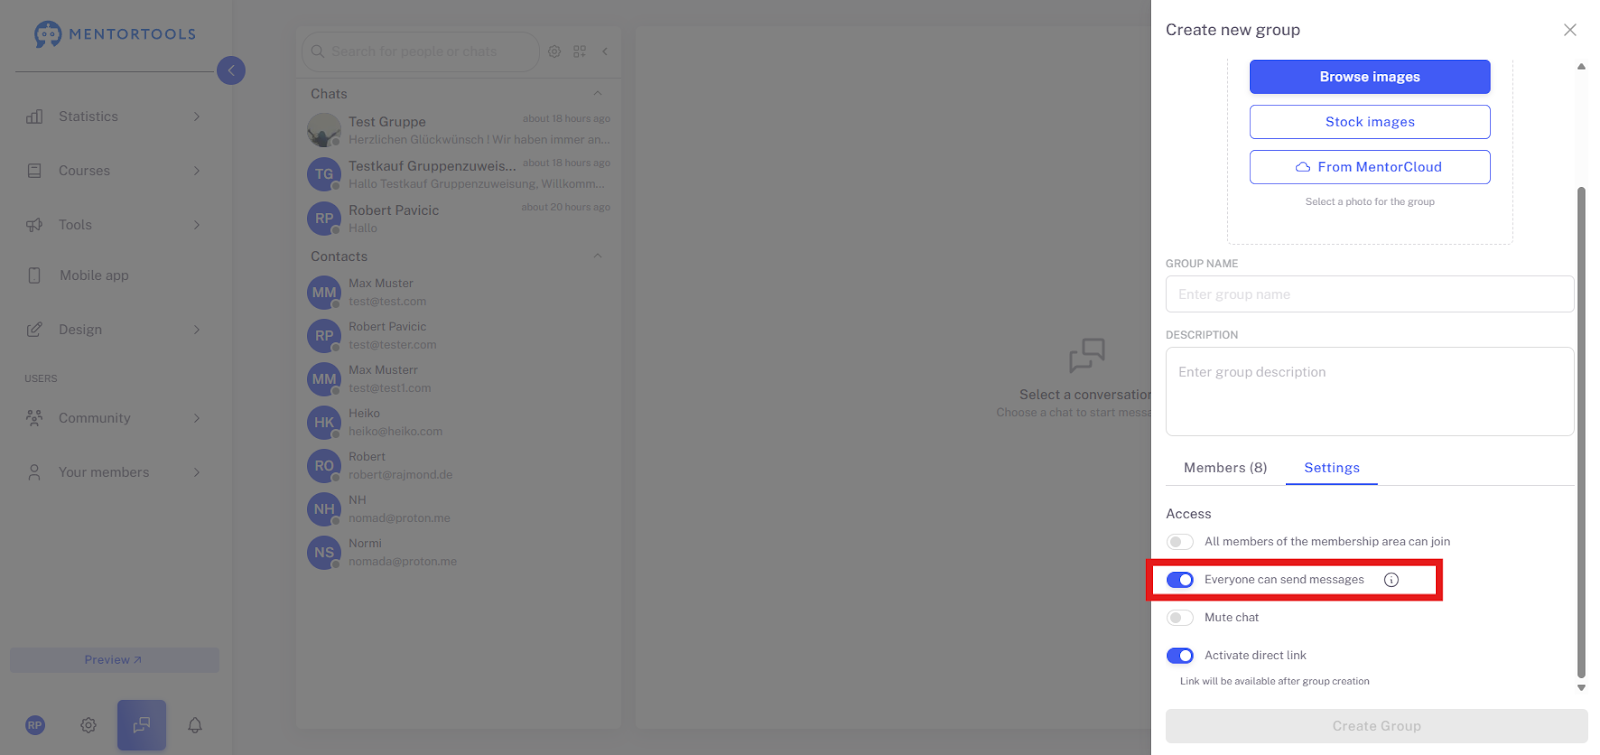
Activated (Default): All participants can write messages and reply to posts.
Deactivated: The group becomes a read-only group. Only the group admin (i.e., you) can send messages. This is ideal for announcements, updates, or lessons where no discussion is desired.
Mute chat:
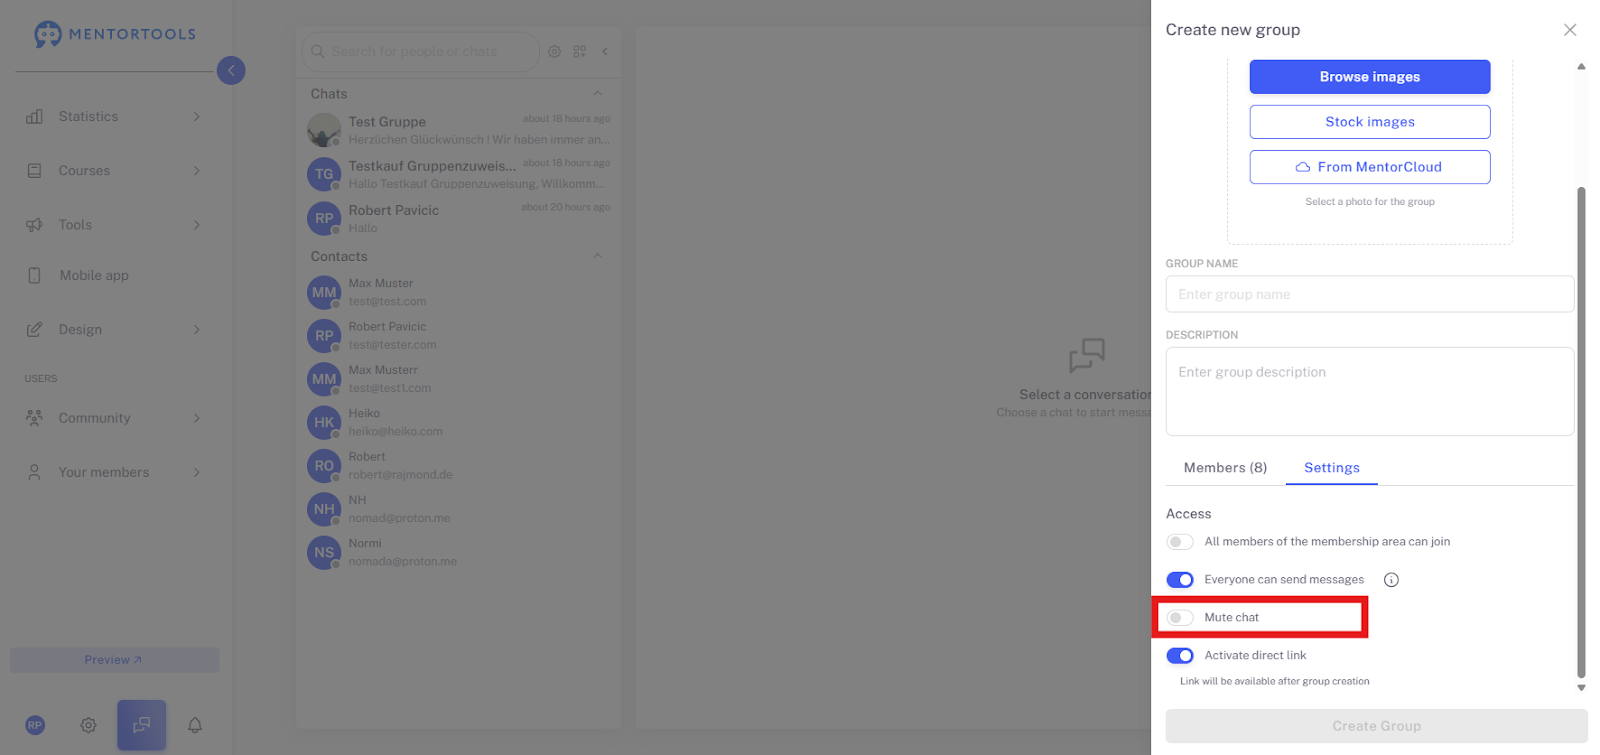
Activated: All participants will no longer receive notifications for new messages in this group. This is useful for very active chats or if you want to minimize distractions.
Deactivated (Default): Users' normal notification settings apply.
Activate Direct Link:
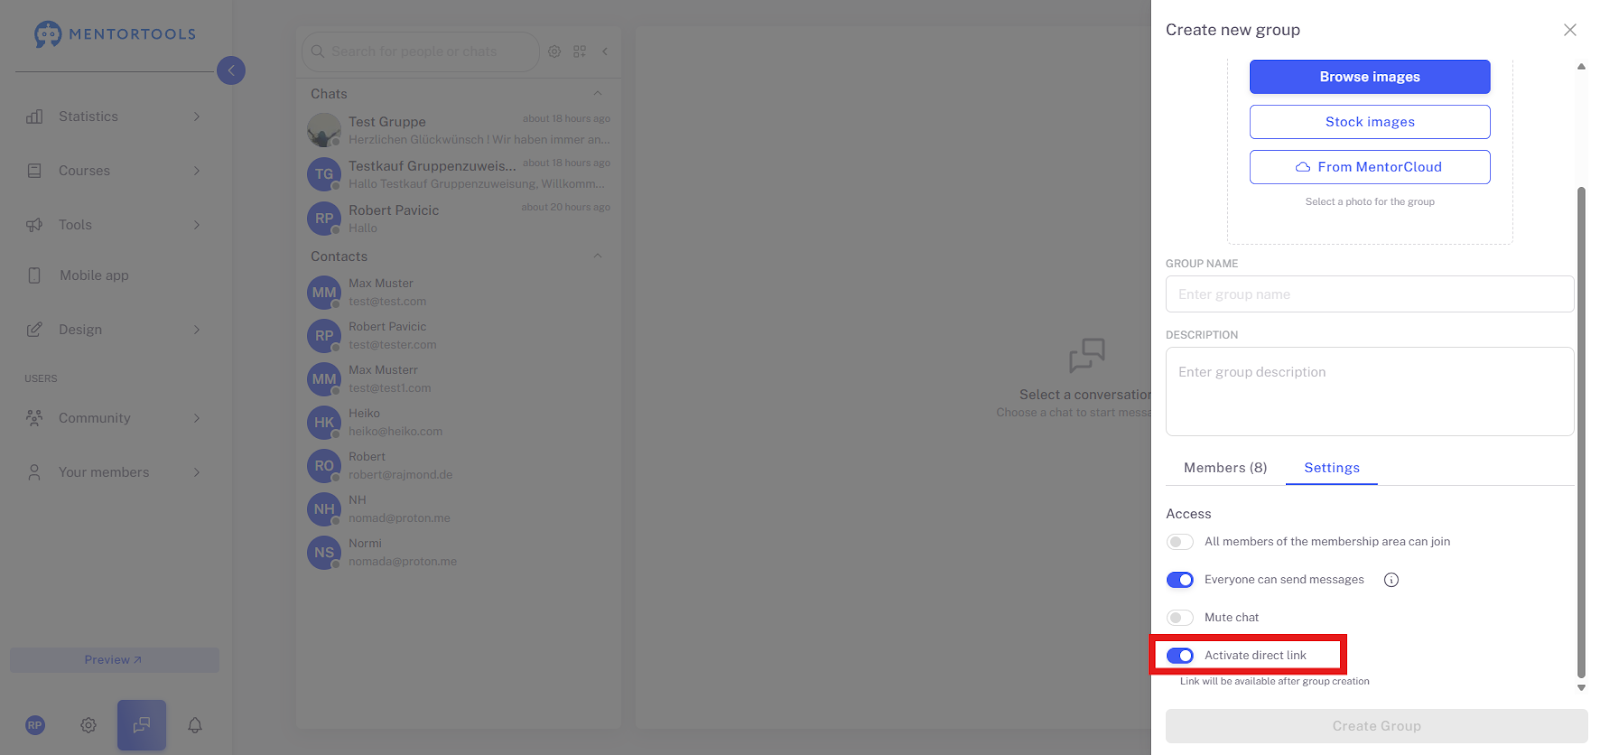
Activated: After the group is created, a unique link will be generated. You can share this link externally (e.g., in emails or on landing pages) to invite people to join the group directly.
Important: The actual link is only available after you have saved the group using "Create Group" (in the previous window).
Create Group
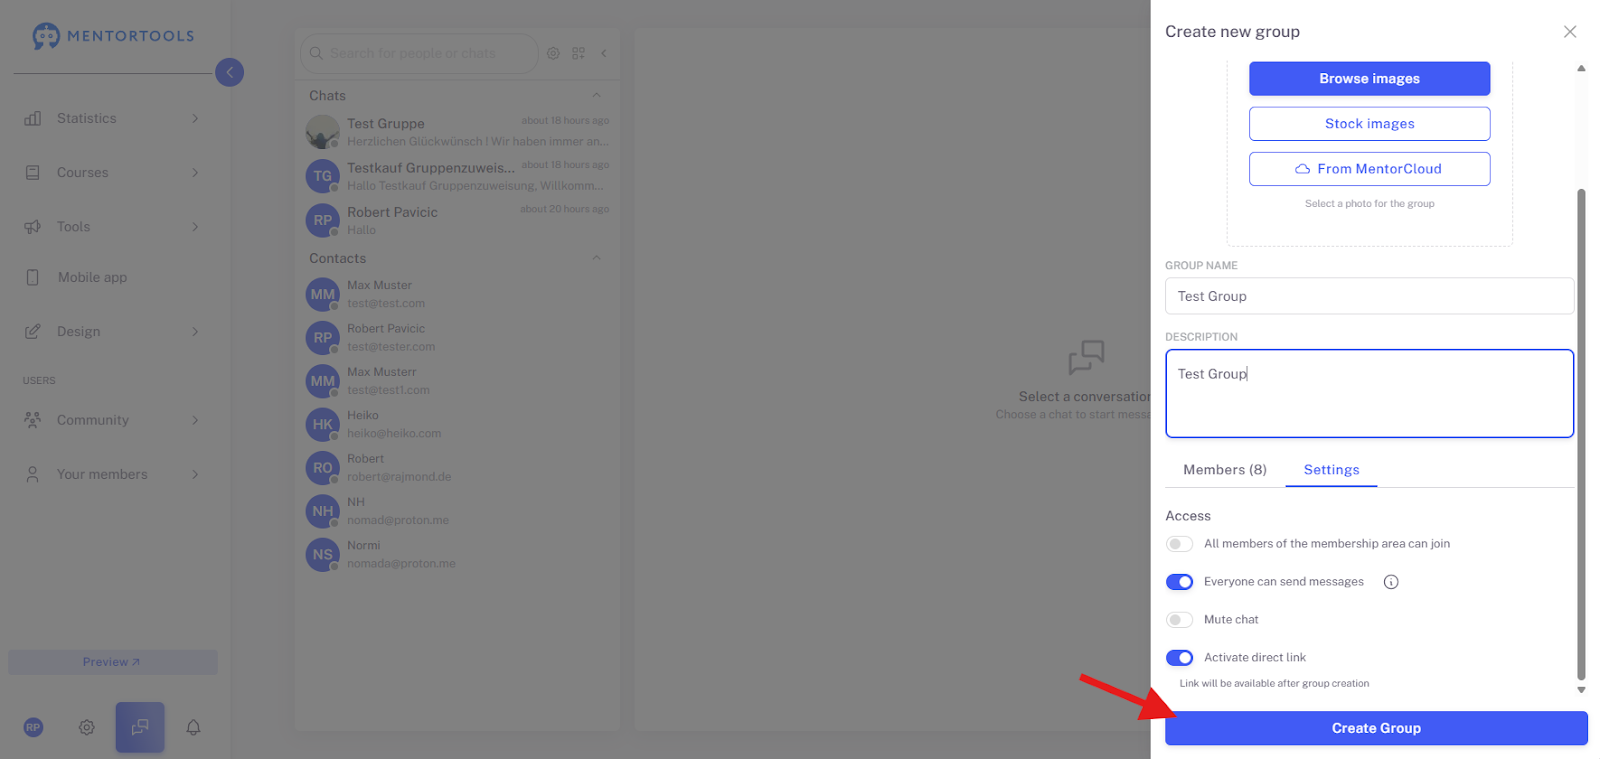
After you have entered all the details, selected the image, and added the members, click the "Create Group" button. Only then will the group be finalized and visible to the participants.
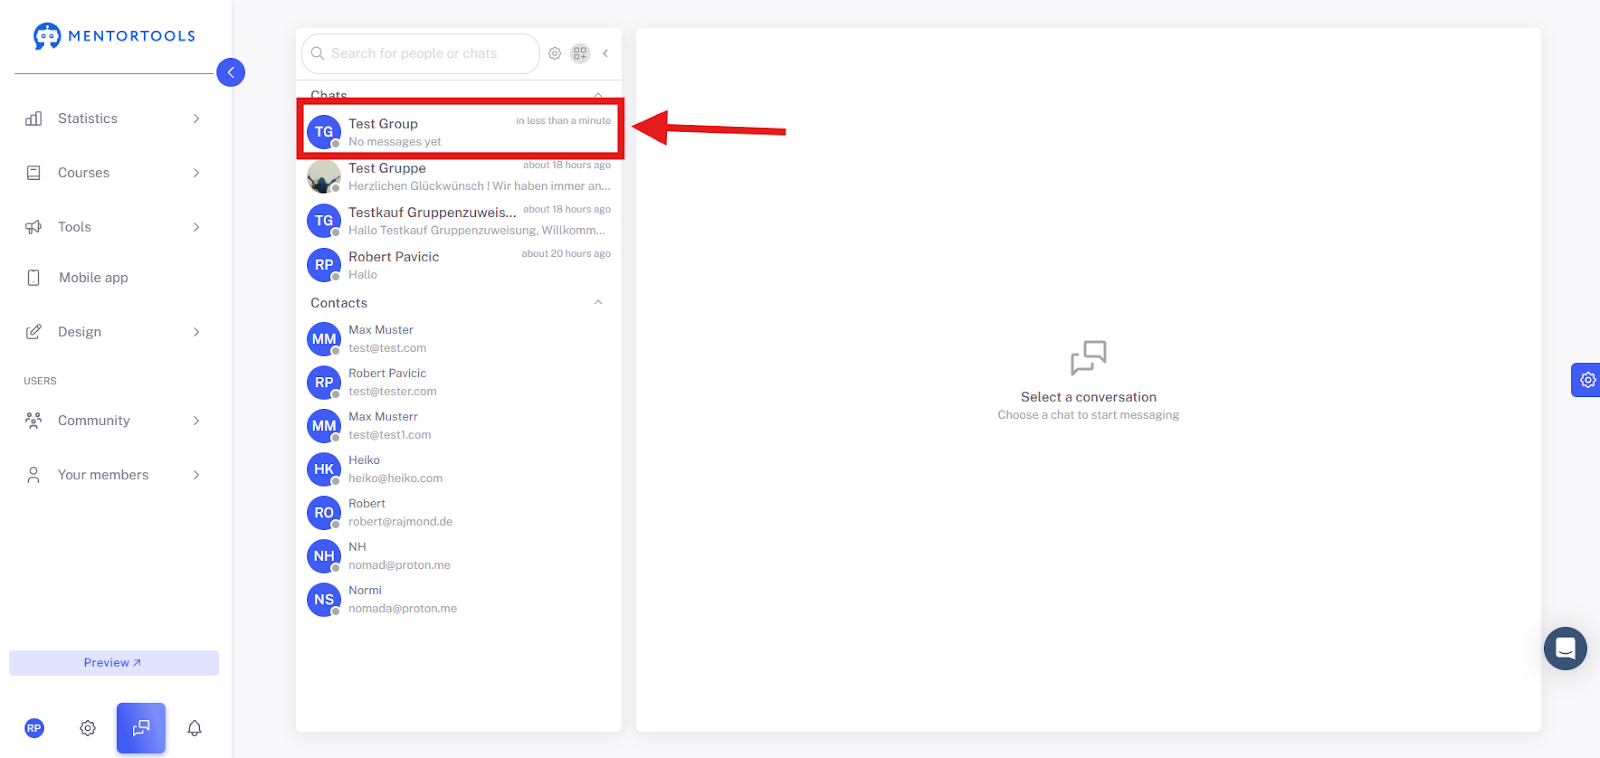
The new group will then be displayed to you under "Chats".
How do I edit an existing chat group?
To edit an existing chat group, select it under "Chats".

Now, click on the three dots in the top right and go to "Group Info".
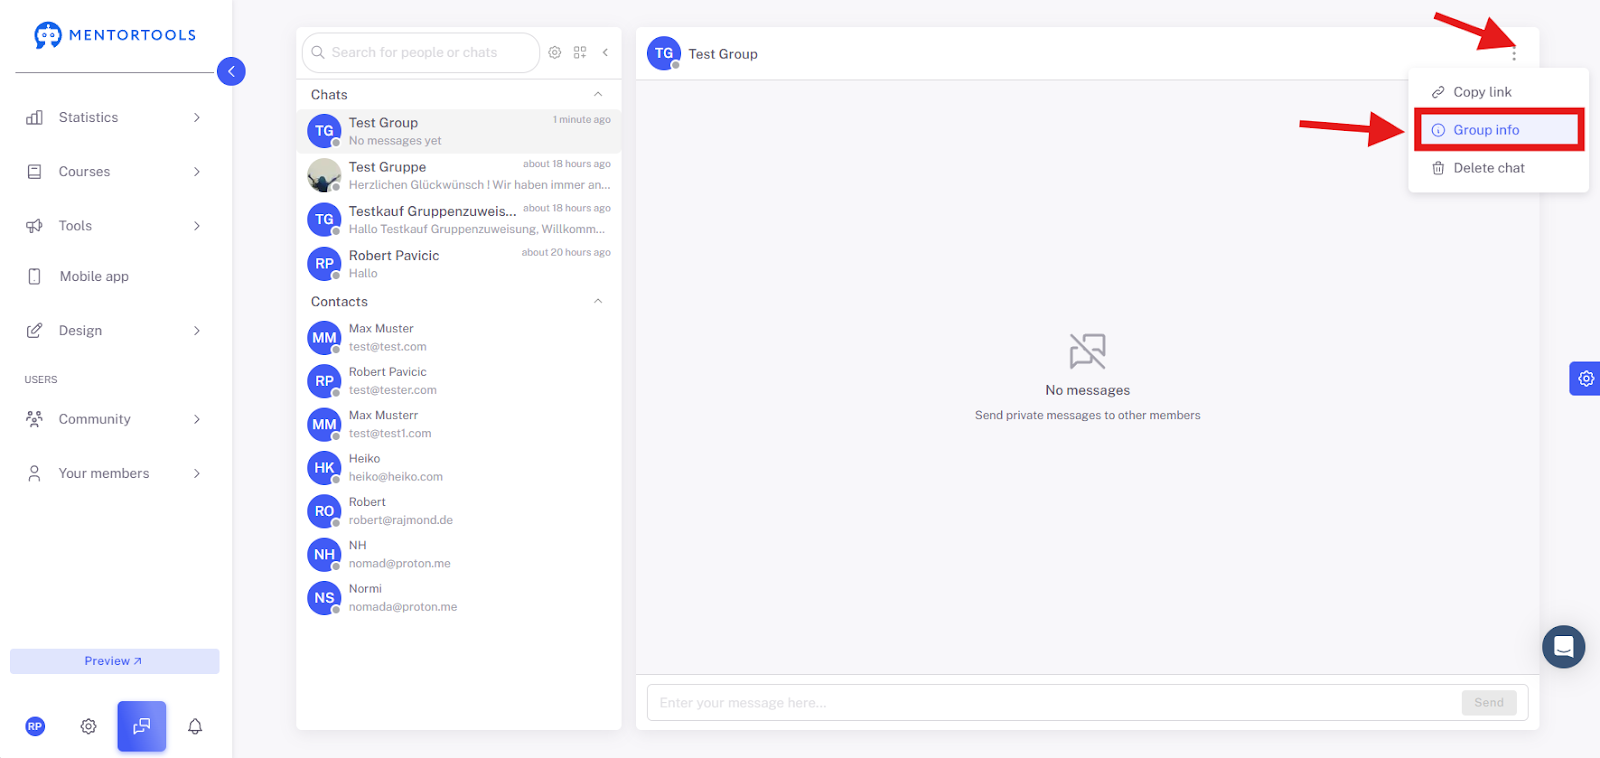
The information about the group and its members will now be displayed to you. Click the pencil icon to edit the group.
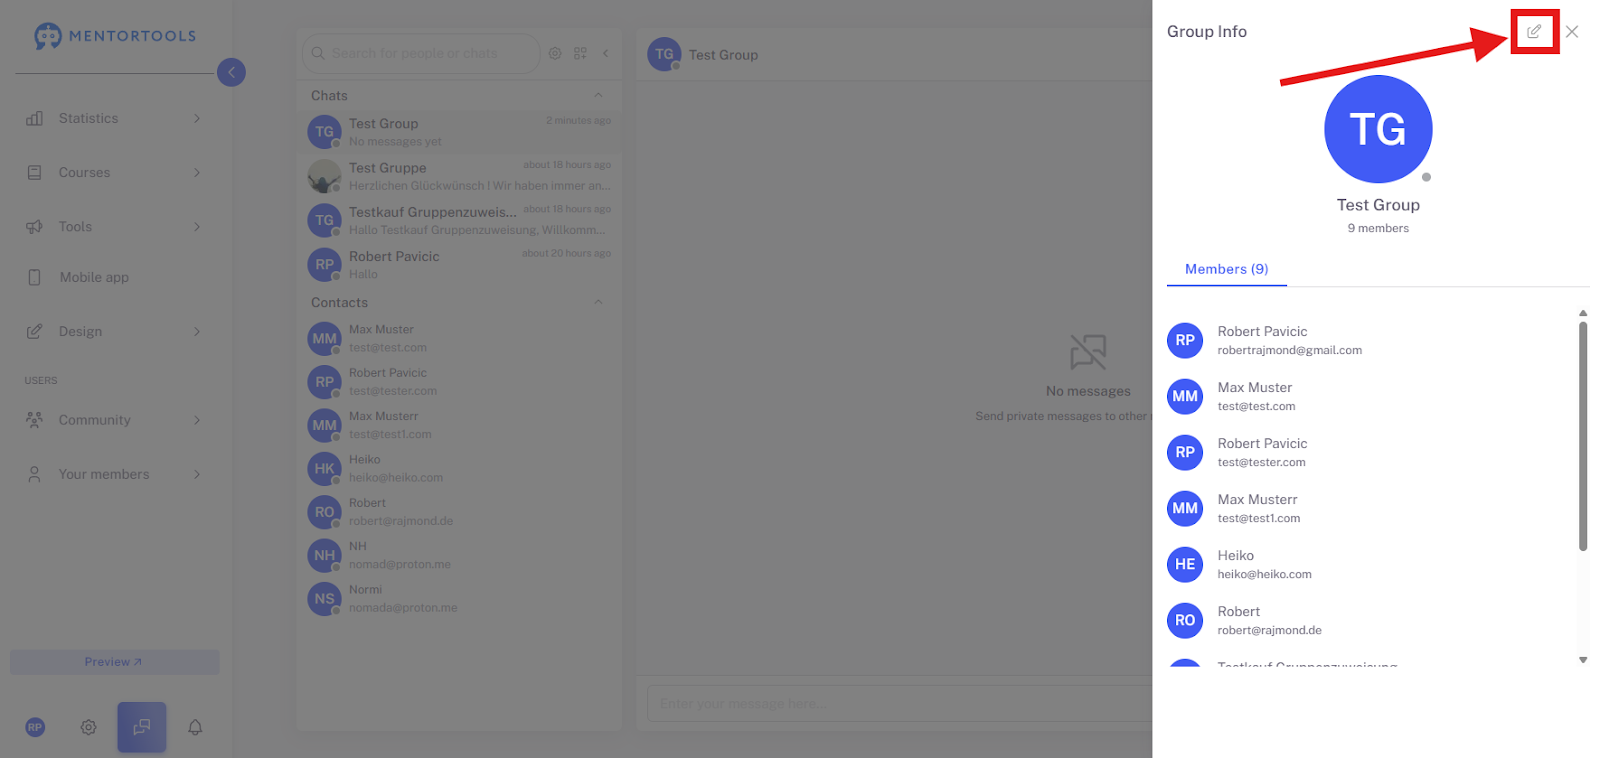
Now you have access to all of the group's settings, just as you did during setup. This is useful for managing members, for example.
That's all there is to it! You have learned how to create a customized chat group and define all the settings in just a few steps.
The most important points are:
Creation & Personalization: You start via the "Create New Group" button and give your group a name, a description, and a suitable image.
Targeted Member Selection: Using the "Select Courses" filter, you can add participants super-fast and in a targeted manner.
Access & Permissions: In the "Settings" tab, you define whether the group is public and decide whether it is a normal discussion group or a read-only group.
Editing: Even after saving, you can adjust all settings at any time via the three dots ("Group Info" and pencil icon) to manage members or change writing rights.
With these functions, you can optimally tailor and manage your internal communication to the needs of your courses.