Create and Edit Certificates
In this guide, you will learn where and how to create certificates in your online academy. The certificates serve as proof of participation in or completion of a course and can be automatically issued to your members based on predefined rules.
Last updated 9 months ago
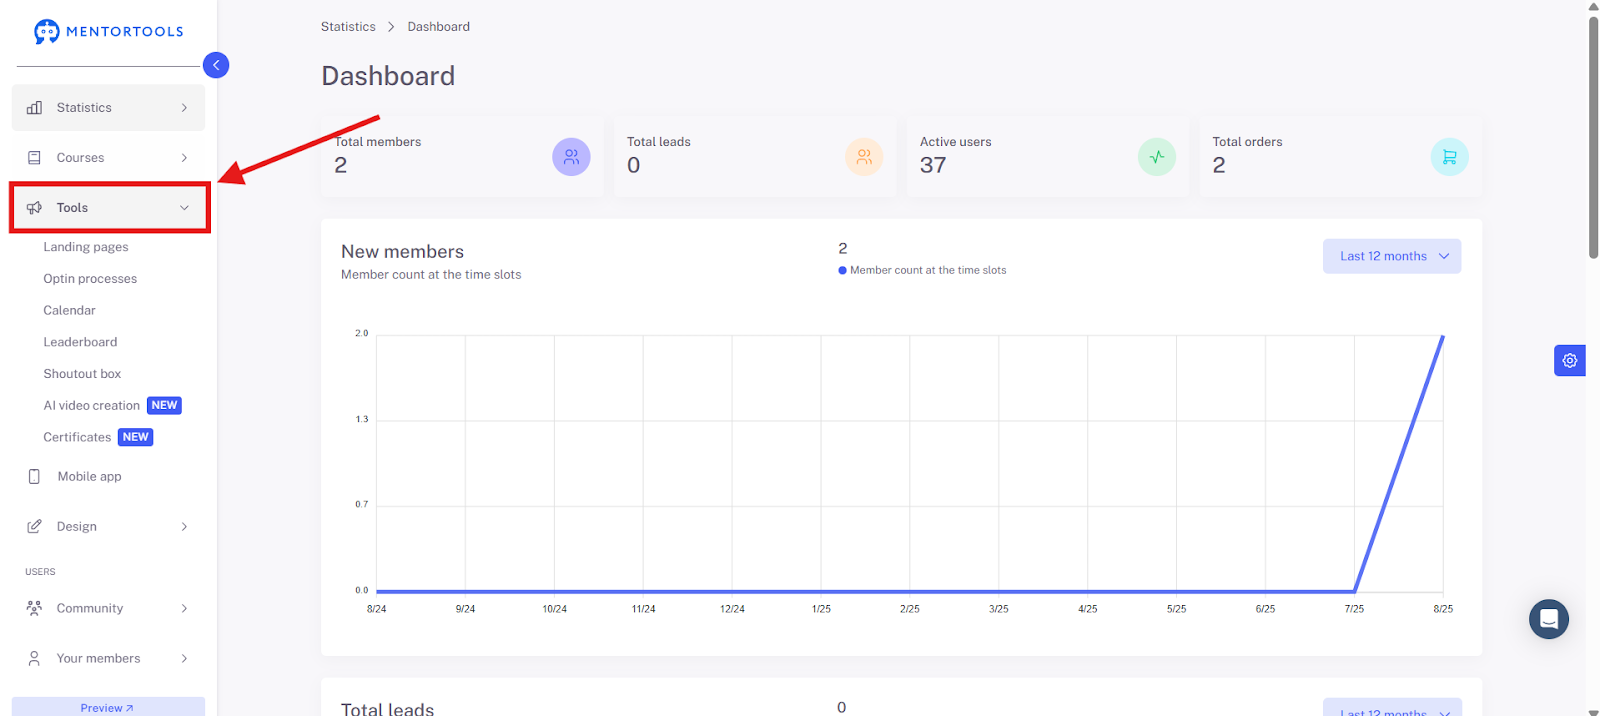
1. Navigate to "Tools"
Log in to your member area and click on "Tools" in the left-hand sidebar menu.
2. Click on the Certificates Menu Item
After you have clicked on "Certificates" in the sidebar menu, the page where you can add, edit, and set up certificates will open. These certificates are automatically issued to your members, for example, after successfully completing a course, coaching, or training.
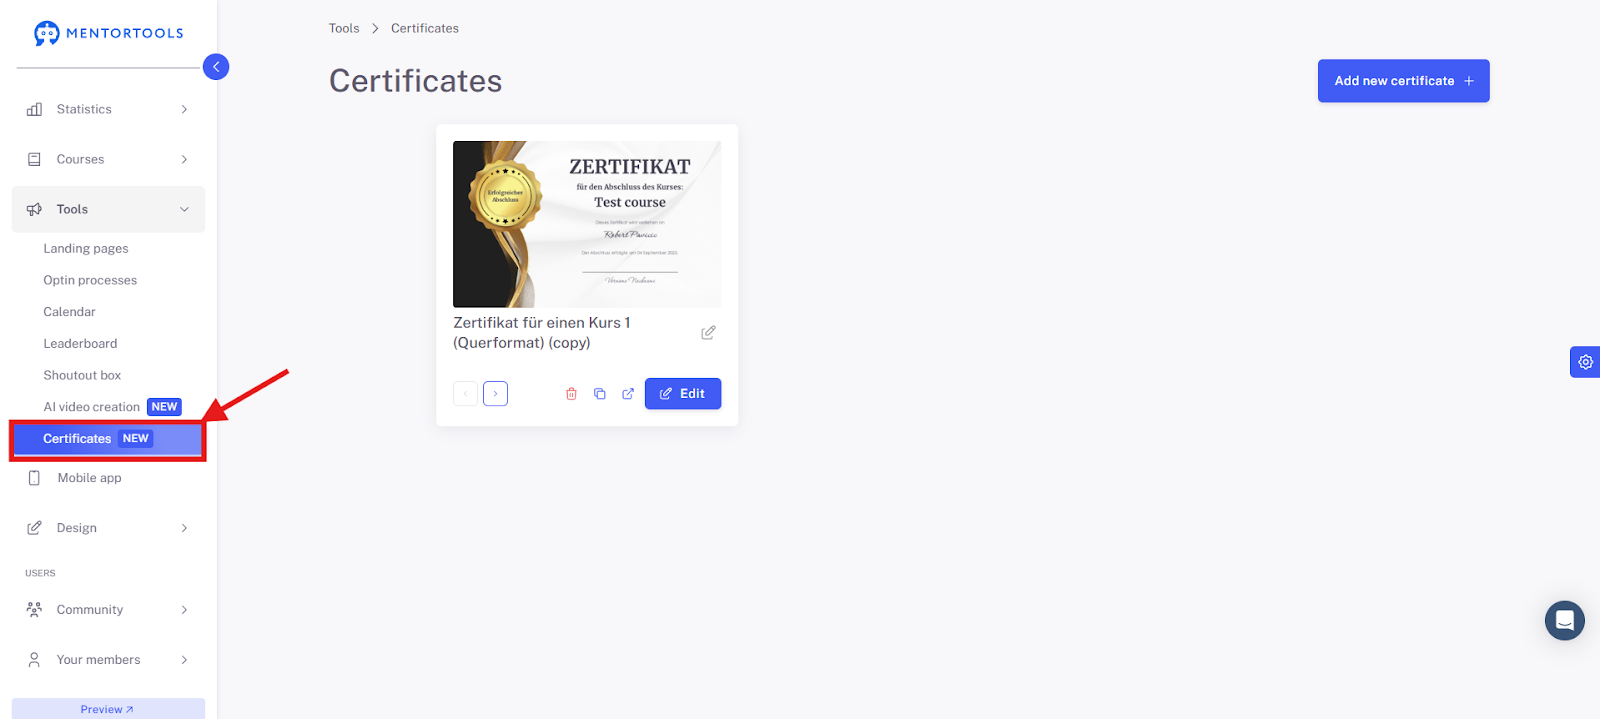
3. Create a New Certificate
To create a new certificate, click on "Add New Certificate +" in the top right corner.
A selection of templates will then appear. You have 4 landscape and 2 portrait templates available. After you have selected a template, you can customize it in the next step.
Click on the desired template to add it to your certificate list. To edit the template, click on "Edit." You will be redirected to the editor, where you can customize the certificate to your liking.
You can edit the text within the template, add images (e.g., signatures or stamps), and individually design the entire layout. In the left-hand editing area, you will find the settings for the individual elements—similar to editing landing pages.
Important: Please do not change any variables in curly brackets {{}}. These placeholders are automatically filled with the corresponding data such as the member's first name, last name, date of birth, and course name.
Finally, save your changes with "Save" and "Publish."
4. Edit the Certificate in the Editor
In the editor, you can change the background of the certificate or modify or add individual elements. We use our page editor to edit the content.
Change Background Image Click on the lower area of the editor and select the entire section ("Page Section"). Then click on the gear icon in the top right and open the sidebar on the left. There you will see the option to upload more images. For example, you can create a certificate with canva.com, delete all the text, export the image, and insert it as a .png file into the Mentortools Certificate Editor.
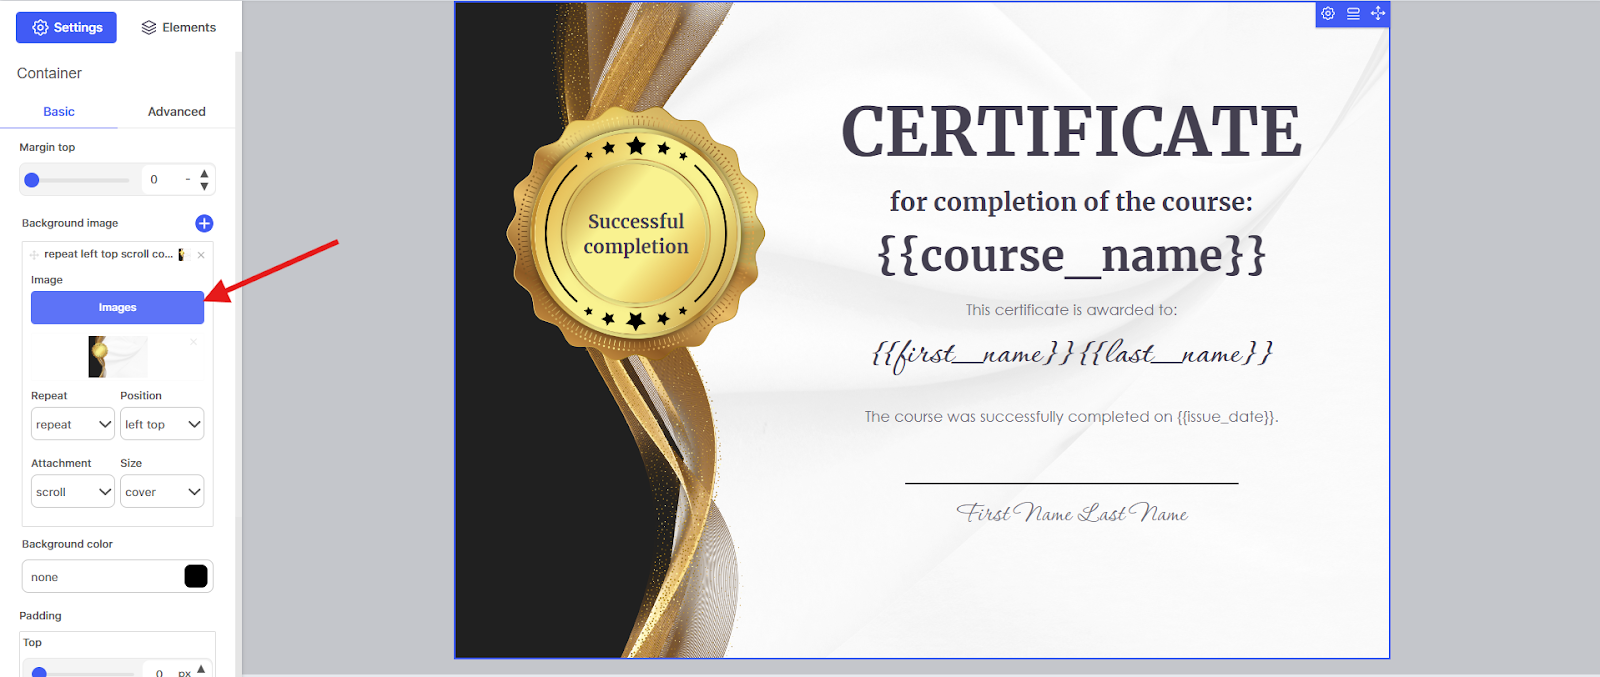
This allows you to quickly and easily change the background and the entire design of a certificate.
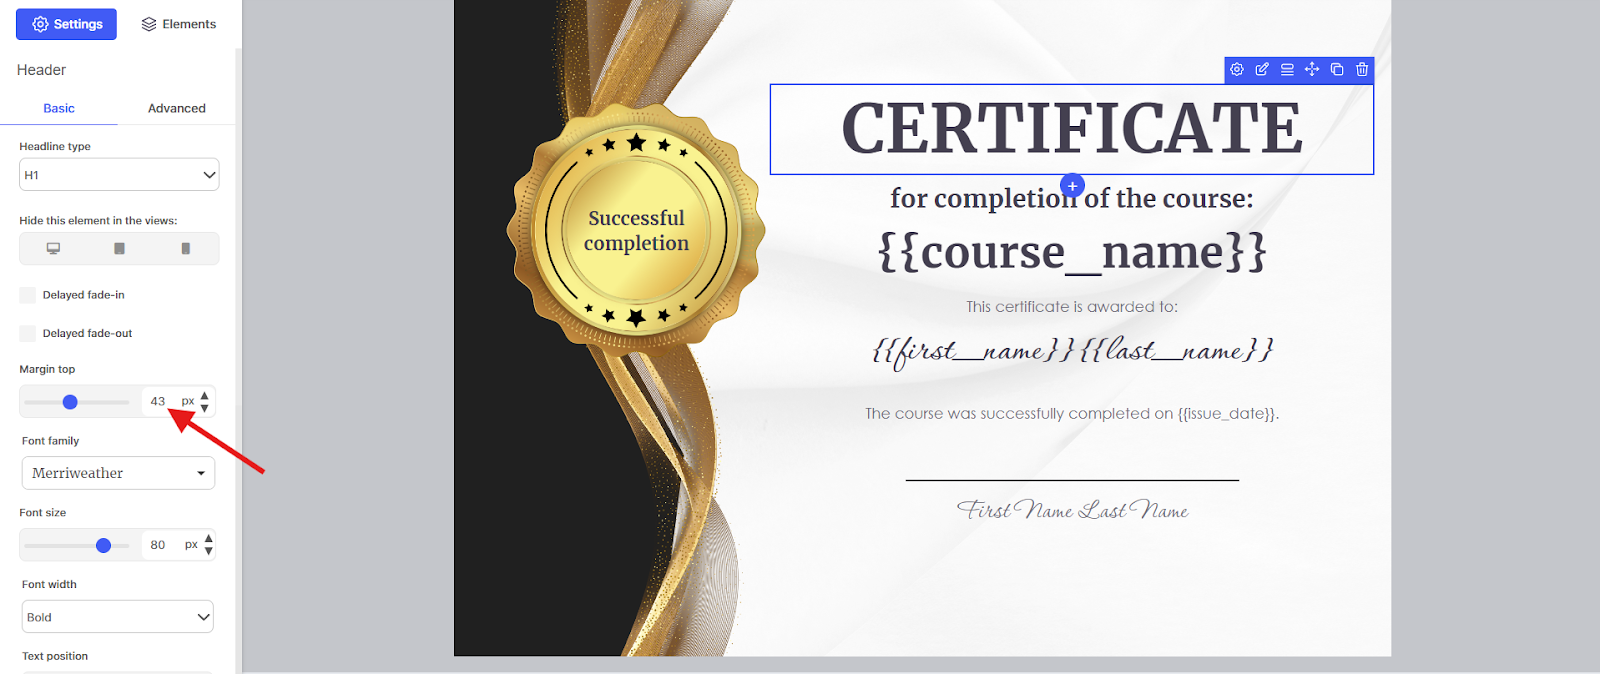
Adjust Spacing You can click on every element of the certificate, especially headlines and text, and edit them. With the settings on the left, you can adjust the fonts, colors, and the spacing to the previous element above. The "Outer spacing top" setting is particularly important for spacing. Use the slider (up to a maximum of 100px) or enter a value, which can also be larger than 100px, to adjust the spacing of an element from the one above it.
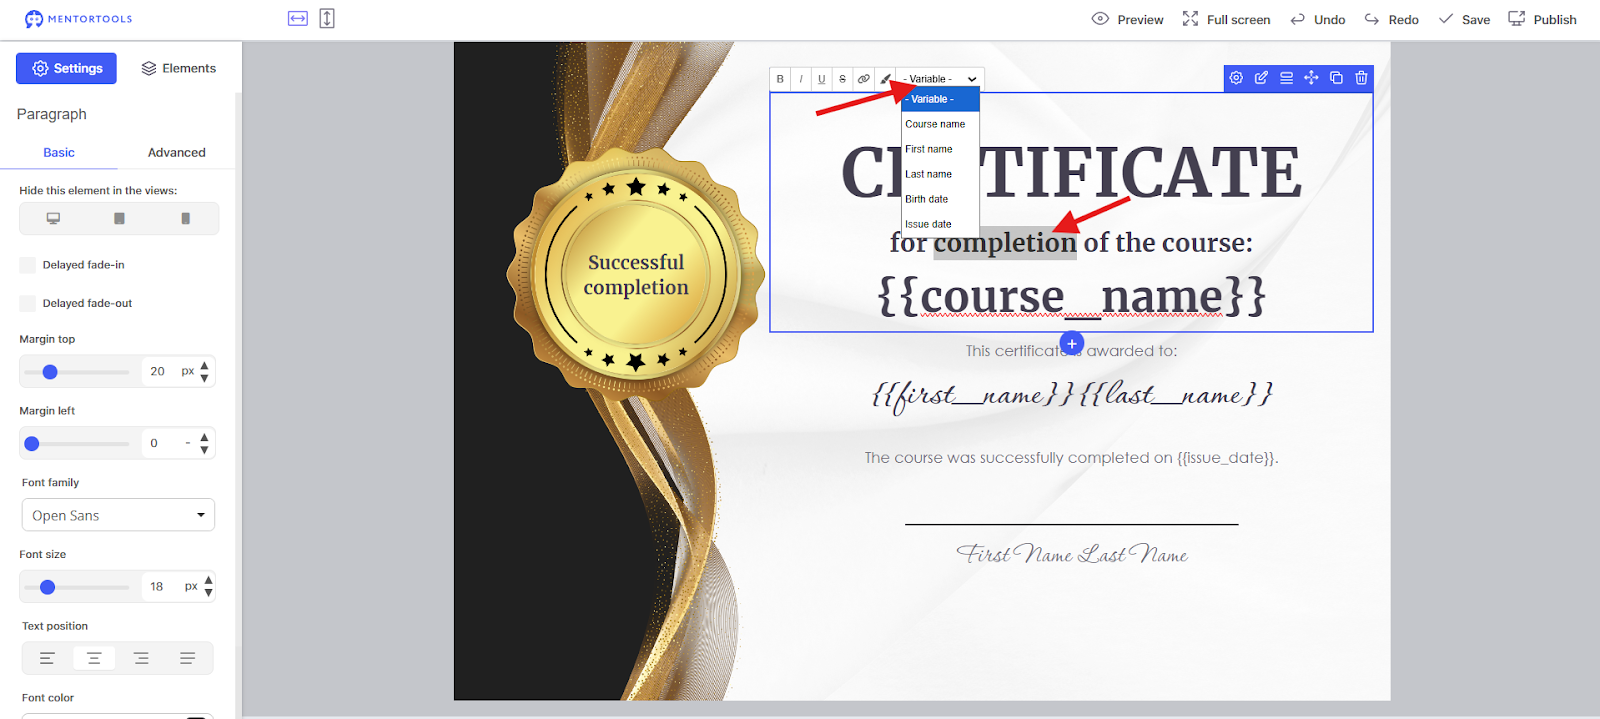
Use Placeholders You can use placeholders (variables) in the editor. The possible placeholders are:
{{first_name}} → First name
{{last_name}} → Last name
{{birth_date}} → Date of birth of the member who receives the certificate
{{course_name}} → Name of the course
{{issue_date}} → Issue date of the certificate
You can highlight a word in a text and then select a variable above the text. This will insert the placeholder instead of the word. You can also format it yourself and design it differently from the rest of the text.
This allows you to quickly and easily create 100% custom certificates within Mentortools.
Save and Publish You can save a certificate in the top menu. This saves your changes. However, users will still see the last published version. Only when you click "Publish" will a new version of your certificate be generated. This will then be used for all new certificates issued to customers.
5. Use the Certificate in a Course
You can now assign the certificate to a course. In this tutorial, you will find instructions on how to do that.
Have fun and much success using the certificates!