Creating Videos with AI in Mentortools
With the new AI video creation feature in Mentortools, you can easily generate training videos for your courses—complete with avatars, an AI voice, or your own voice recording. In this guide, we'll show you everything you need to know, from activation to uploading your presentation.
Last updated 10 months ago
Prerequisites
Before you start:
AI video creation is an additional, bookable feature.
You need a PowerPoint presentation in .pptx format (e.g., exported from Google Slides, Canva, or OpenOffice).
Each slide must contain notes—image-only slides without notes will cause errors.
Audio recordings for your own voice must be in .mp3 format.
Minimum Requirements:
Audio: 60 seconds is ideal (between 45 seconds and 1:30 minutes)
Video: 20 seconds is ideal (between 15 and 30 seconds)
Presentation: Up to 50 slides
Slide: A maximum of 1,000 characters per slide, no empty slides (without any text in the slide notes).
Important: Do not use abbreviations like "AI." Instead, write out terms in the notes ("artificial intelligence"). This improves the AI's speech output.
Step 1: Acquire a License
Go to "Tools" in your Mentortools dashboard and select "AI Video Creation."
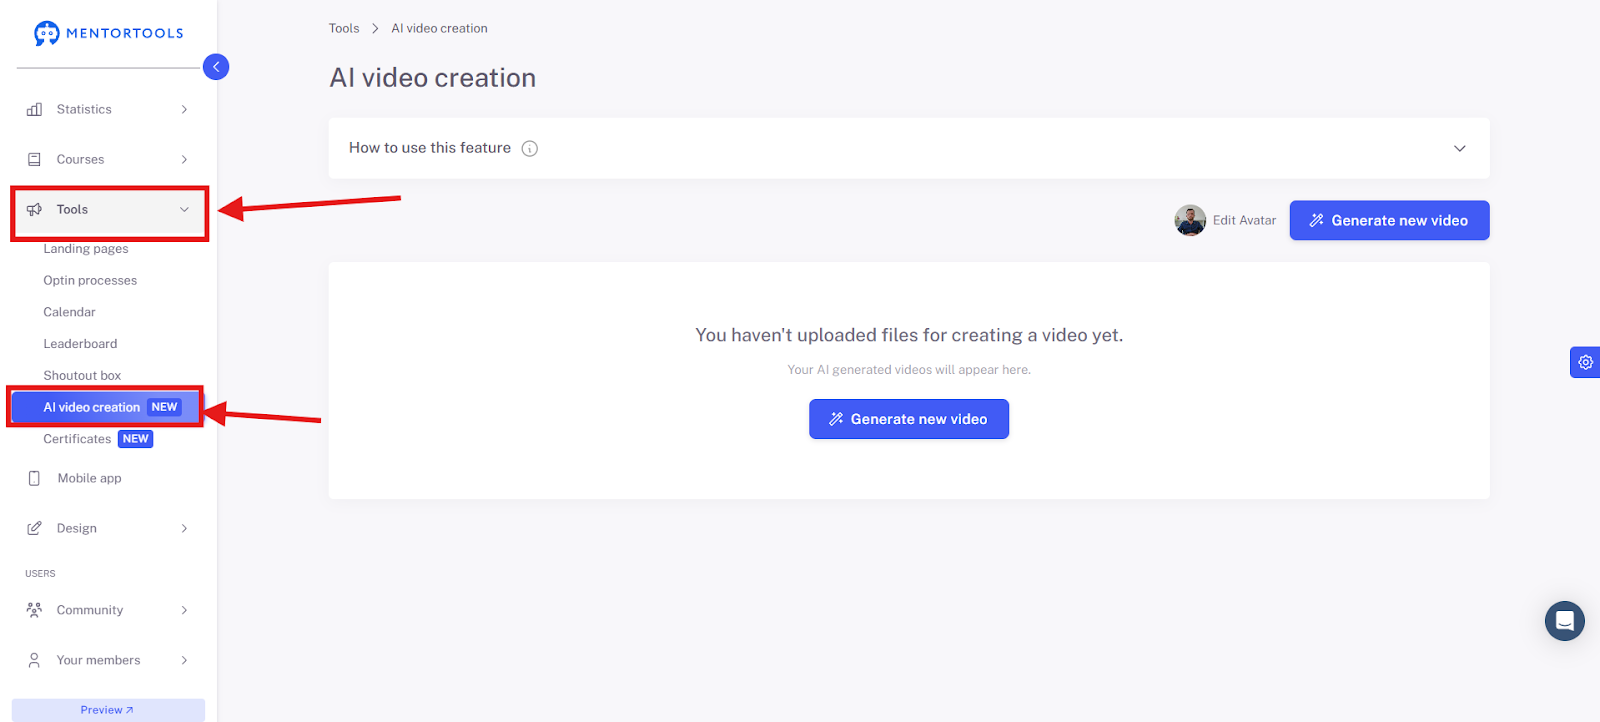
If you have not yet acquired the AI video license you can click on the blue button in the middle and purchase it.
Step 2: Set Up Your Avatar and Voice
Before you generate a video, you need to set a default avatar and choose a voice.
You can also upload your own voice; the file must be in .mp3 format.
Note: For abbreviations like "AI," ensure you pronounce the individual letters clearly ("A-I") to avoid misunderstandings.
2.1 Set up an Avatar
Click on "Set up Avatar."

2.2 Select a Voice
Here you can select the voice for your avatar. You can choose different languages like English, German, Slovak (Slovenský), Czech (Čeština), and select from various voices by clicking the downward-pointing arrow to open the dropdown menu.
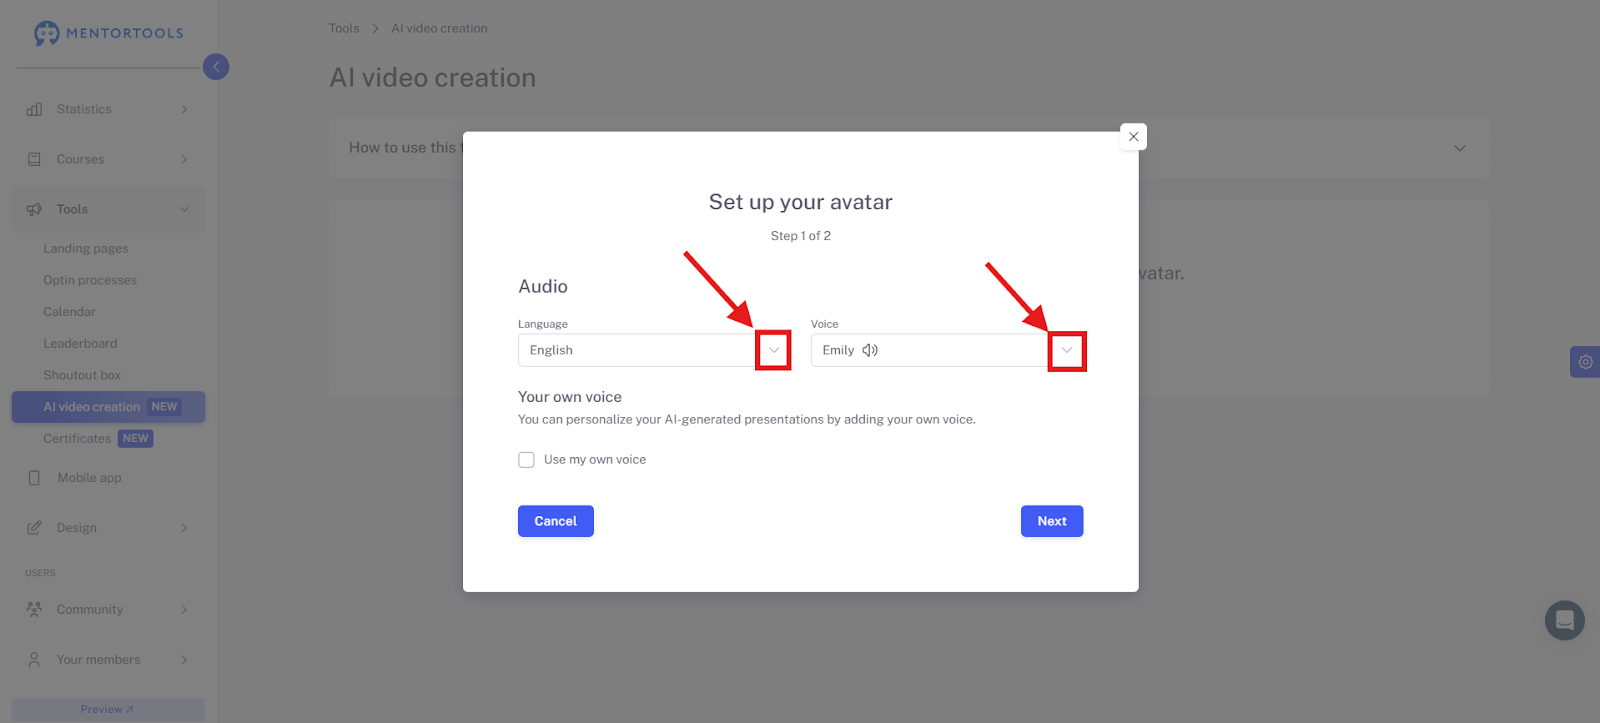
After selecting a voice, you can preview it by clicking on the speaker icon.

2.3 Add Your Own Voice
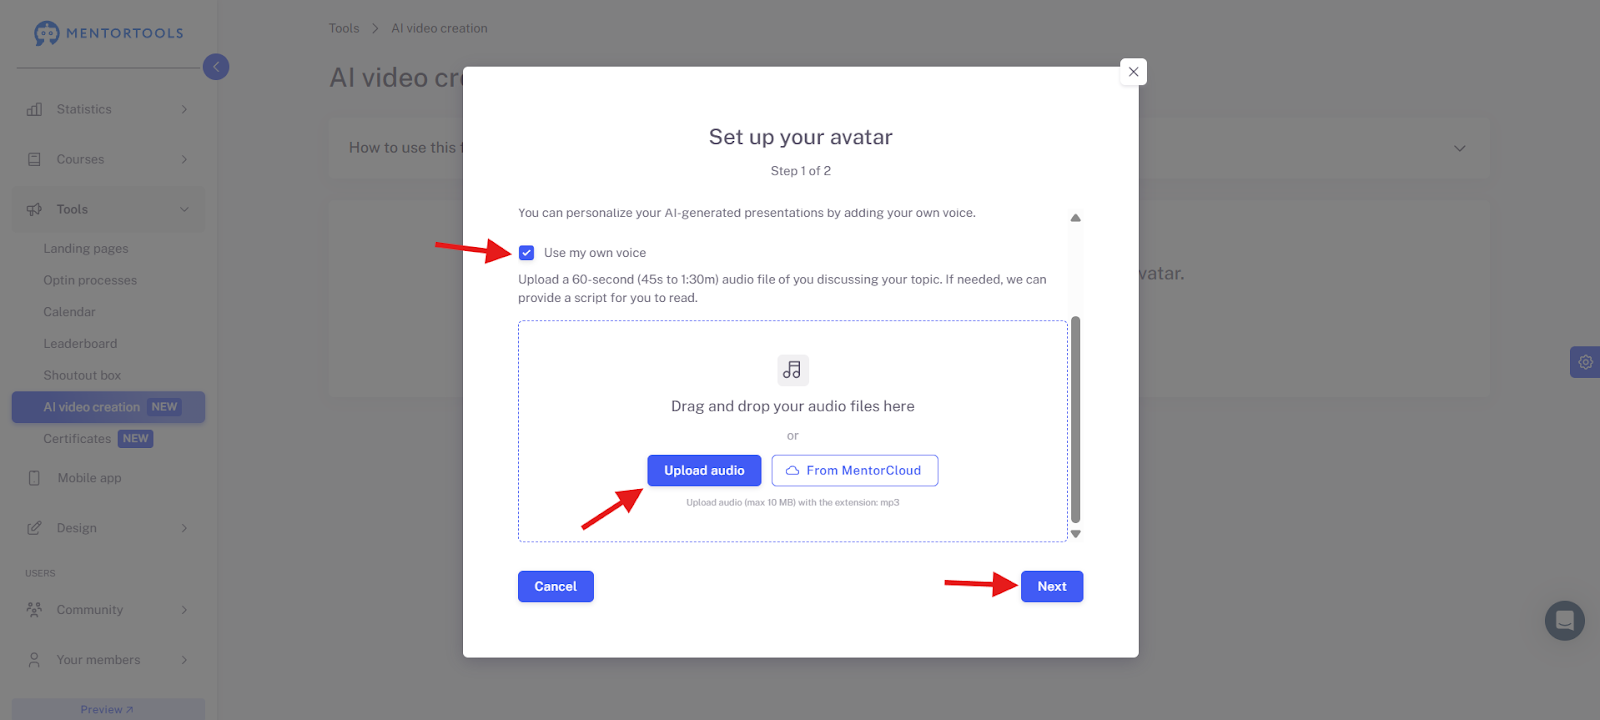
You can add your own voice to personalize your AI-generated videos. To do this, upload a 60-second (45 seconds to 1:30 minutes) audio file in .mp3 format where you explain your topic. If needed, we are happy to provide a script for you to read.
To use your own voice, check the box for "Use my own voice" and either upload the audio file from your device or use a file you have already uploaded to the Mentorcloud. Then click "Next" to proceed to the next step.
2.4 Select 'Talking Head' Video Avatar
In this step, you can choose a model for your video avatar, create your own video avatar, or decide to use only audio (the voice) without a 'talking head.'
If you don't want to create your own video avatar, select the desired model or the option "Use audio only - no 'Talking Head'" and click "Save." You have now successfully set up your avatar.

2.5 Create Your Own Avatar
You can also upload your own video to create a model based on it. To do this, select the "Create my own" option.

Then, upload (or use a video from your Mentorcloud) a clear, high-quality video (15-30 sec., ideally 20 seconds) with good frontal lighting, where you speak clearly and look into the camera.

Note: Please speak your text directly into the camera. It doesn't matter what you say.
The following things are important for the video avatar:
Avoid making frantic hand movements. Your hands should not be directly visible in the video. Also, try to move your head as little as possible to the left or right.
Look directly into the camera and speak as if you were reading the news on television. Please also make sure you have good light from the front and that your face is clearly visible.
Note: Position your head in the center of the screen, approximately like this:

Step 3: Prepare Your Presentation
The slide presentation must meet the following requirements:
File format: .pptx
Each slide needs notes; otherwise, no audio can be generated.
No empty slides or slides with only images—they will cause errors.
You can create presentations with tools like Google Slides, Canva, OpenOffice, or Gamma.app and export them in .pptx format.
Generate a Video with Your Presentation
3.1 Click "Generate New Video"

3.2 Avatar Settings
In the avatar settings, you can edit your avatar by clicking the pencil icon, enable or disable the option to generate the video with a 'Talking Head' using the checkbox, and set the position of the avatar using the dropdown menu.

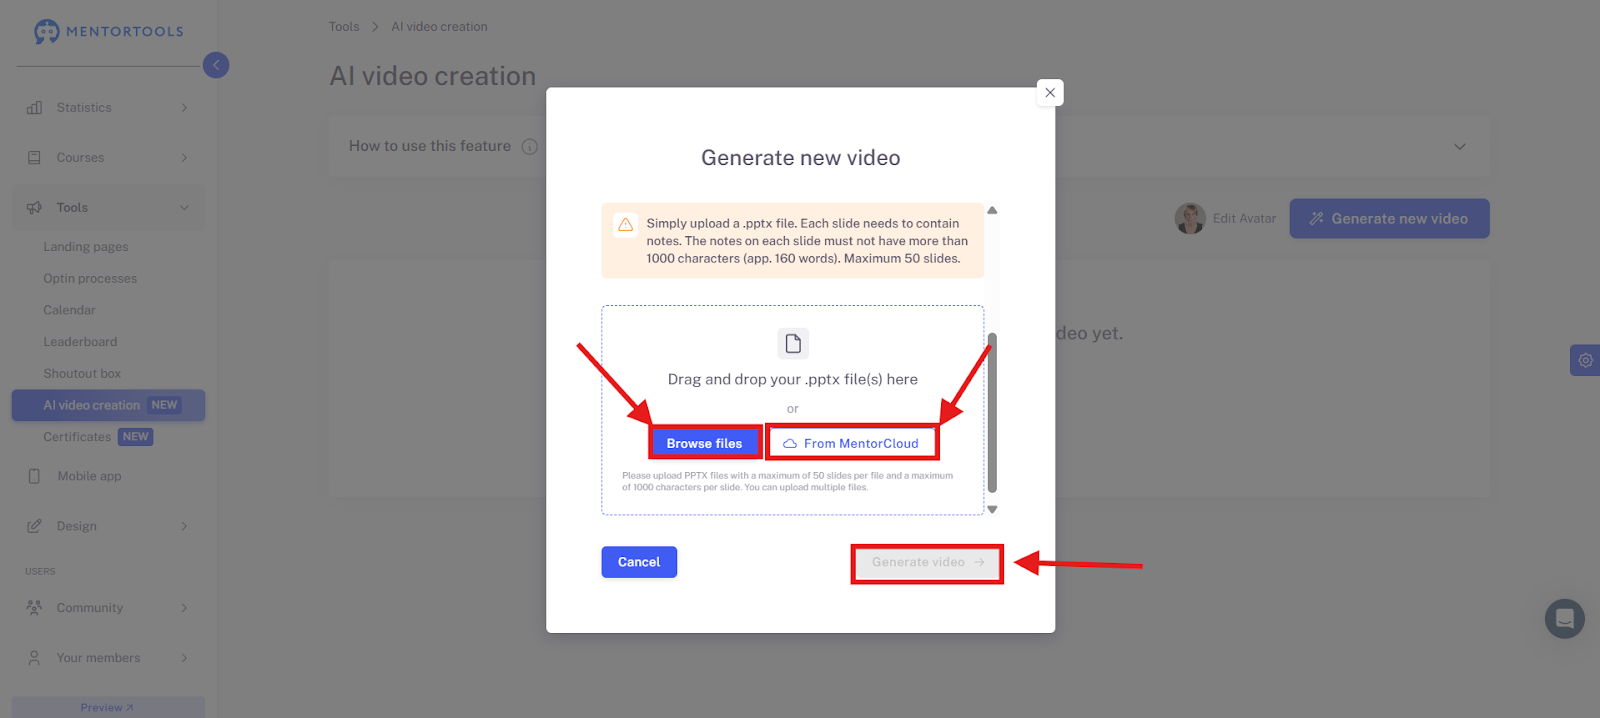
3.3 Upload Your Presentation
Scroll down to the area where you can upload your presentation. Use PowerPoint to create your presentation or export from Google Slides, Canva, or Gamma as .pptx. You can now upload your presentation or use a presentation from your Mentorcloud. After the presentation has been uploaded, click "Generate Video" to start the video creation.
Note: Generating an AI video can take only a few minutes or several hours, depending on the length of your presentation. However, you can upload multiple presentations at the same time and simply wait for all the videos to be created.
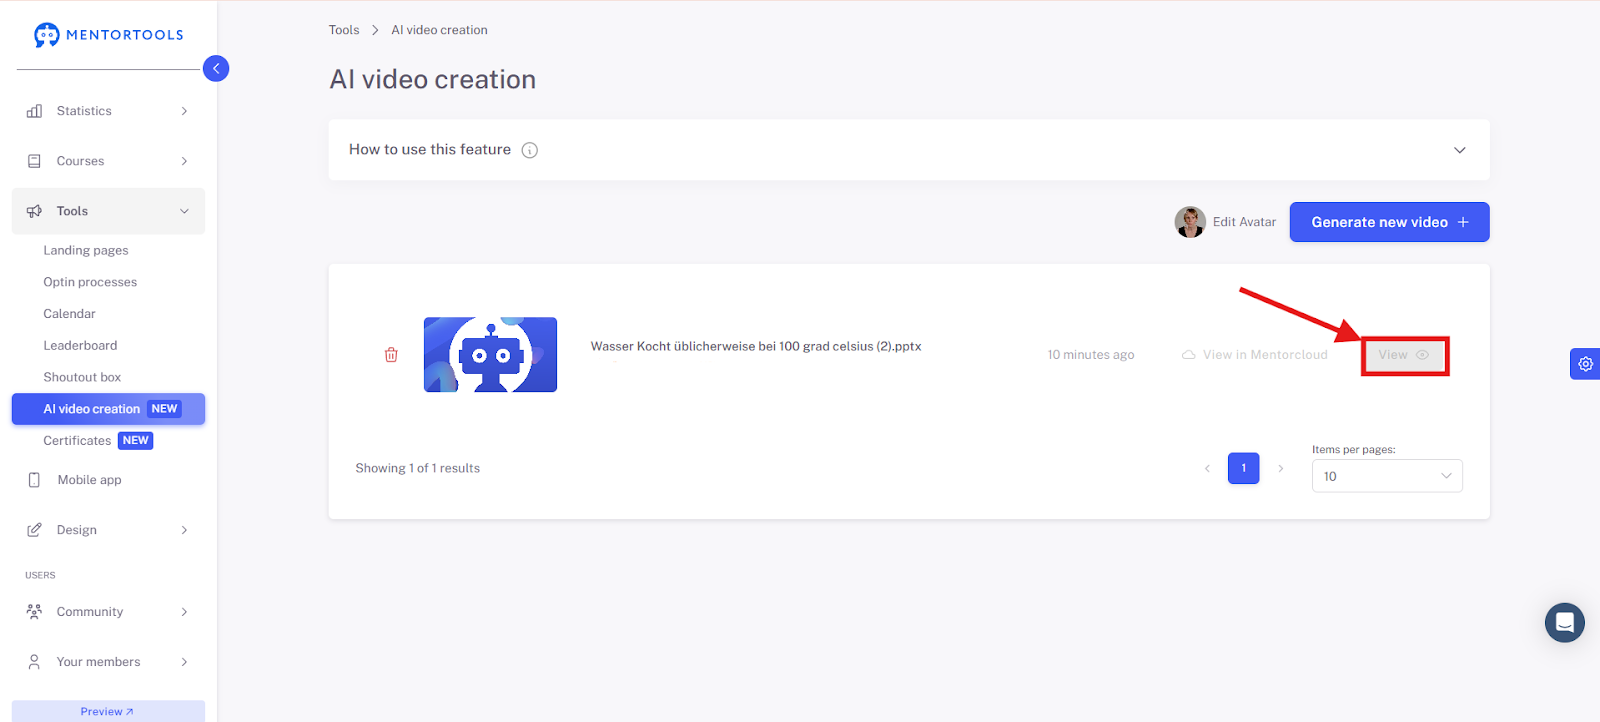
3.4 Check the Preview
After the video has been generated, you will find it under AI Video Creation. There you can watch the video.
If errors occur:
Check if every slide contains notes.
For faulty slides: delete the file, correct it, and upload it again.
If you have problems, use a "Force Refresh" (Alt+F5) or simply reload the page.
4. Tips & Best Practices
Ensure every slide has complete notes.
Use clear language and write out technical terms in full.
Combine audio, image, and notes meaningfully for the best possible results.
Use synonyms and easy-to-understand language for the AI voice as needed.
Use at least 3-4 slides for a good video length.
Summary
With the AI video feature in Mentortools, you can create professional talking head videos in just a few minutes—directly from a PowerPoint file. It's ideal for training, course content, and marketing materials—without technical know-how.
Easy to use with a 1-click upload
Automated video production, including a talking head avatar
Ideal for digital courses and presentations