Events – Create and Edit Events
The Events feature in Mentortools allows you to display all important live dates like webinars, workshops, coaching sessions, or Q&A sessions directly in your members' area.
Last updated 10 months ago
The clear calendar view presents all planned events in a well-structured, chronological overview—for both you as the provider and for your participants. This significantly simplifies communication about dates, and your members are guaranteed not to miss any important live event.
Activate the Calendar for Your Members' Area
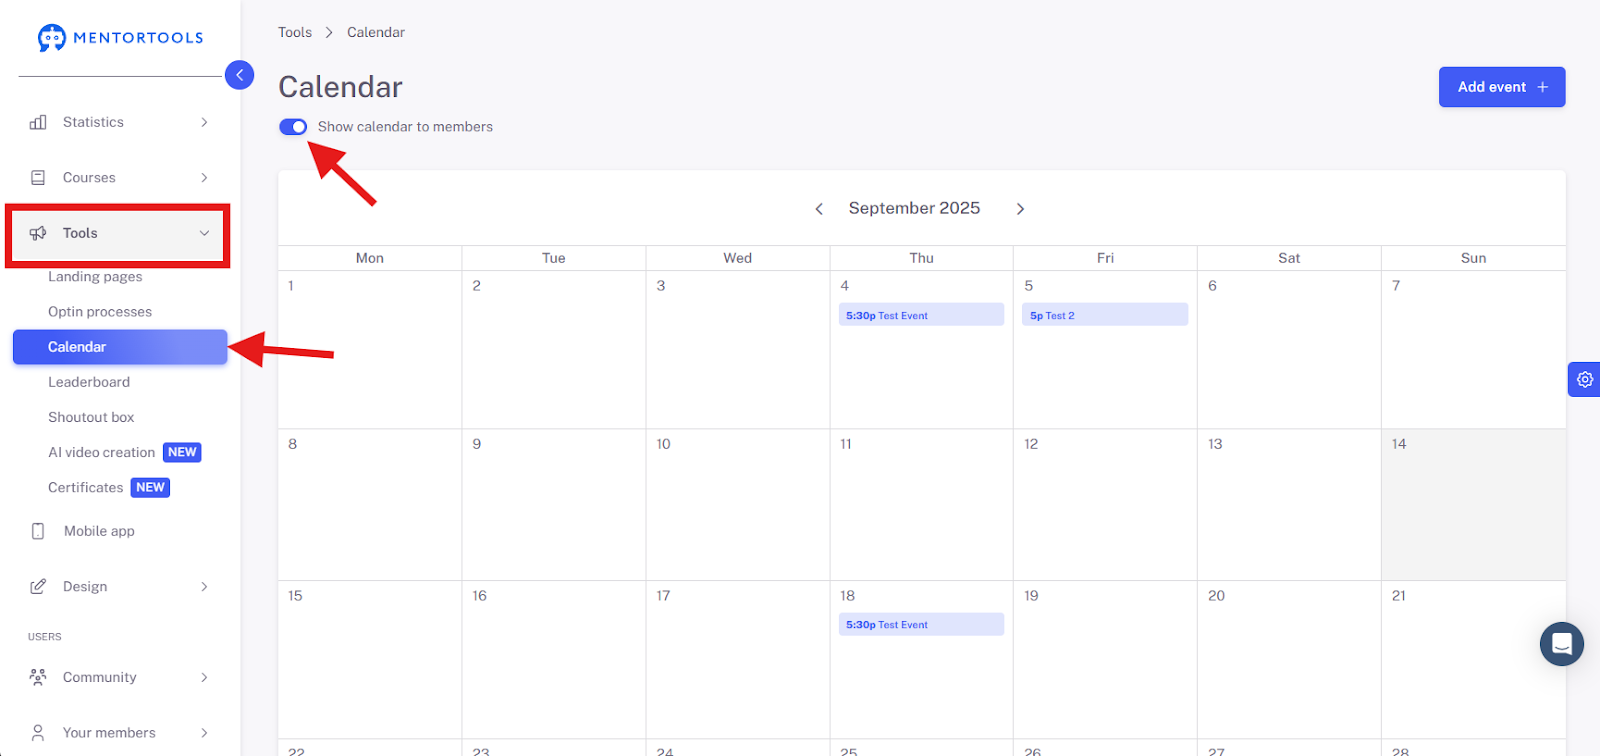
If you want to share events with your members in the calendar, you must first activate the calendar. To do this, please go to Tools, then Calendar, and set the slider for "Show calendar for members" to active.
Create a New Event
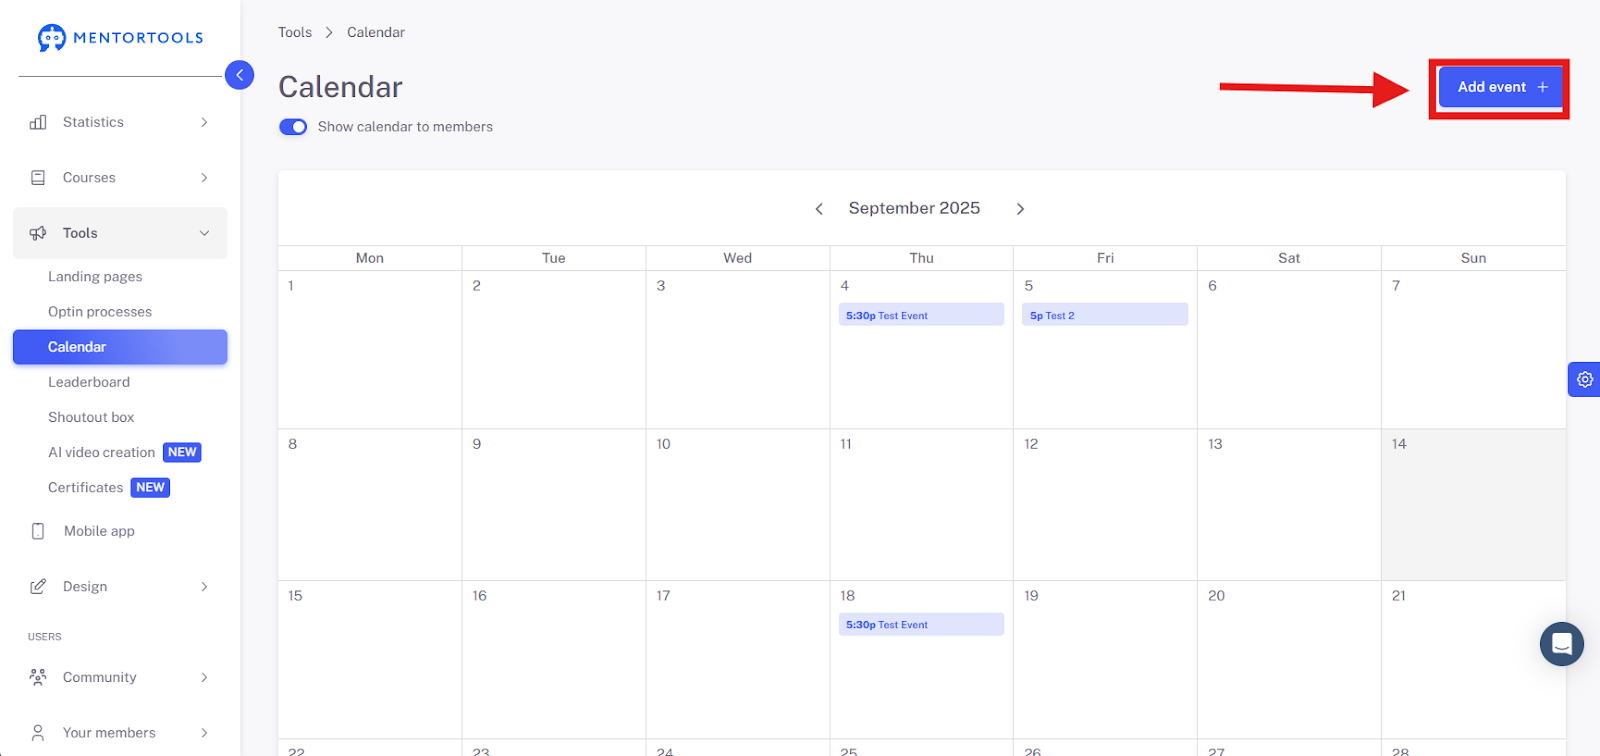
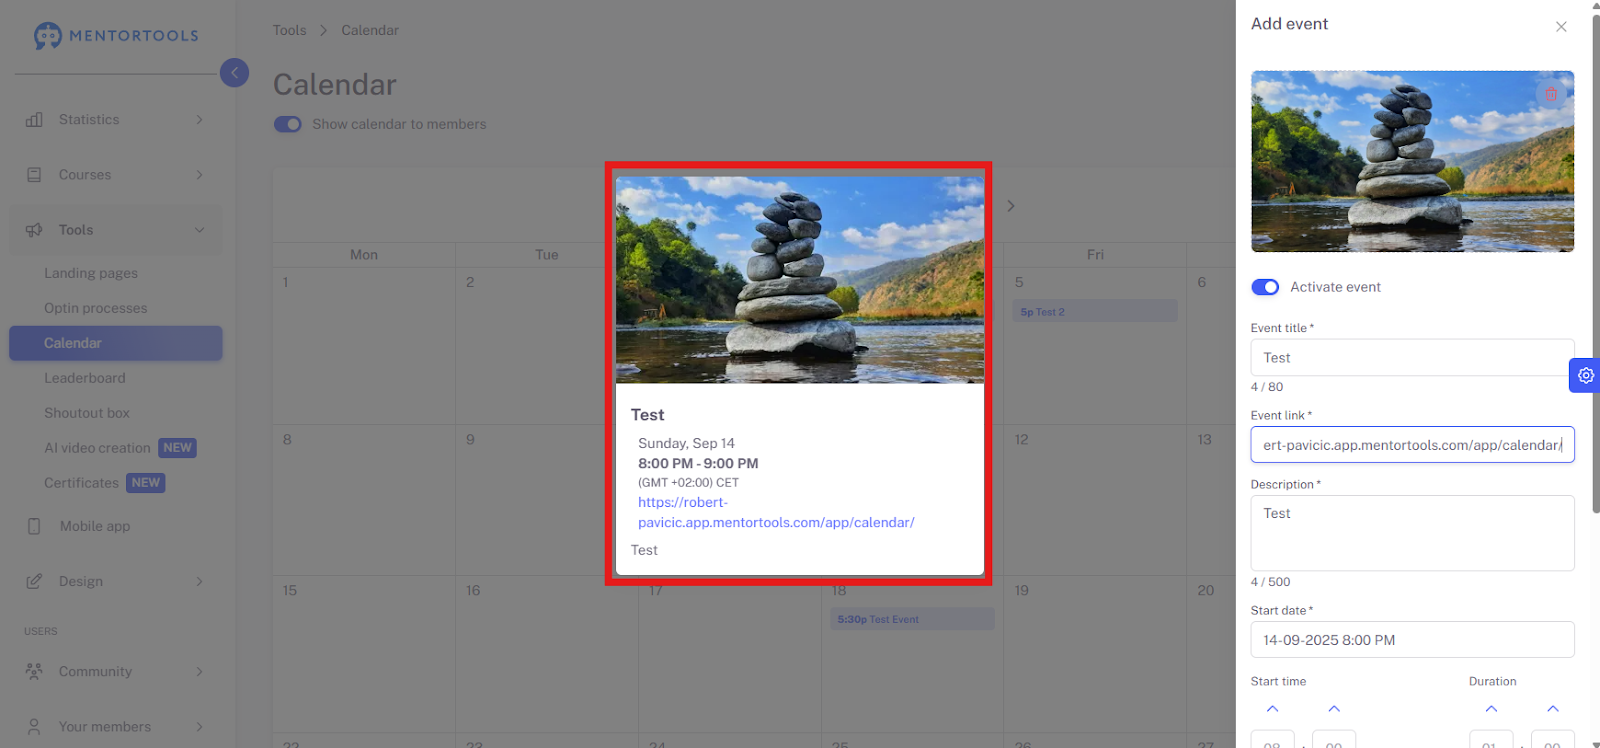
To create a new event, click Add Event in the same window.
A new window will then open. Here you can make all the settings for your event.

As a first step, it is recommended to add an image as a cover for your event. You can use a royalty-free image from our templates, select one of your own images from the media library, or upload an image from your own files.

After that, you can continue with the general settings for your event. Let's go through the individual steps together.
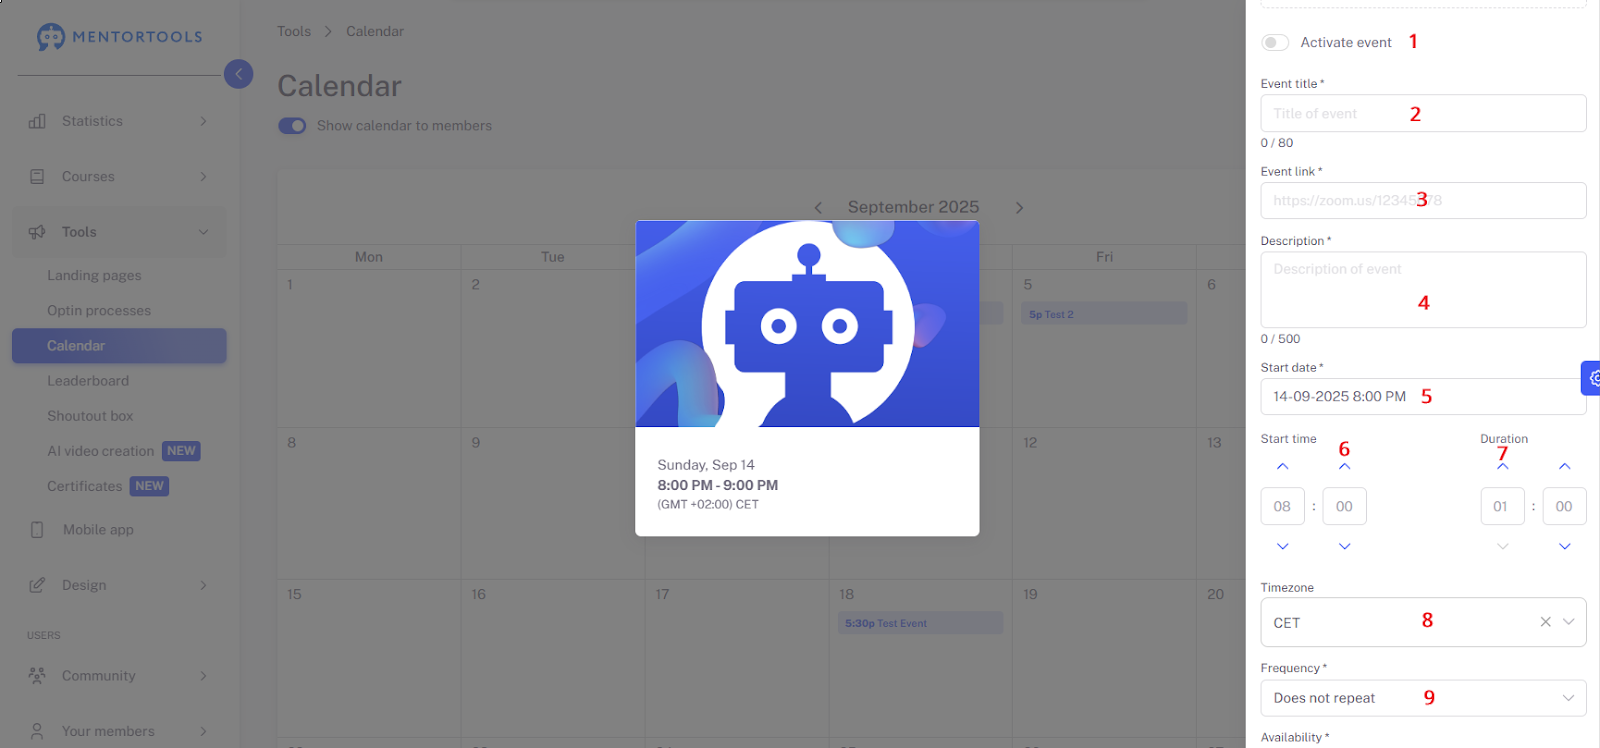
Activate the Event – Activate this slider so the event is visible to your members. If the slider is not blue, the event will not be displayed for your members, and no one can participate.
Give the Event a Name – It's best to choose a recognizable and easy-to-remember title here.
Link the Event – If you're doing a webinar, you can insert the direct link to the webinar or the sign-up page here so your members can get to the webinar directly from the calendar. Of course, you can also include a link to a website or a landing page here. This way, your members can get more information. Important: When you insert the link to the event, be sure to include https:// or http://.
Create an Event Description – To ensure your members are well-informed about what the event is about, it's a good idea to include a description of the event. Describe what your members can expect in the event here.
The Event Date – When should your event take place?
Event Start Time – At what time does the event start? Enter the start time here.
Event Duration – How long does the event last? Enter the duration of the event here. Does the event last, for example, 30 minutes or 2 hours? Important: Please do not enter the end time of the event here, but the duration.
Time Zone – Since many of our customers and their members are not exclusively in the D-A-CH region (Germany, Austria, Switzerland), we recommend specifying the time zone in which the event will take place. This ensures that all participants have the same time and do not arrive late.
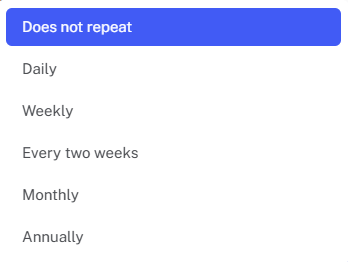
Event Repetition – Is your event a one-time event or a recurring one? For example, if you have a weekly live call or a monthly workshop, you can choose how the event should repeat here. This way, you don't have to set up the event manually every time; the event will be displayed in the calendar for your members at the frequency you want.
If you want to delete a specific date from a recurring event, please click on Delete at the very bottom. A field will then open, and you can decide which events from this series you want to delete.

Important: Deleting here really means deleting. The event will be gone.
If you have filled out all the fields up to this point, you can take a look at what your event will look like. In the small image, you'll see a preview of the event. All changes are adjusted live here.
You have now completed the general settings for your event. Now decide who is allowed to see the event and who has access to it. Scroll down a bit to "Availability"
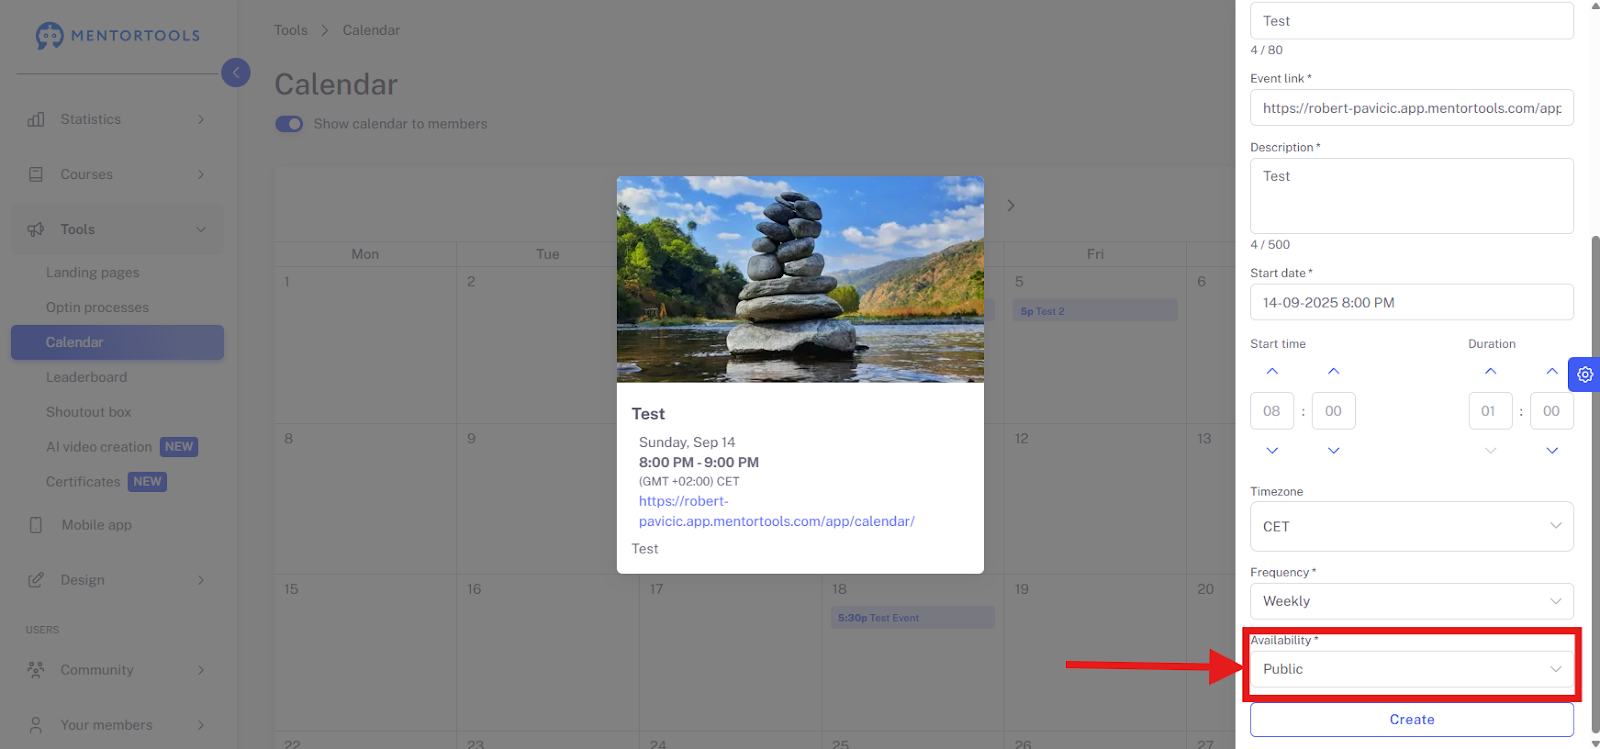
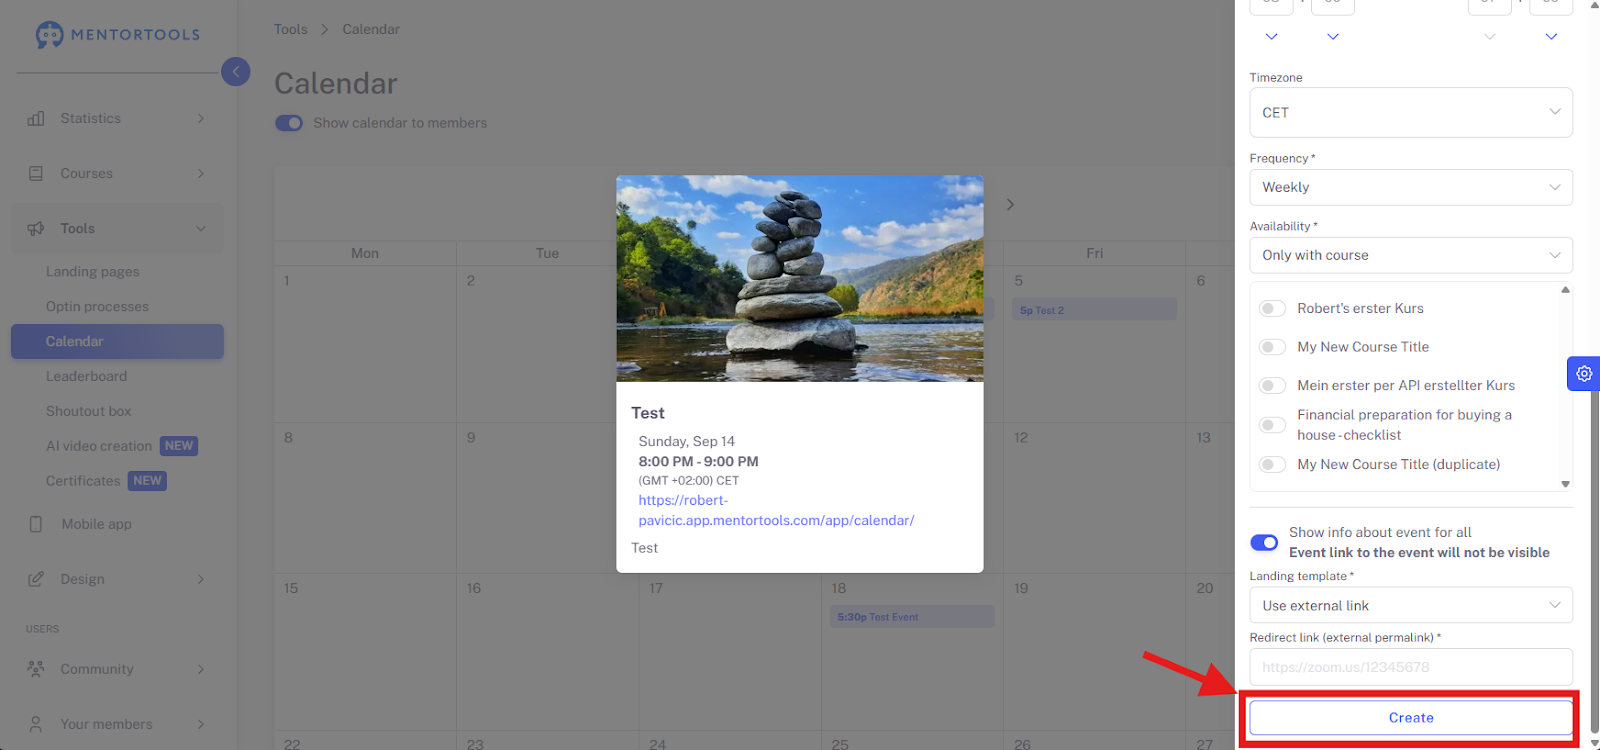
Click here to select whether the event should be public (accessible to everyone) or whether only participants of a specific course should have access.
Public Events
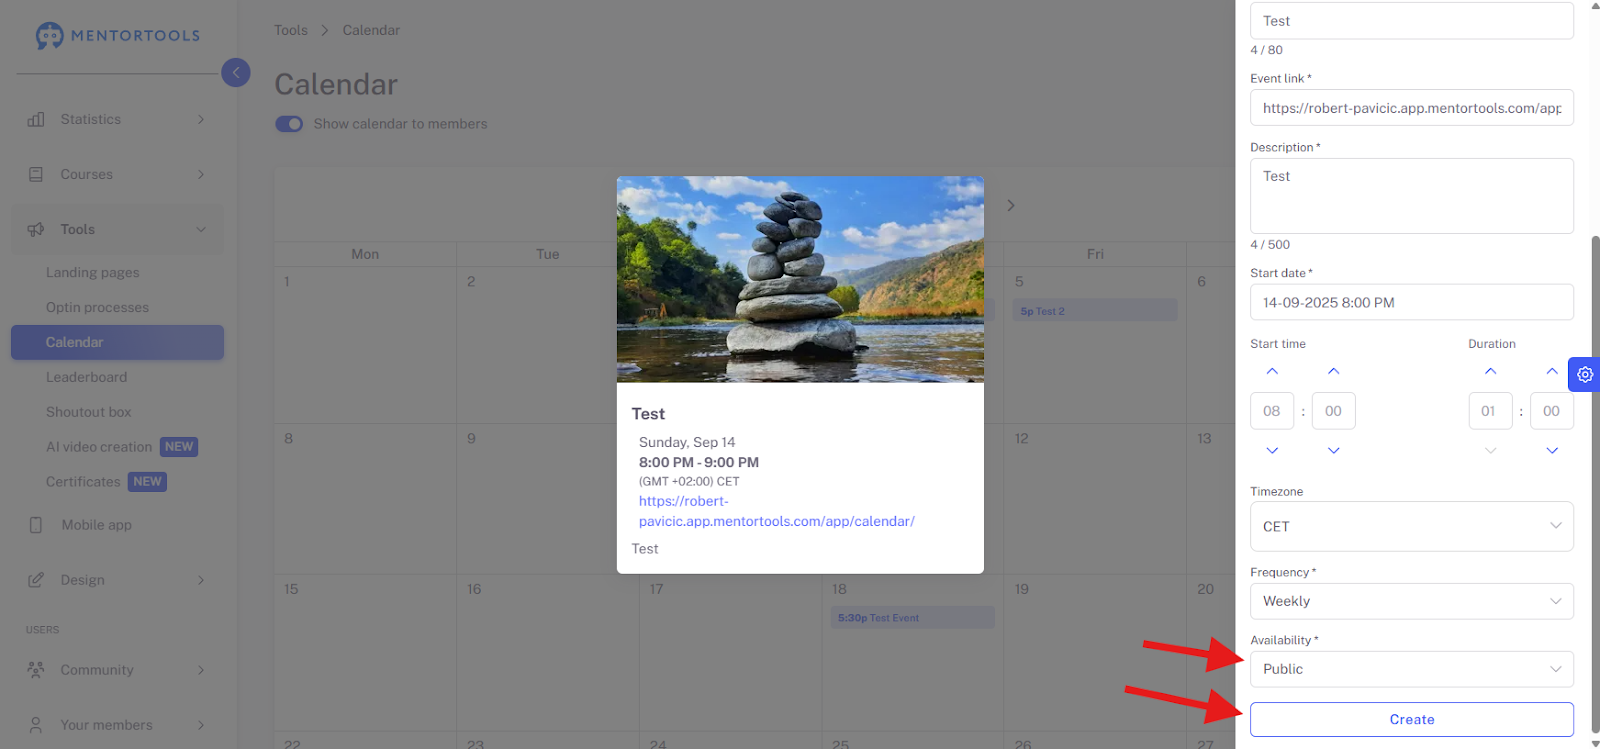
For a public event, click on Public here and, very importantly, click Create.
Access to the Event Only for Course Participants
If your event should only be accessible to participants of a specific course, then select Only with course here.

In the next step, you activate the course or courses that should be linked. The event will then be visible in their calendar on the main page of your members' area for all members who have at least one of these courses.
Complete the last steps before you can create the event.
Who should see the direct link to the event? Here you can decide whether you want to show all the information or not.
Where should members be redirected if they do not have access to the course? Here you can choose whether they should be redirected to a landing page or an external website where they can book/buy the course.
The link to the external page – This field is not visible if you have selected one of your landing pages, as it is linked directly within Mentortools. Important: Here, too, be sure to include https:// or http:// in the link.

Important: When you have filled out all the fields, click Create.
After clicking the Create button, the event will be displayed in your calendar.

By clicking on the blue bar, the event window opens again, and you can review all the settings or adjust them if necessary.

Edit a Finished Event
You can easily make changes and adjustments to an already created event by going back to your calendar view. Click on the corresponding day and then on the bar of the event you want to edit.

This way, you will get back to the editing mode and can make adjustments here, e.g., to the duration of the event or other points.
Important: Be sure to click Save afterward.

How Is the Event Displayed for My Members?
If you have successfully created the event and both the calendar and the event are set to active, your members will see the following view in your members' area:
Here is an example of the calendar shown in the Mentortools Academy.
Your calendar is displayed in the navigation bar of the members' area. Here, your members will see the events accessible to them.

By clicking on the Calendar menu item, it opens, and your member sees all the events accessible to them.
By clicking on the green bar on a day, this window opens, and your member sees all the relevant information about the event.

Public events are displayed for all members. If it is an event with course access and the participant has booked this course, they will see the corresponding link here and can go directly to the event.
Have continued fun & success creating your events!