Order overview
This guide will show you how to access the order overview in Mentortools, review and add new orders, and export all orders as a CSV. This is ideal for managing your customers' purchases and analyzing revenue.
Last updated 10 months ago
1. Click on "Members" in the left menu.
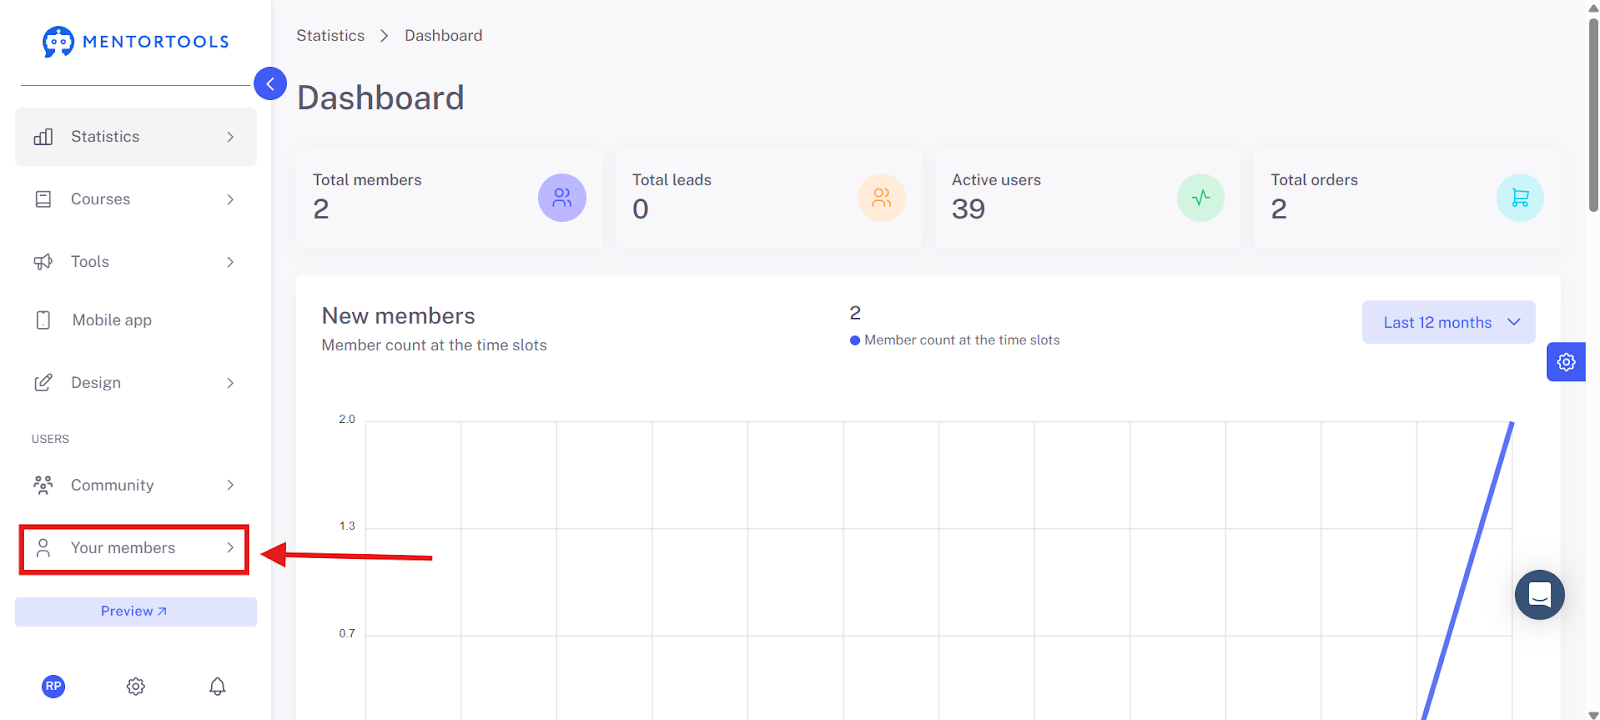
2. Select "Orders."
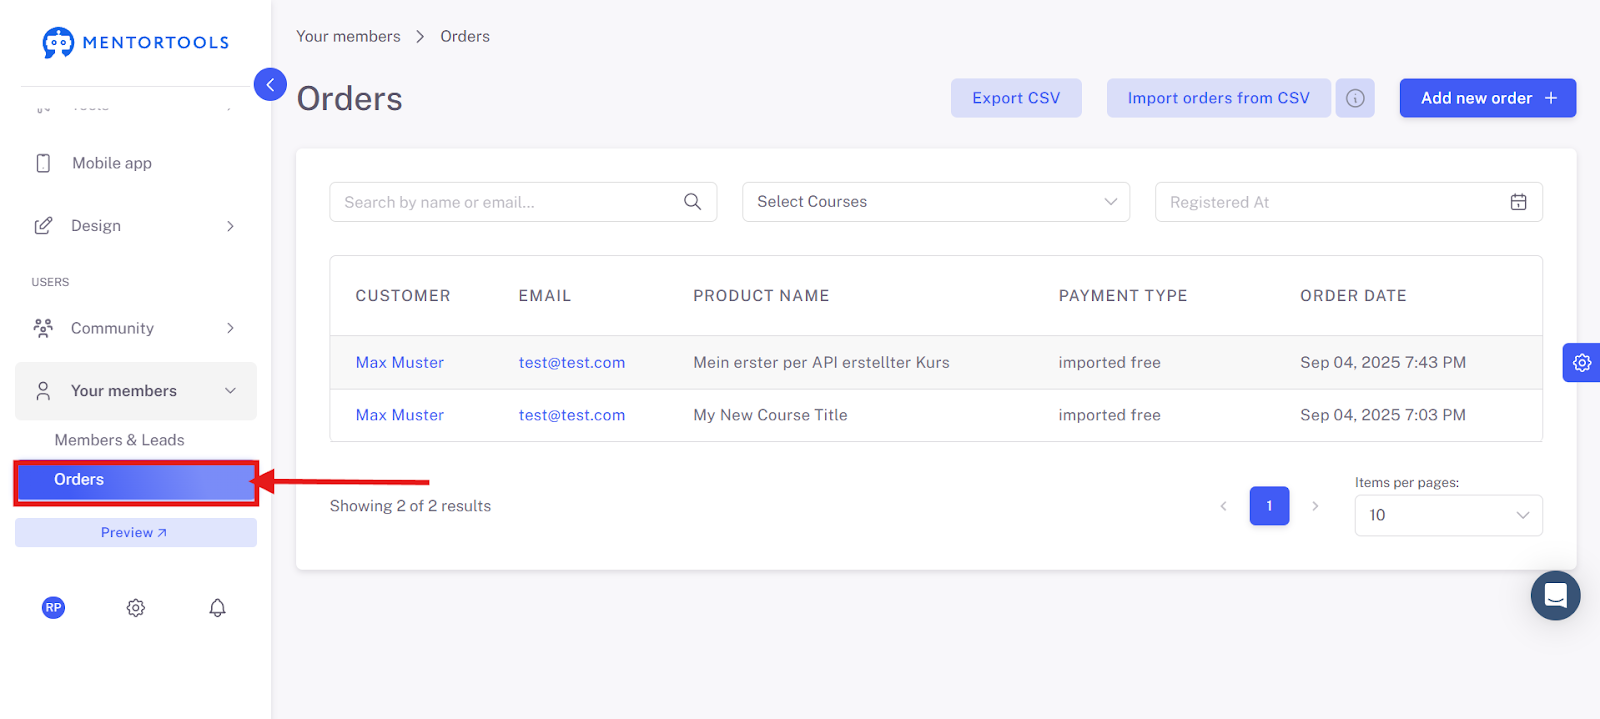
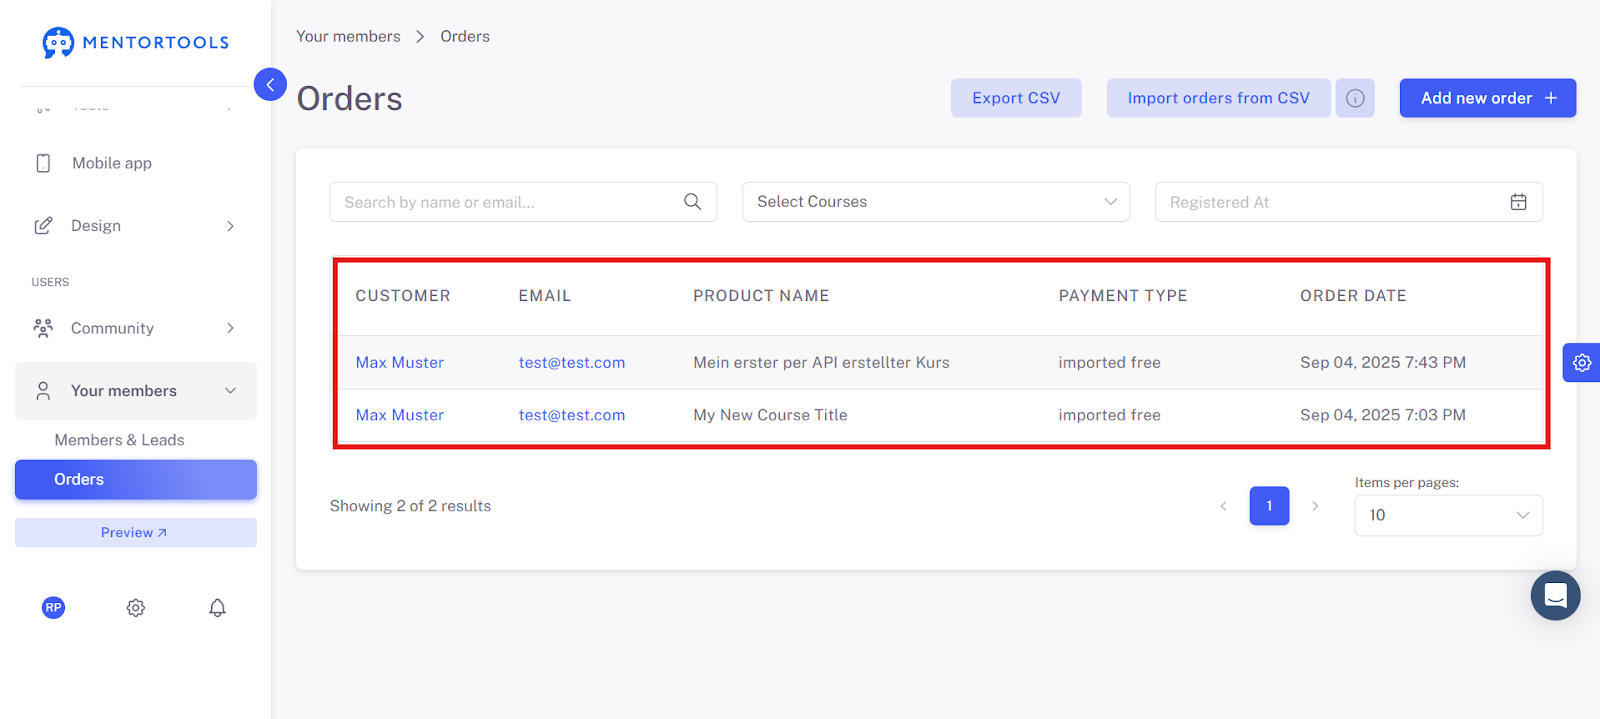
Order Overview
Now you have an overview of all orders. This area gives you a summary of all purchases in your system.
Customer & Email: Who made a purchase.
Product Name: Which course was purchased.
Payment Methods: How payment was made (e.g., "imported free").
Order Date: When the purchase was made.
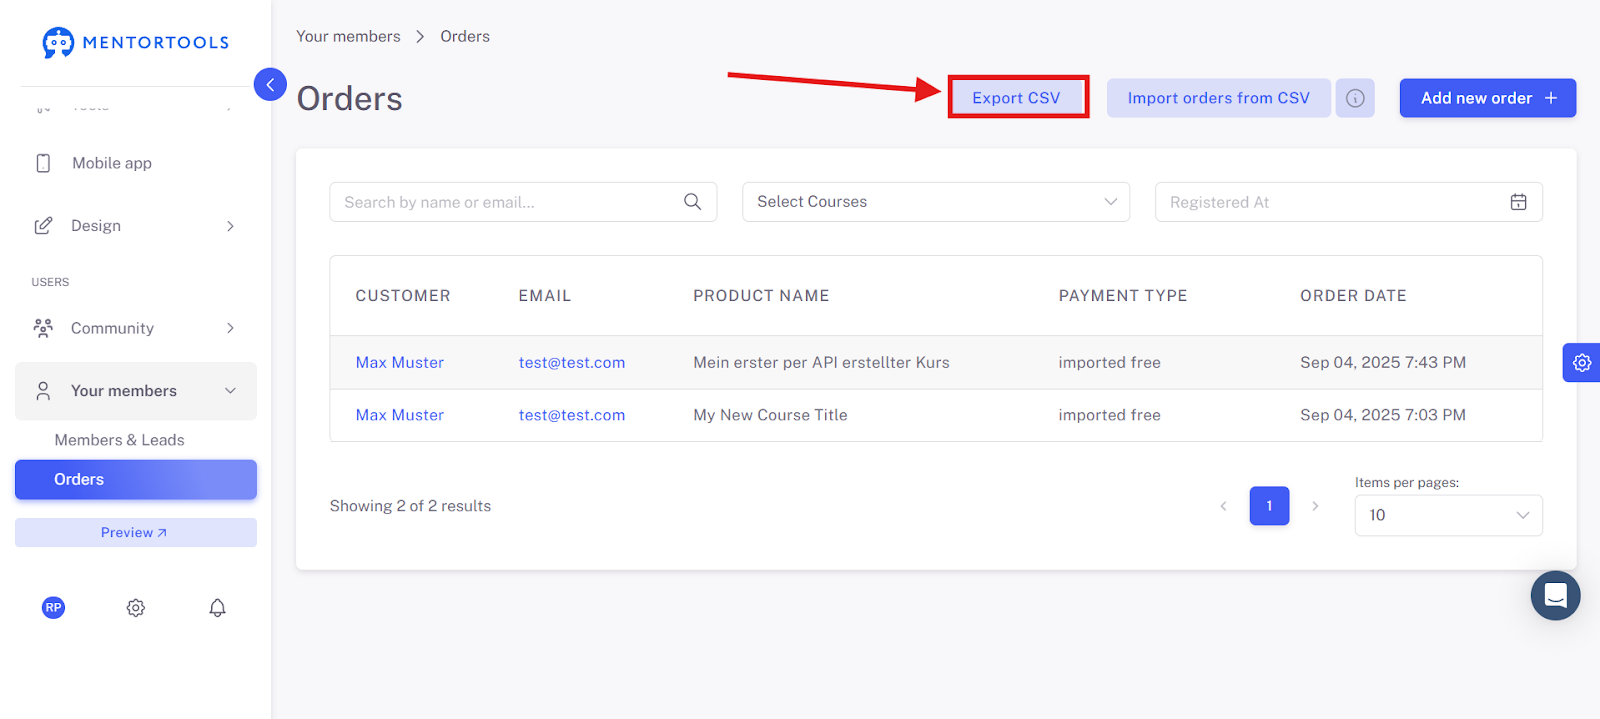
"Export CSV": This button allows you to download the order data as an Excel spreadsheet.
"Add new order": This is for when you want to manually create access for a customer.
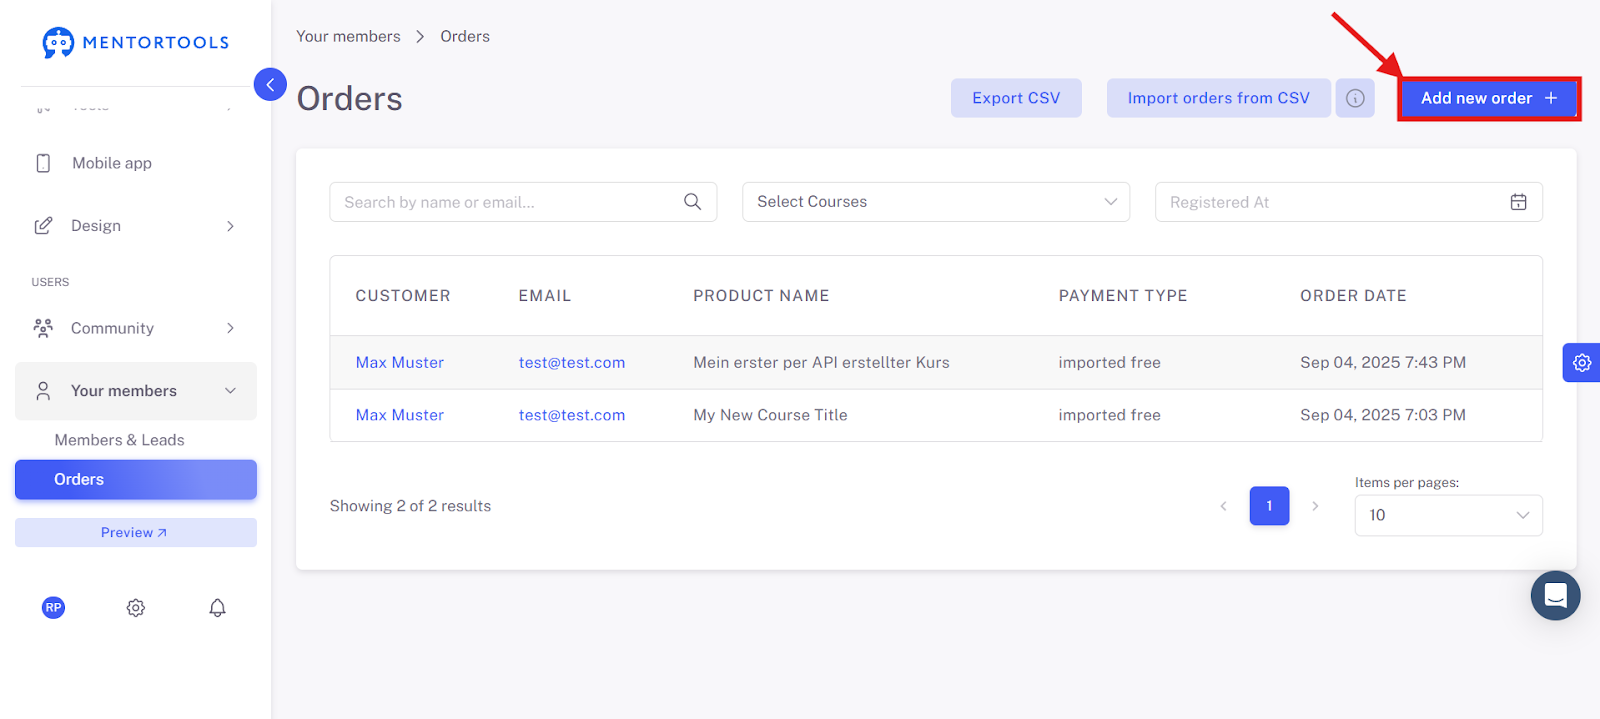
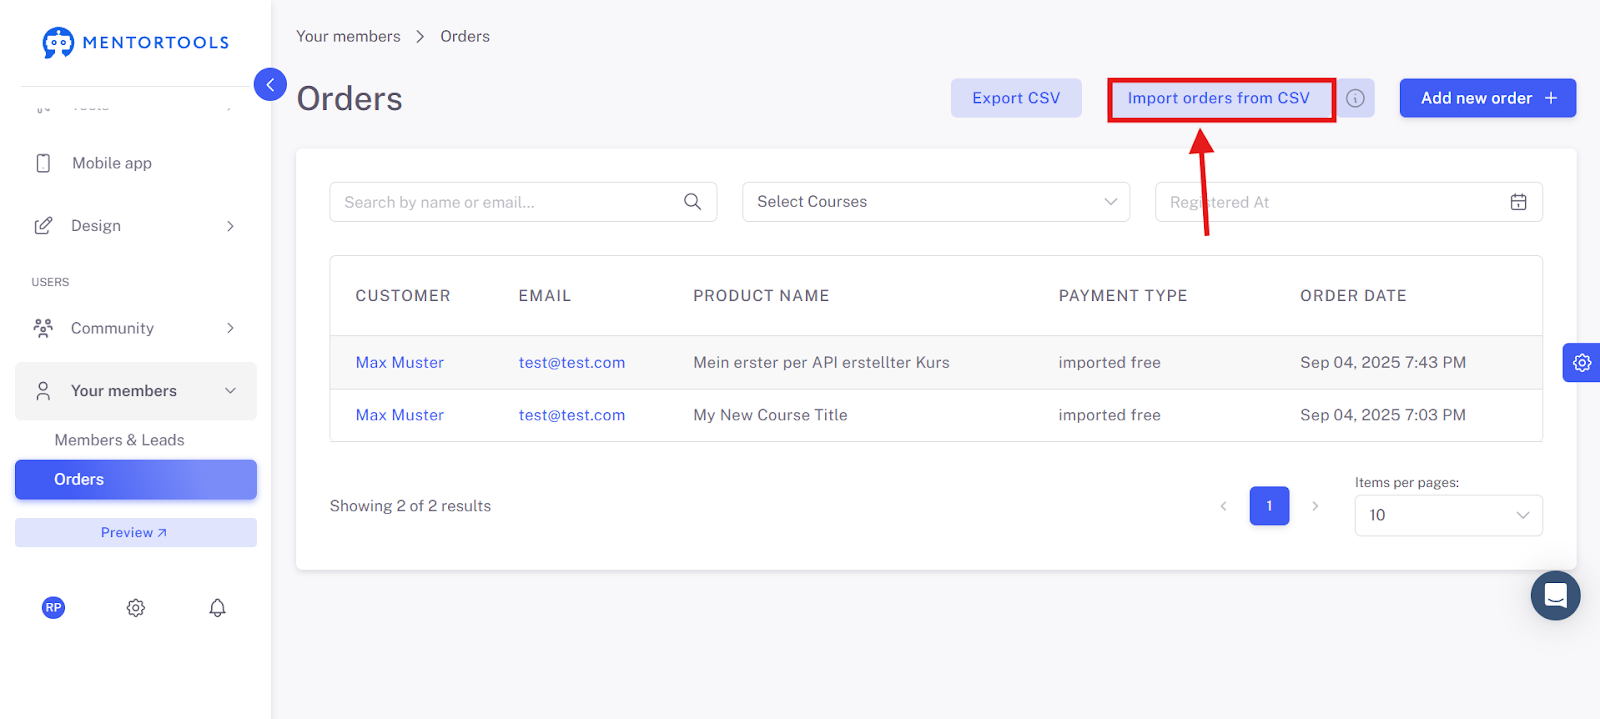
"Import orders from CSV": You can import all your users from another system using an import template. You can find instructions for this here.
Order Filtering Options
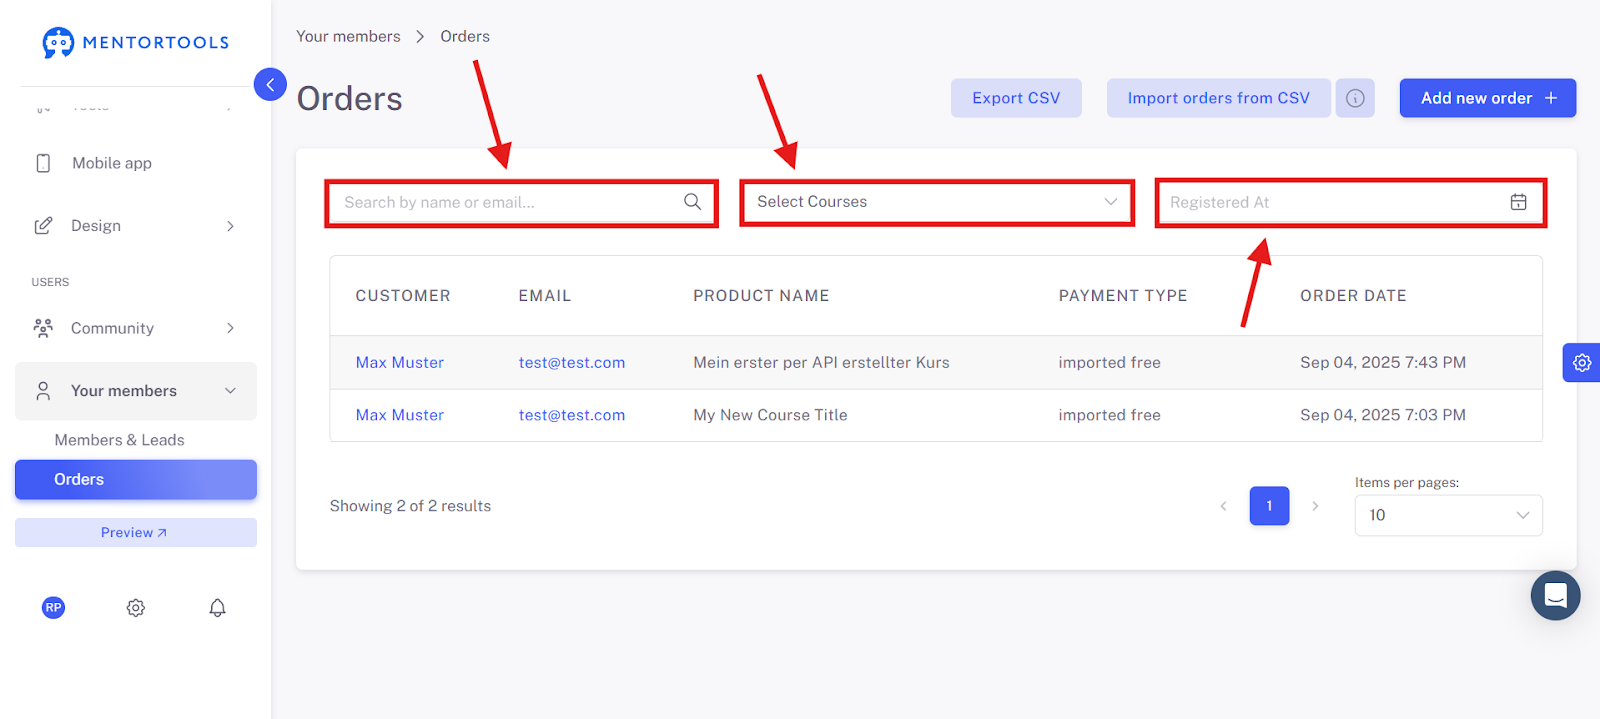
In the "Orders" section, there are three filter options that help you quickly find what you're looking for:
Search by name or email... Here you can enter a customer's name or email address. This is the easiest way to find a specific order if you know who you're looking for.
Select courses This dropdown menu shows you all your courses. You can select one or more courses to display only the orders related to those courses. This is practical if you want to see how many times a specific course has been sold.
Registered on This field is a date filter. You can set a start and end date here to display only orders made within a specific period. This helps you check your sales figures for a particular month or week.
Detailed Information on Specific Orders
Click on a specific order to view more details.
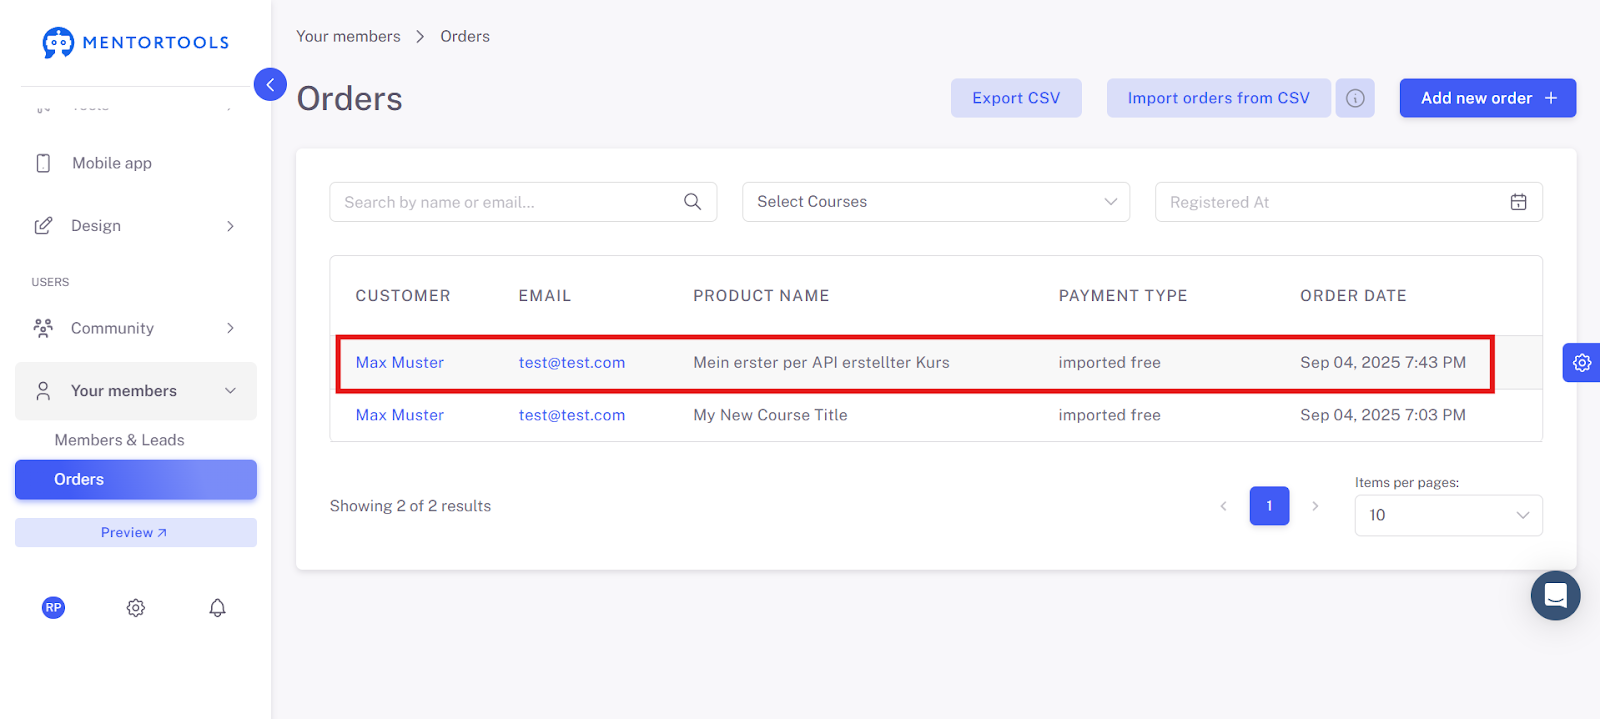
More details about this order will be displayed.
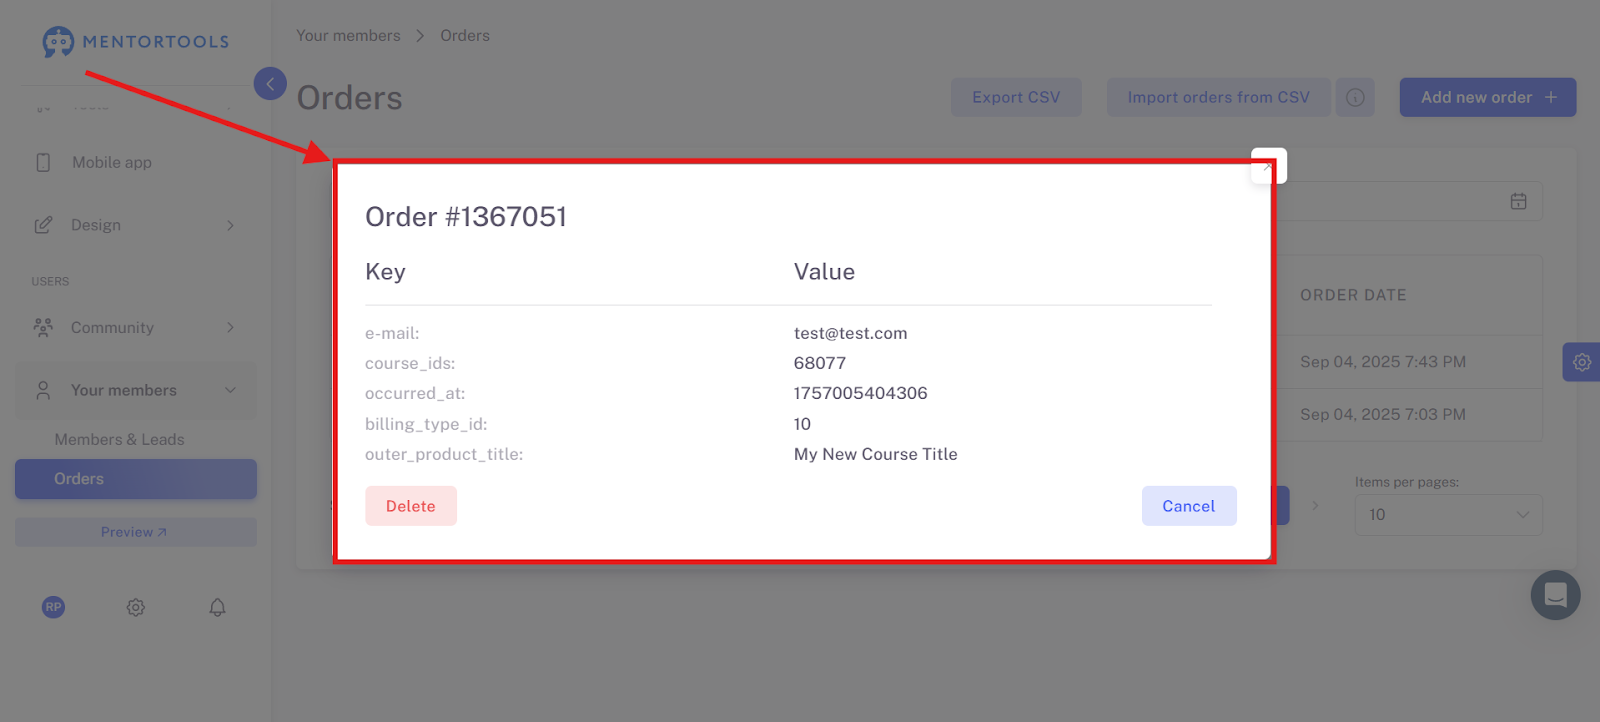
Order Details
When you select a specific order, a pop-up window opens that shows you additional, detailed information about that transaction. The image shows an overview in a "key-value" format.
Here is the information you get:
e-mail: The email address of the customer who placed the order. This is useful to see who it was directly.
course_ids: The internal ID of the course the customer purchased. The system uses this ID to uniquely identify the course.
occurred_at: The time of the order in a special format that the system uses.
billing_type_id: An internal number that represents the type of payment or order. In the image, it is "10," which in this case means "imported free order."
outer_product_title: The title of the course the customer purchased. This is the name you gave the course (in the example: "My first course created via API").
At the bottom of the pop-up, there are two buttons: "Delete" and "Cancel." With "Delete," you can permanently remove the order from the system.
Summary: Order Overview
With this guide, you have learned how to use the order overview in Mentortools. You now know how to view all your customers' purchases, manually create new orders, and export the data as a CSV file.
Furthermore, you can use the filters (search, courses, date) to quickly find the orders you are interested in. You can also view the detailed information for each individual order and delete them if necessary.