Lesson – Attachments
In every lesson within Mentortools, you have the option to upload attachments for download, such as PDF files, worksheets, presentations, or other documents. These materials help your participants deepen their knowledge.
Last updated 10 months ago
The "Attachments" function is ideal for coaches, trainers, lecturers, and anyone who wants to add valuable downloadable materials to their video or text content.
How to Add Attachments to a Lesson in Mentortools
This guide will show you how to add downloadable files like PDFs, worksheets, or other documents to an existing lesson in Mentortools. You will learn which formats you are allowed to upload and how the attachments are displayed for your customers.
Where Can I Upload Attachments to a Lesson?
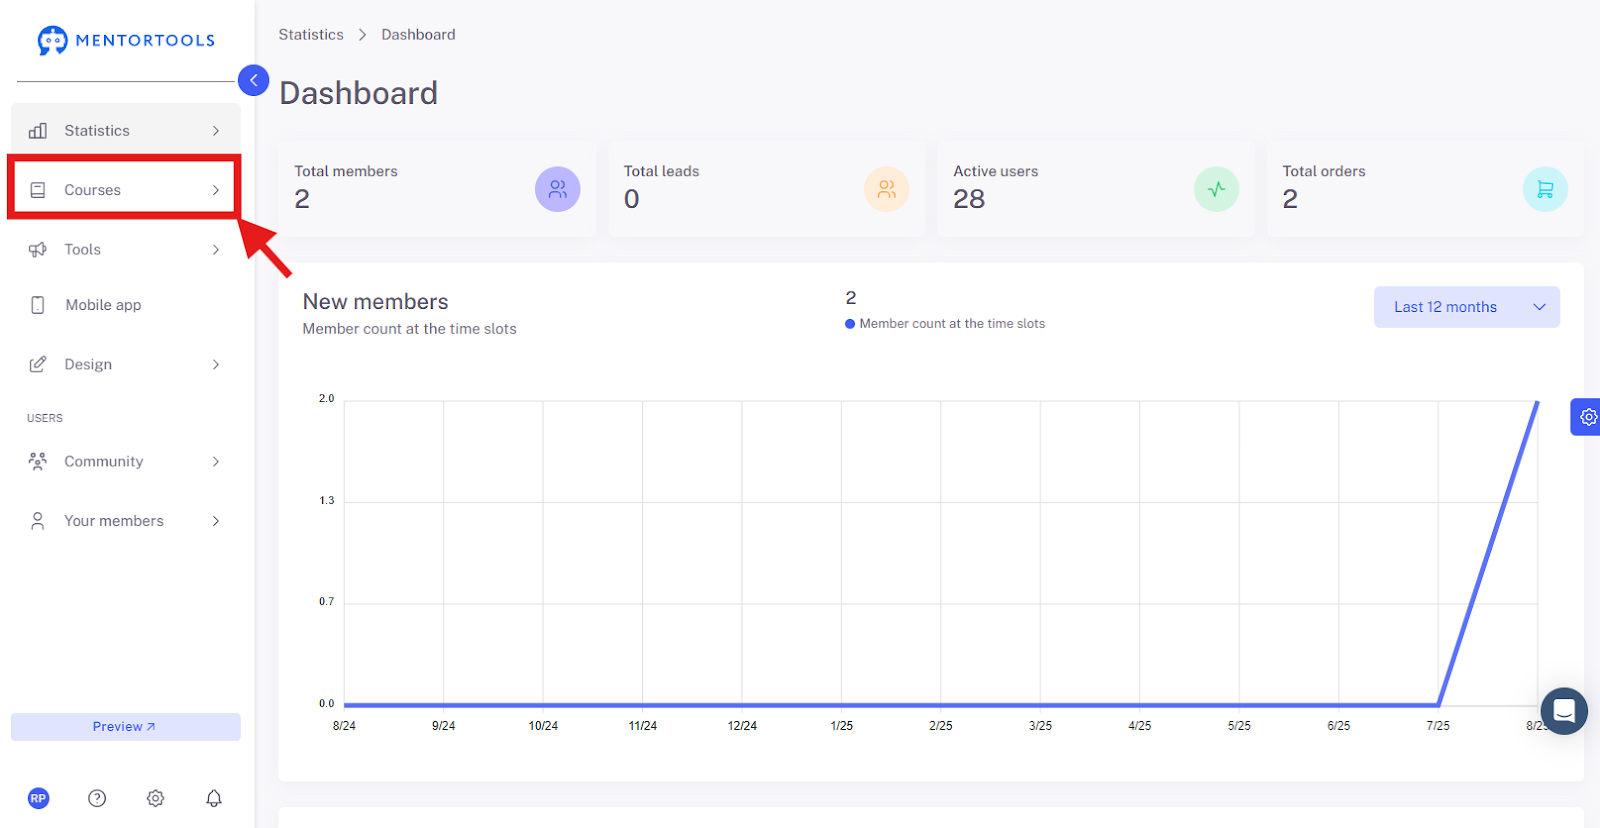
Go to "Courses"
In your online academy, go to "Courses" in the side menu.
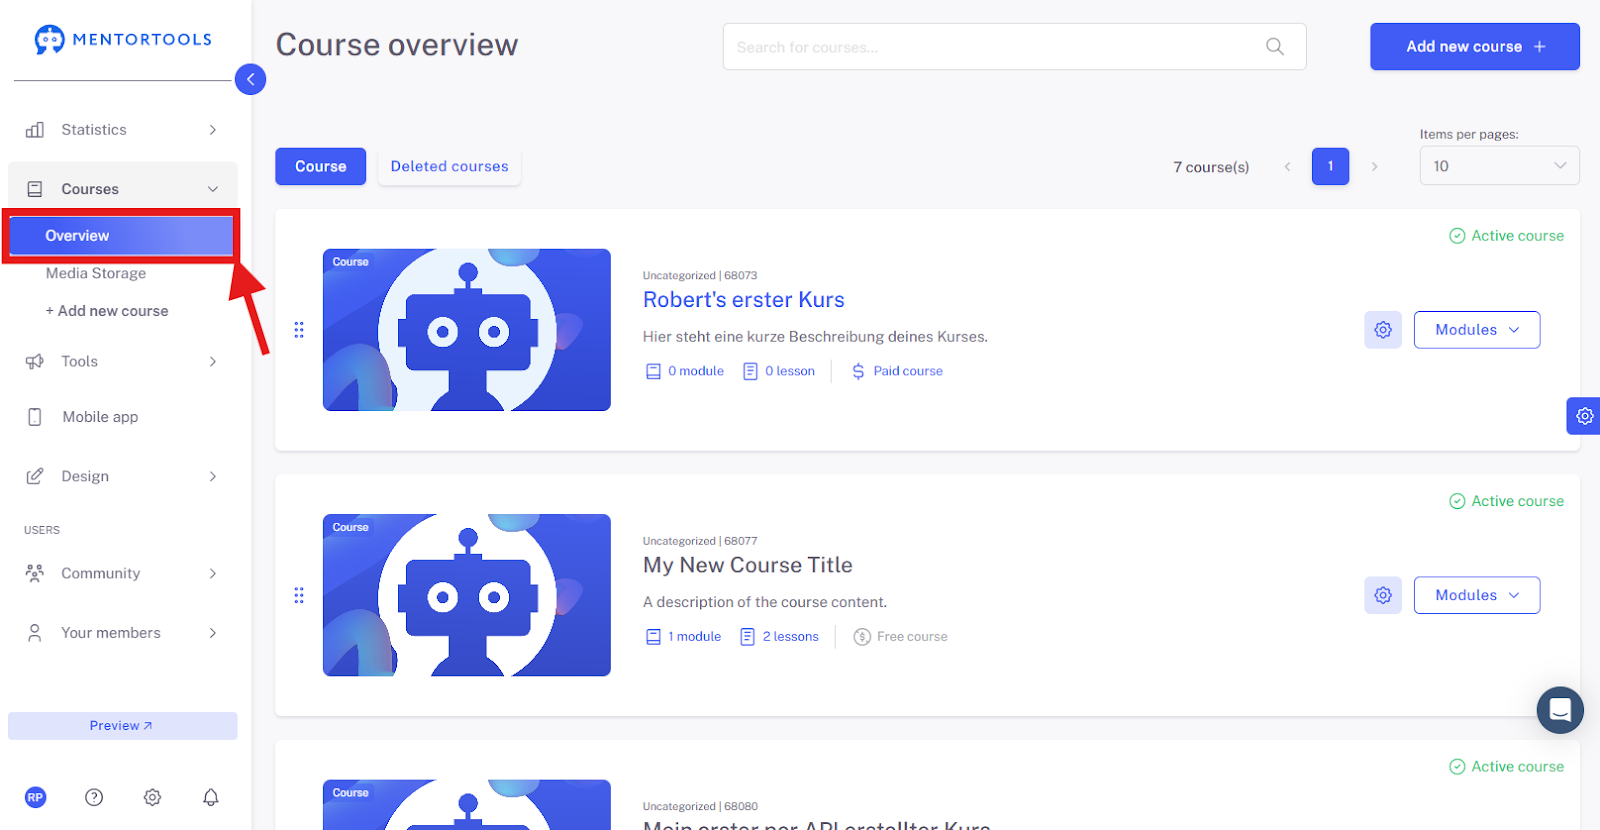
Go to "Overview"
To see the list of all your courses, go to "Overview."
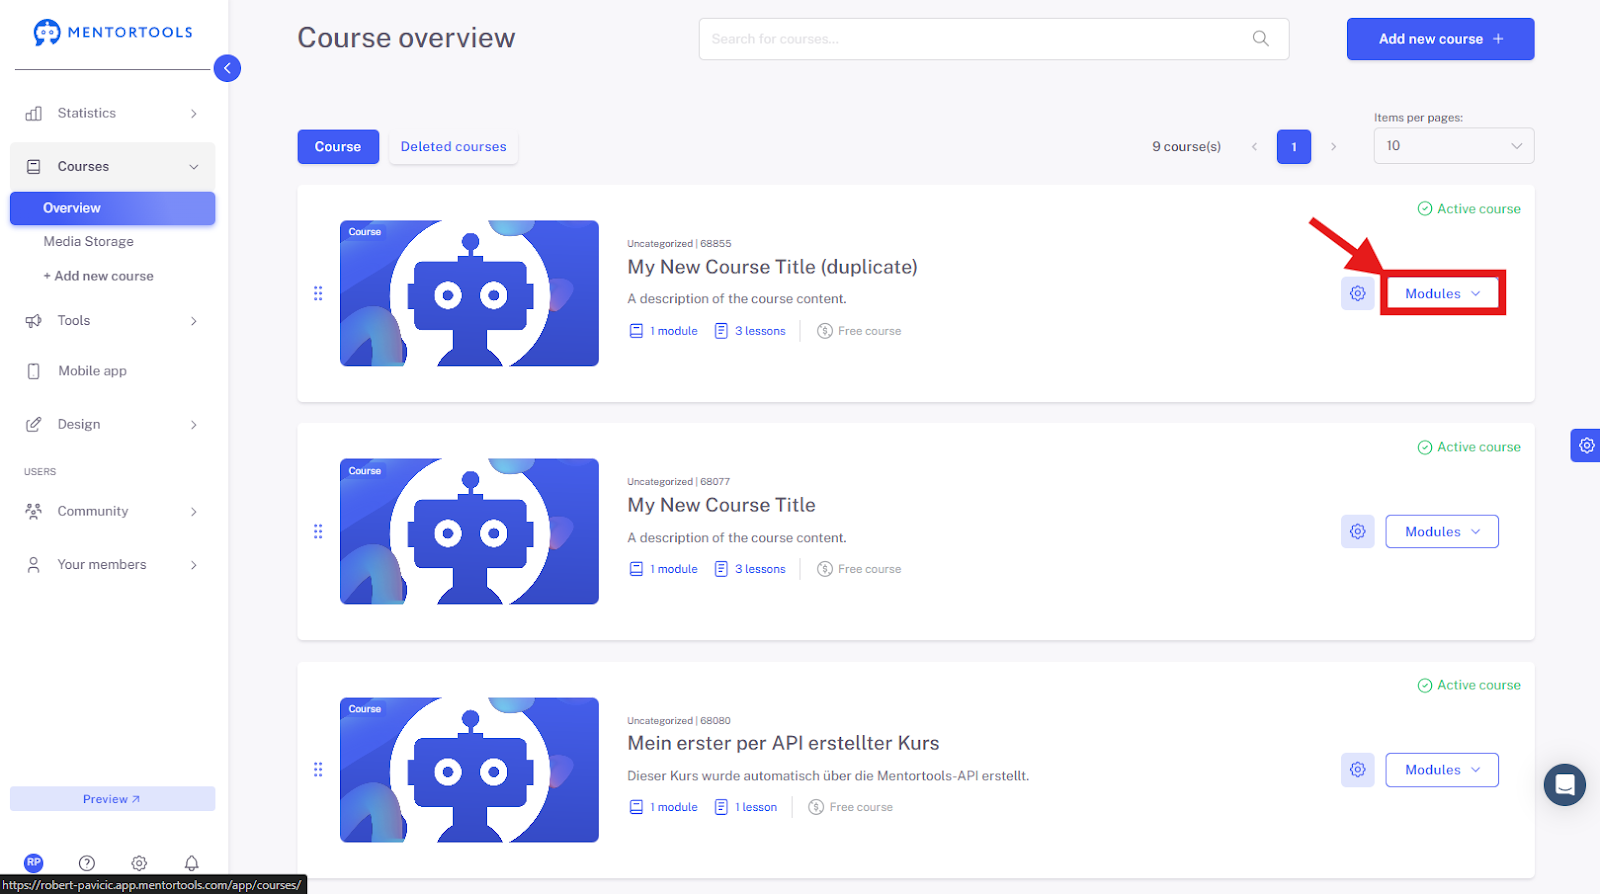
Select a Specific Course
Choose a specific course and a module where you want to upload attachments to a lesson. If you click on "Modules," you will see all the existing modules in that course.
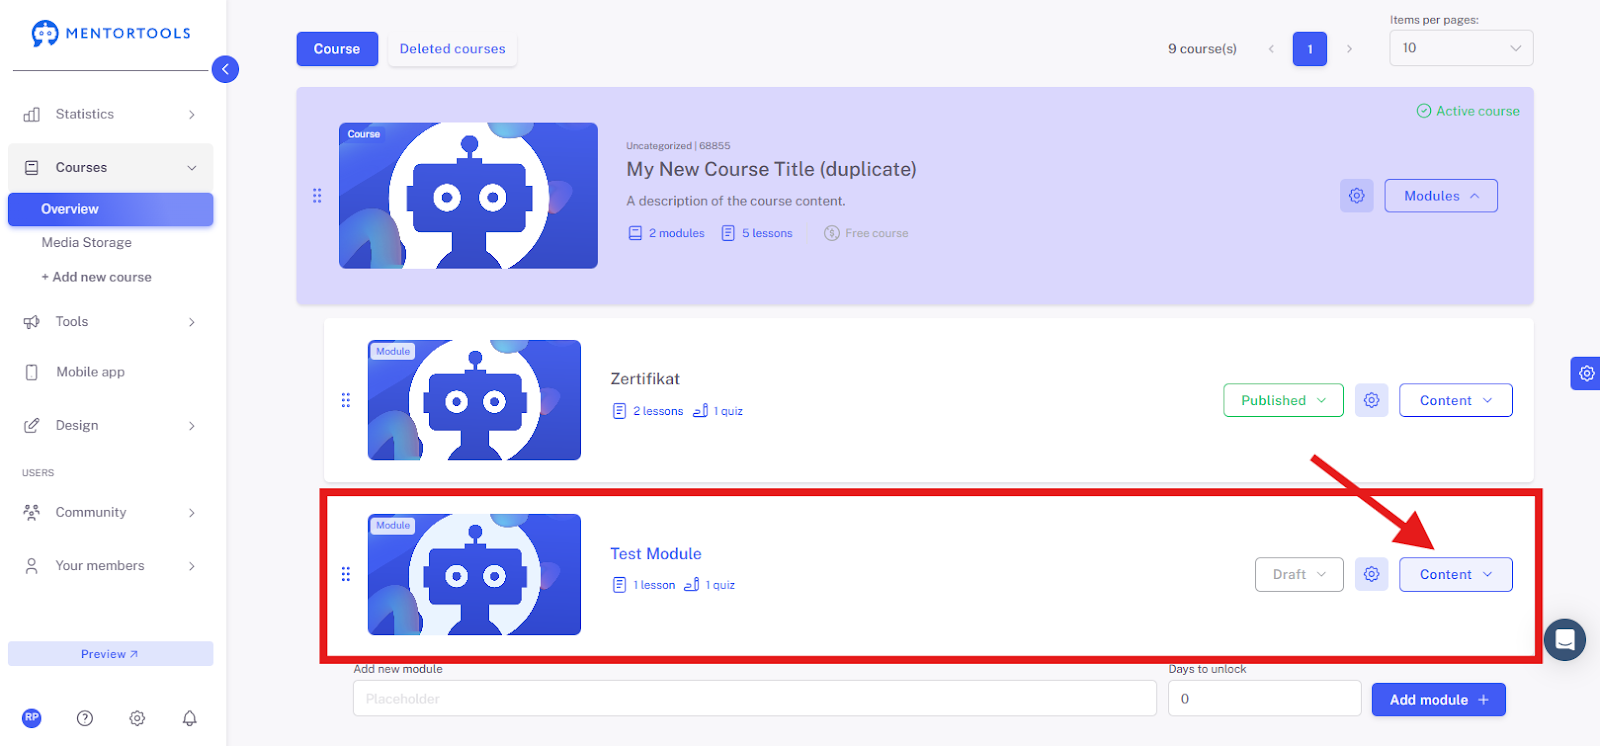
Display the Content of the Module
By clicking on "Content," all existing lessons in that module will be displayed.
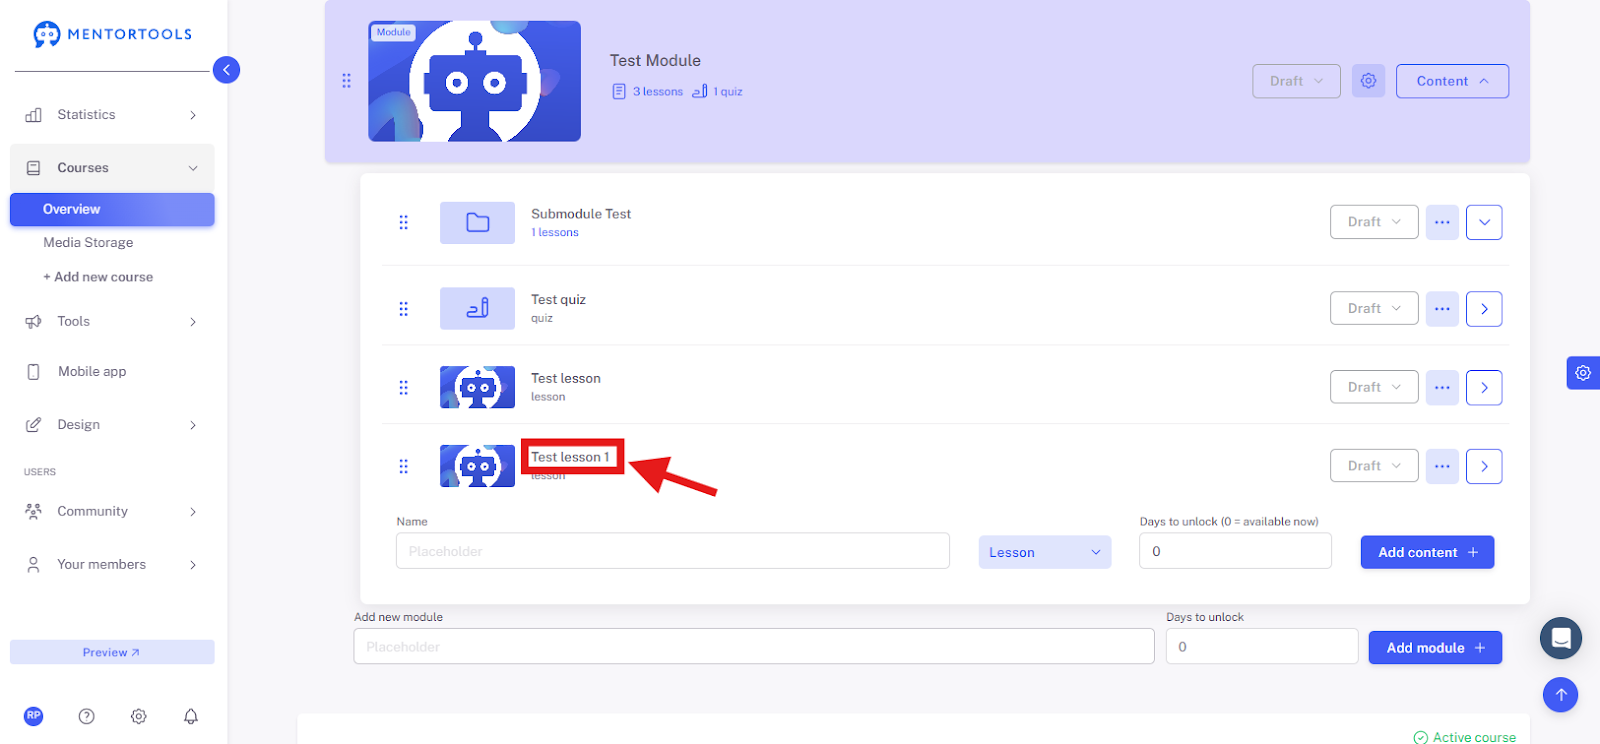
Select the Lesson
To upload attachments to a lesson, click on the title of the respective lesson. After clicking, all the settings will be displayed.
Upload Attachments to a Lesson
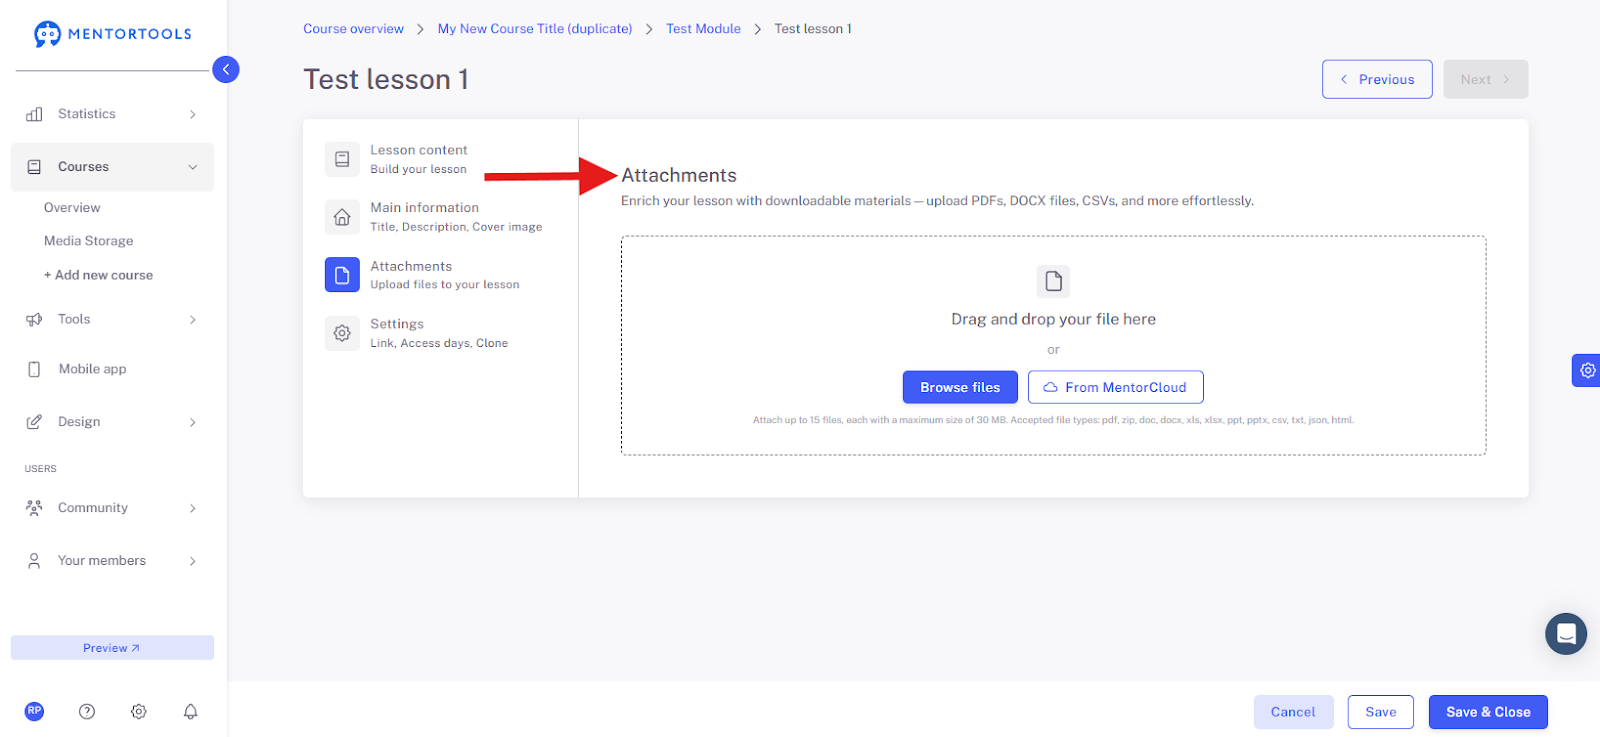
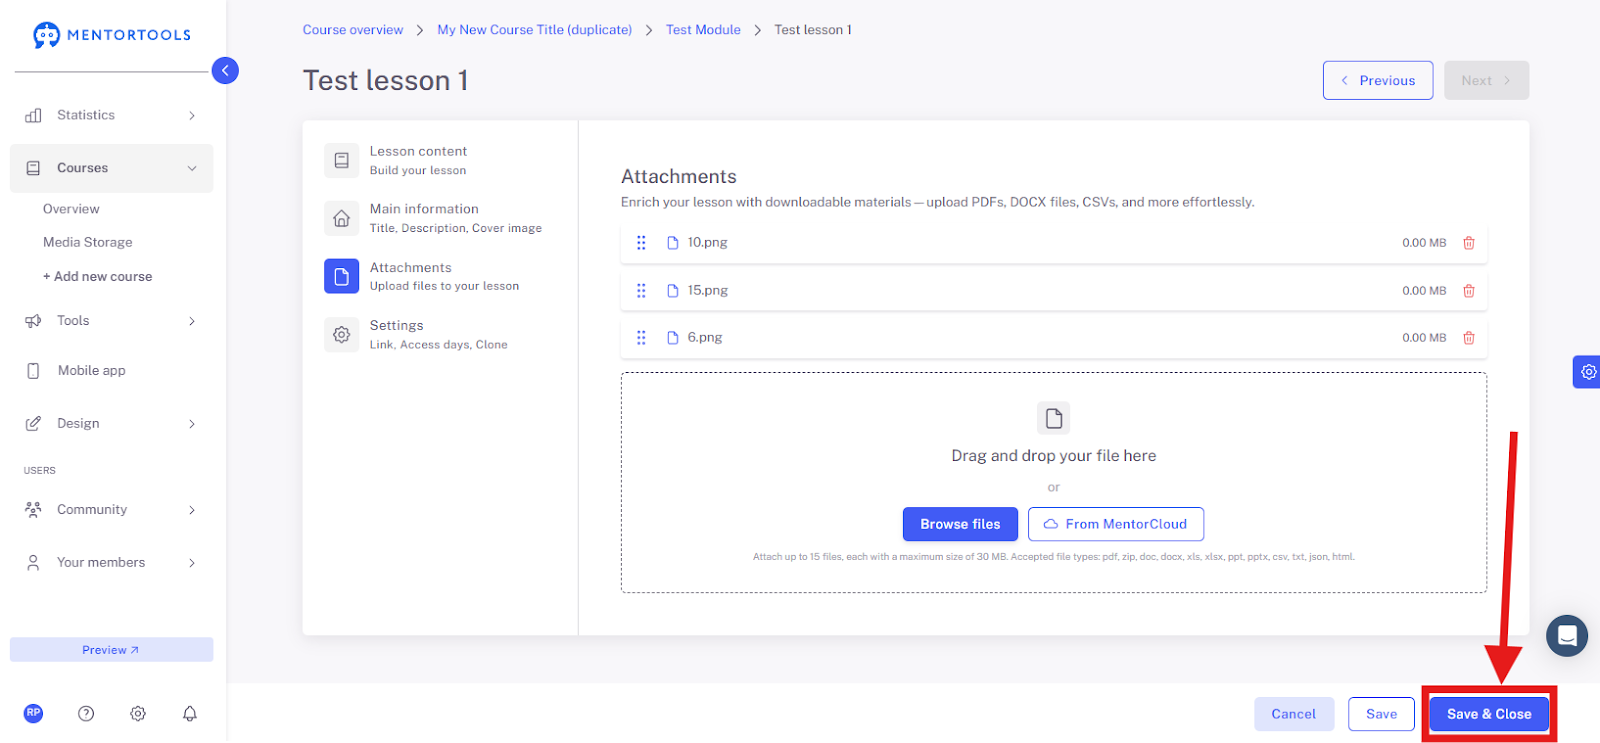
If you want to upload attachments for download in this lesson, go to the "Attachments" tab.
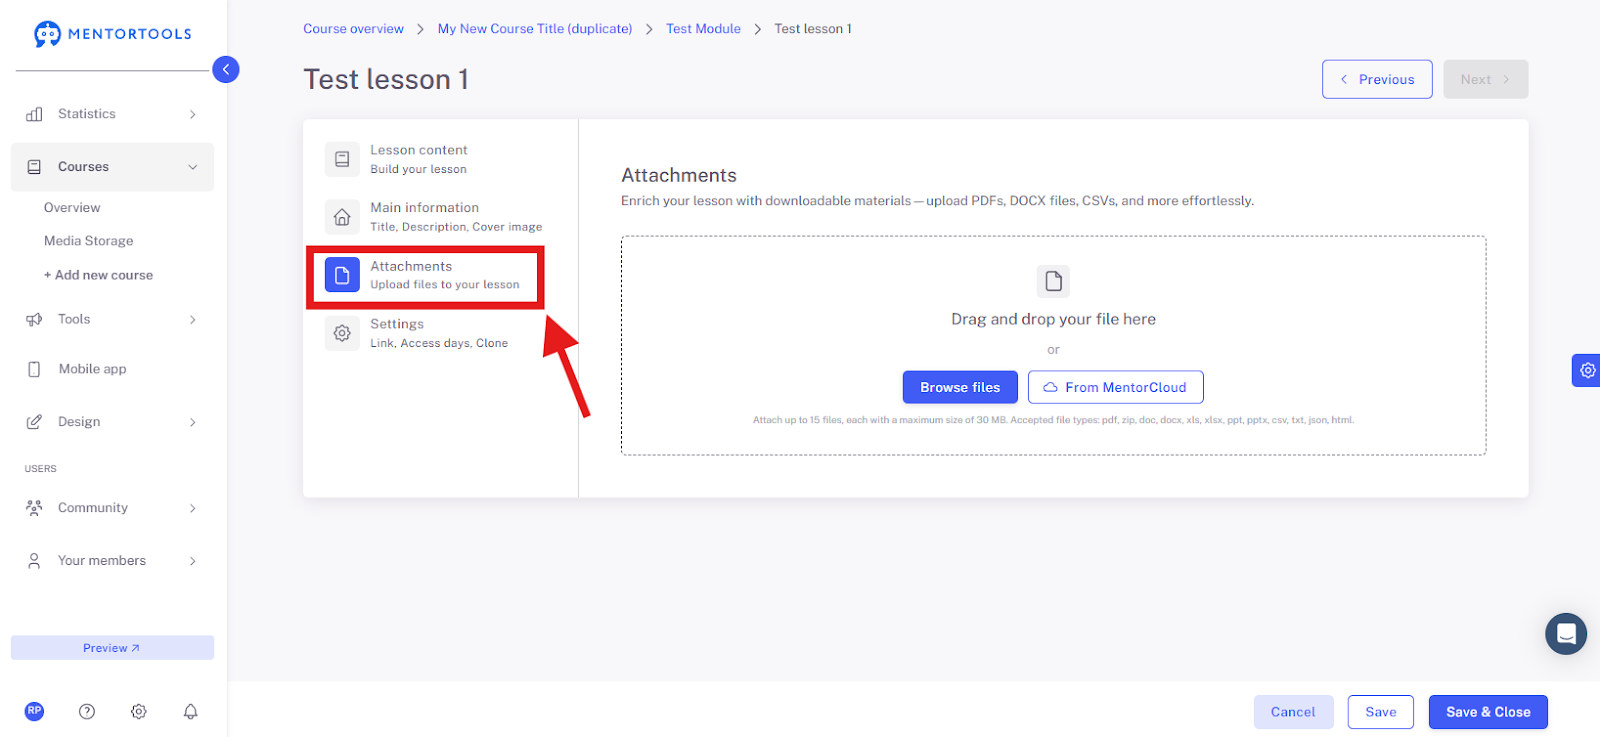
Here you can upload all the files that your customers can download from this lesson to their computer.
Drag your file into the highlighted field or click on "Browse files" to upload the file manually.
You can upload new files from your computer or select files from MentorCloud.
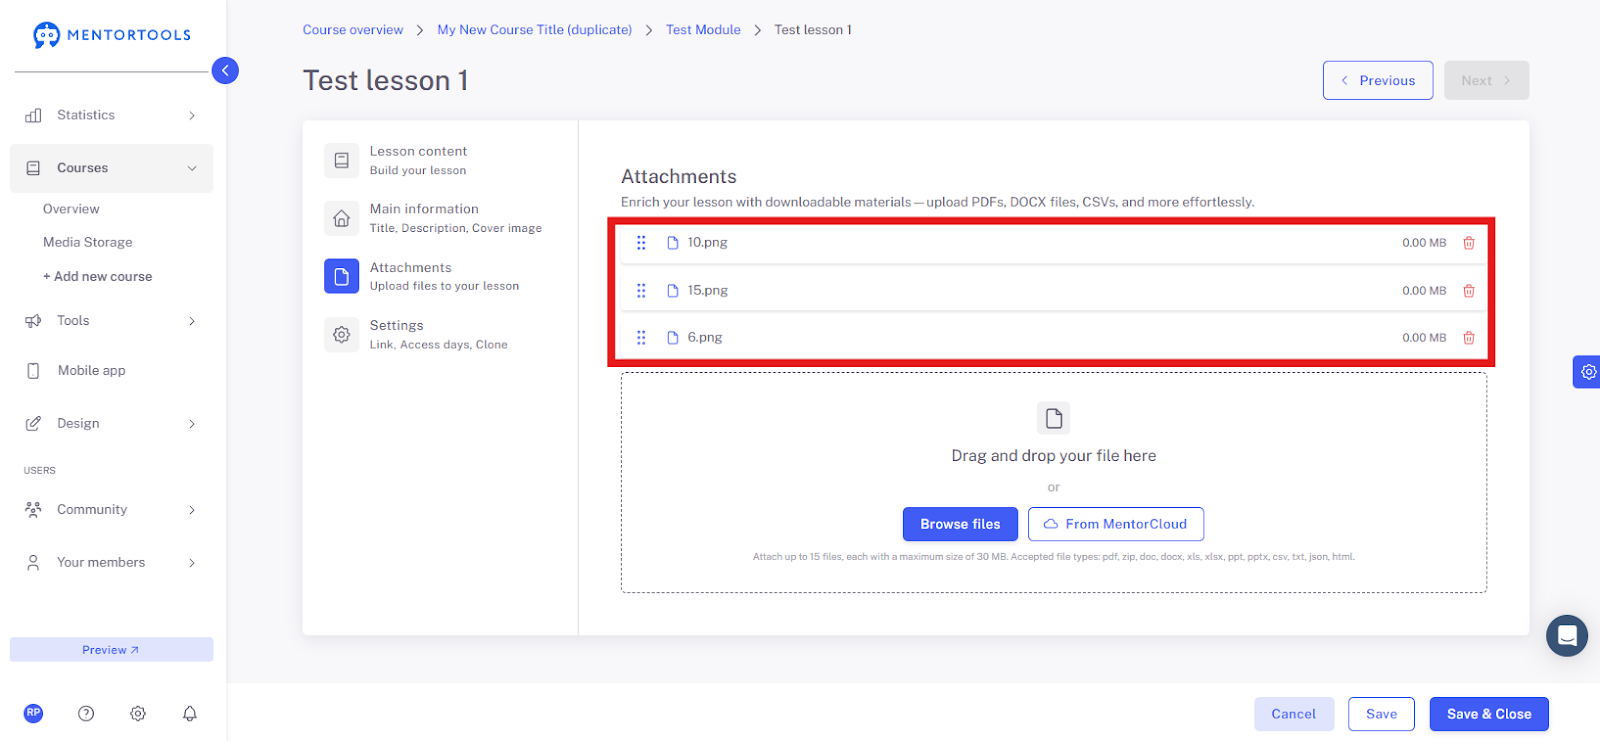
Finally, click "Save" or "Save and close" to save the changes you have made.
Which File Formats Can I Upload as Attachments?
You can upload various file types as lesson attachments:
PDF, TXT – e.g., worksheets, e-books, checklists, scripts
DOC / DOCX – text documents or editable templates
PPT / PPTX – presentations
XLS / XLSX – spreadsheets or data entry templates
ZIP – multiple files packaged in a "bundle"
Images (JPG, PNG) – e.g., infographics, photos, pictures, screenshots
Audio files (MP3, WAV) – audio recordings, podcasts, meditations
Video files (MP4, MOV) – various video formats – tutorials, screen recordings
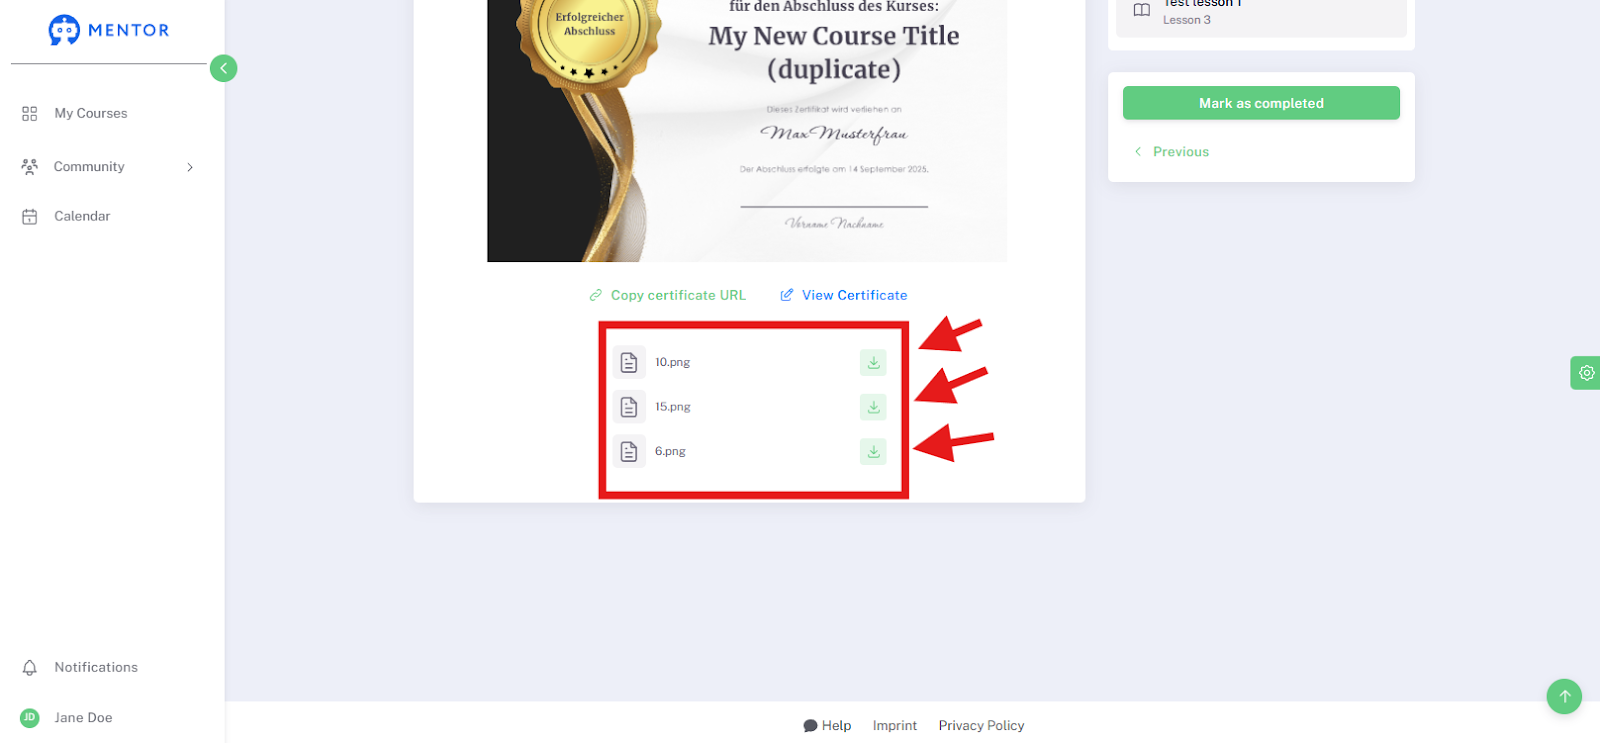
How Are the Attachments Displayed to Members?
In your online academy, all attachments for download are displayed below the lesson content with a download icon.
Each uploaded file is shown with its title, and next to it is a download icon.
Your members can easily download the file by clicking on the download icon.
The file will then be saved directly to the computer of the respective member of your online academy.
Best Practices
Course Design Tip
For every lesson (or at least one lesson per module), you can add at least one additional material for download—such as a checklist, a worksheet, or another resource. This increases the perceived value of your course and gives your participants the opportunity to get more actively involved. This helps course participants to better internalize and apply what they have learned.