Leaderboard
In this article, you will learn how to activate, set up, and configure the leaderboard in Mentortools for specific courses or communities. The leaderboard helps you provide your participants with a playful incentive to complete their courses.
Last updated 10 months ago
Step-by-Step Guide
1. Open Leaderboard
Go to https://app.mentortools.com.
In the left-hand menu, click on "Leaderboard" to display the Leaderboard.
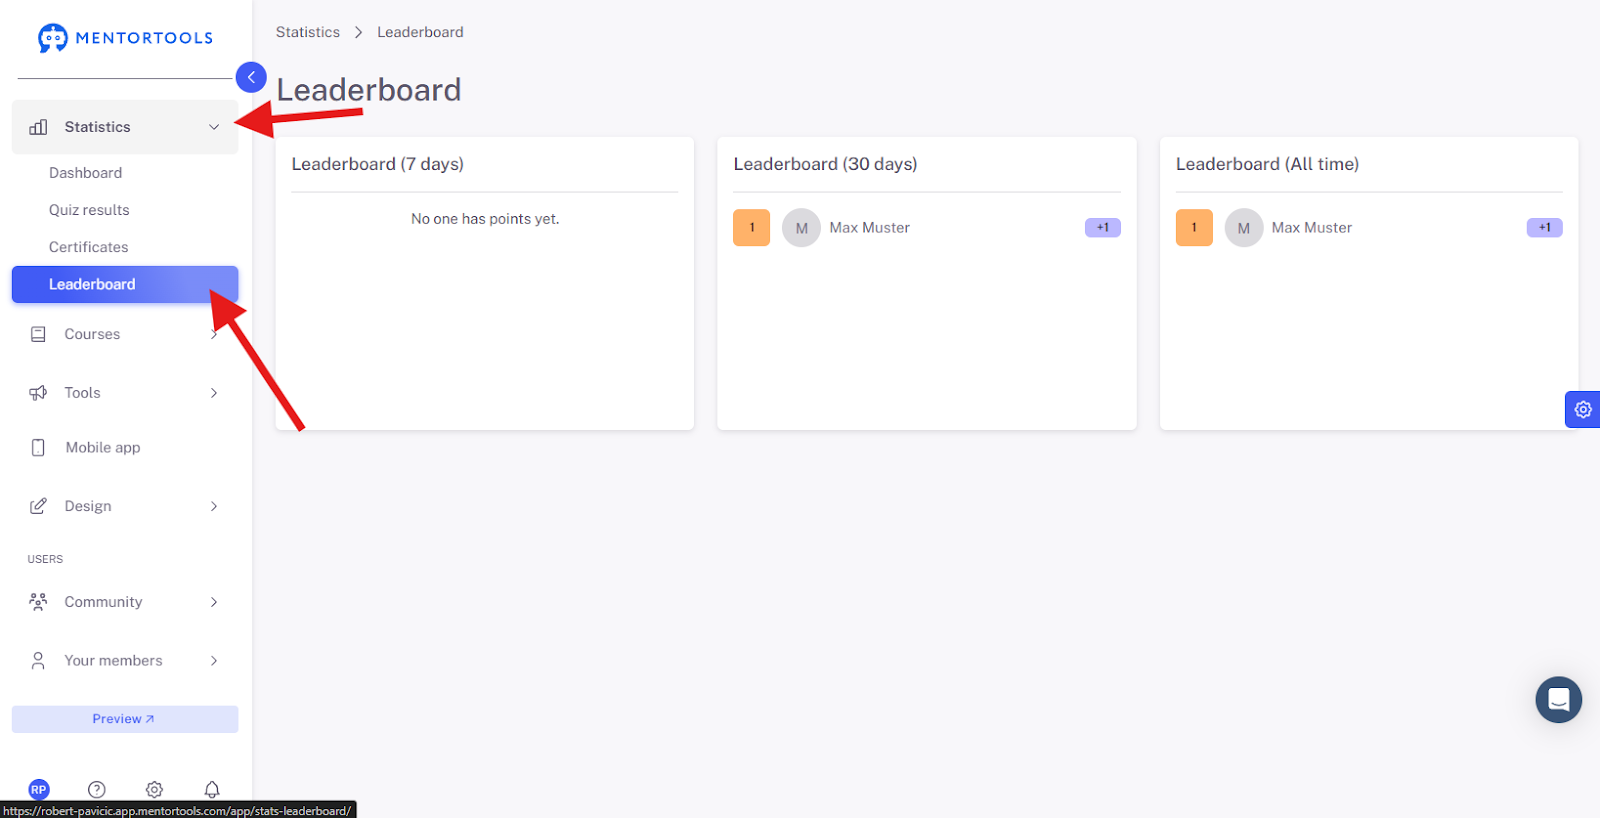
Click on “Tools” and "Leaderboard" again to go to the settings view.
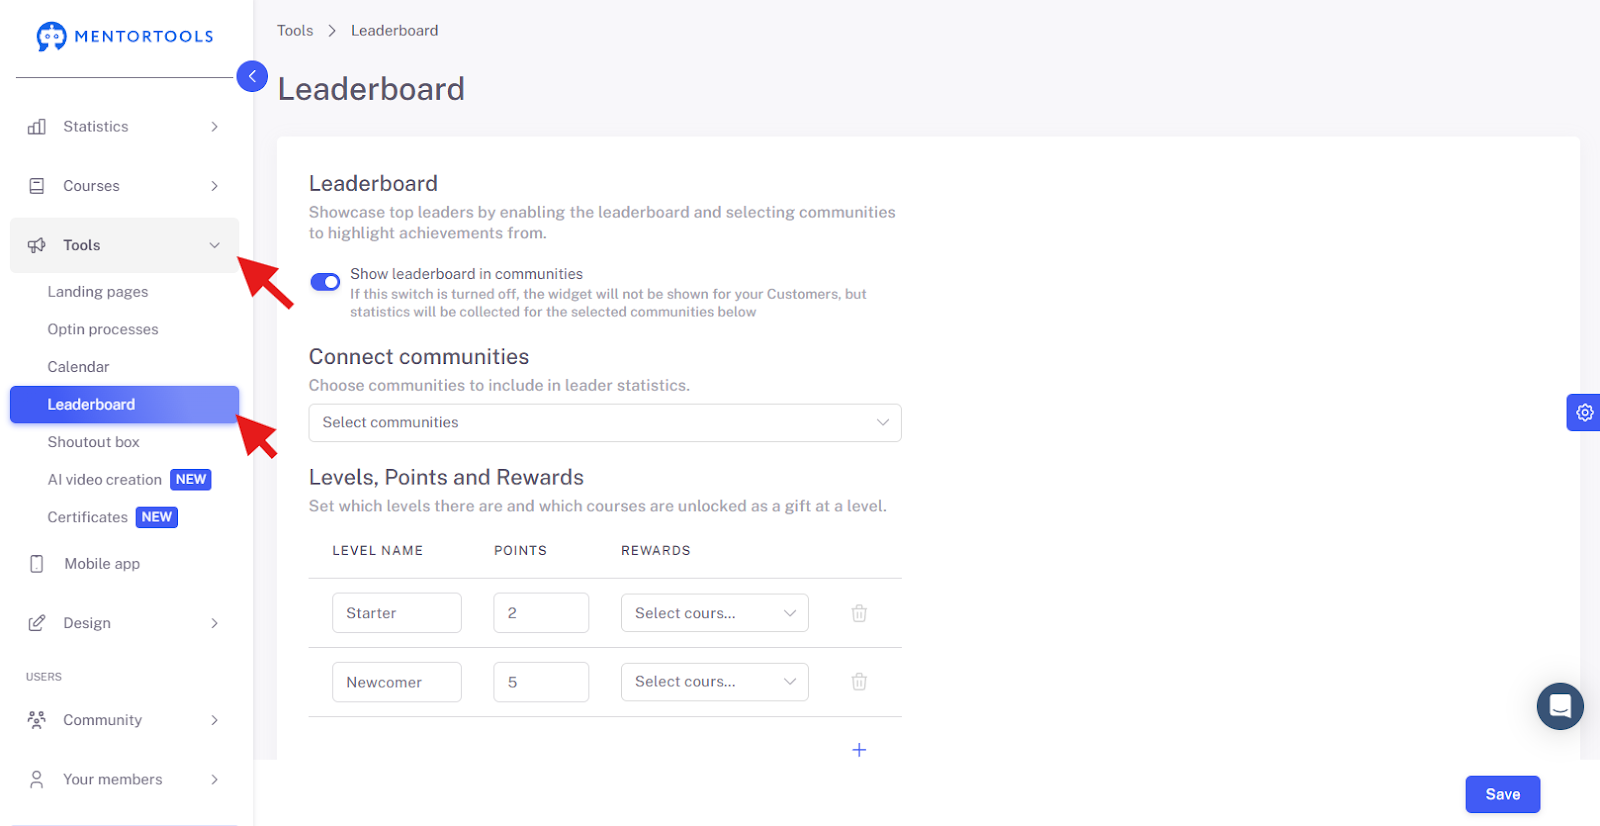
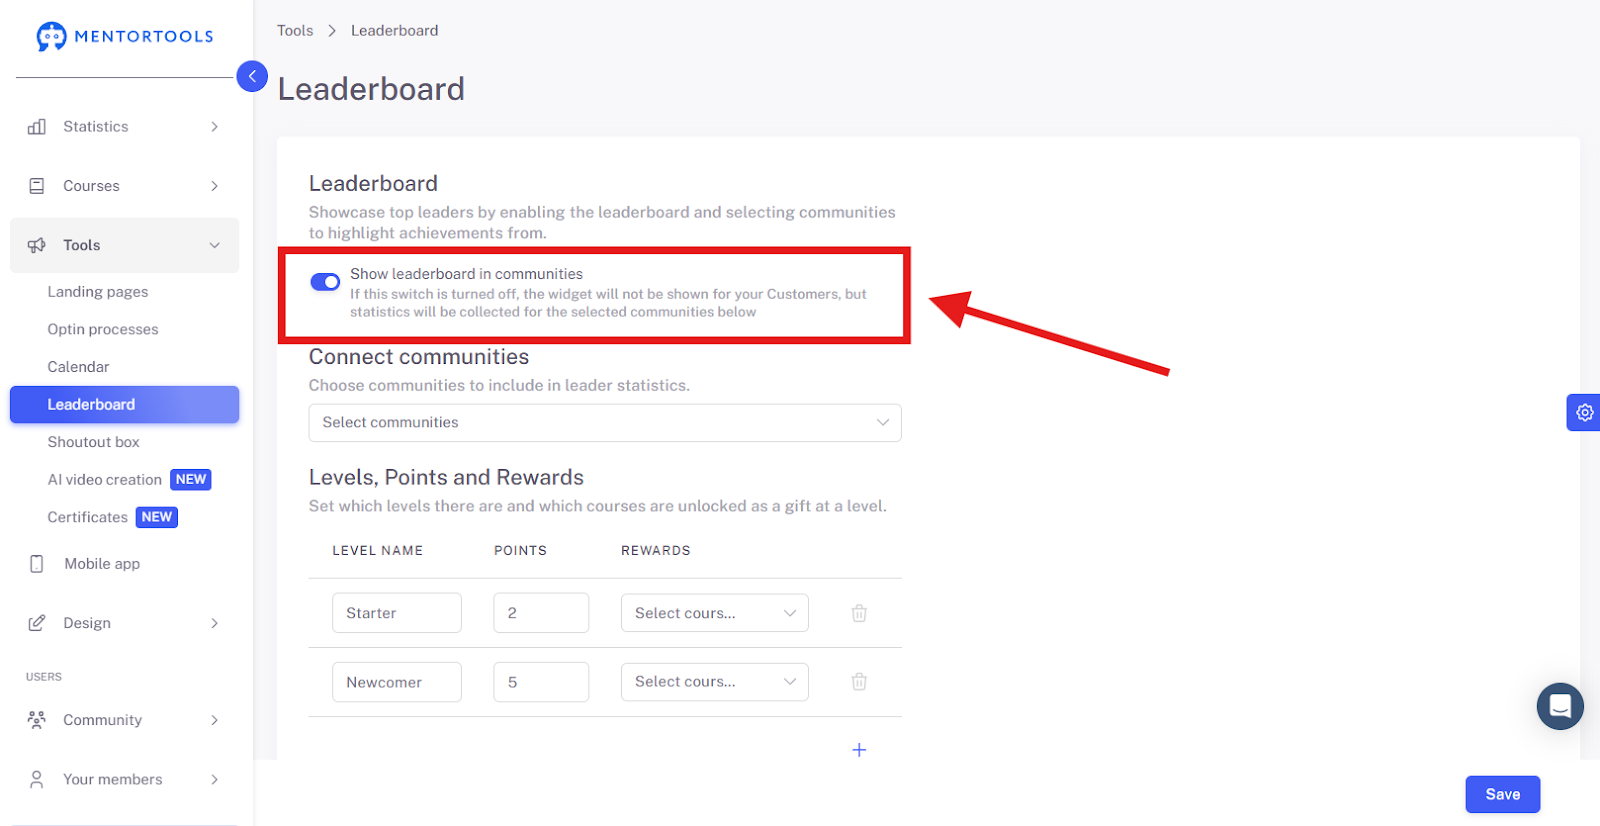
2. Activate Visibility
Activate the leaderboard to make it visible to your users.
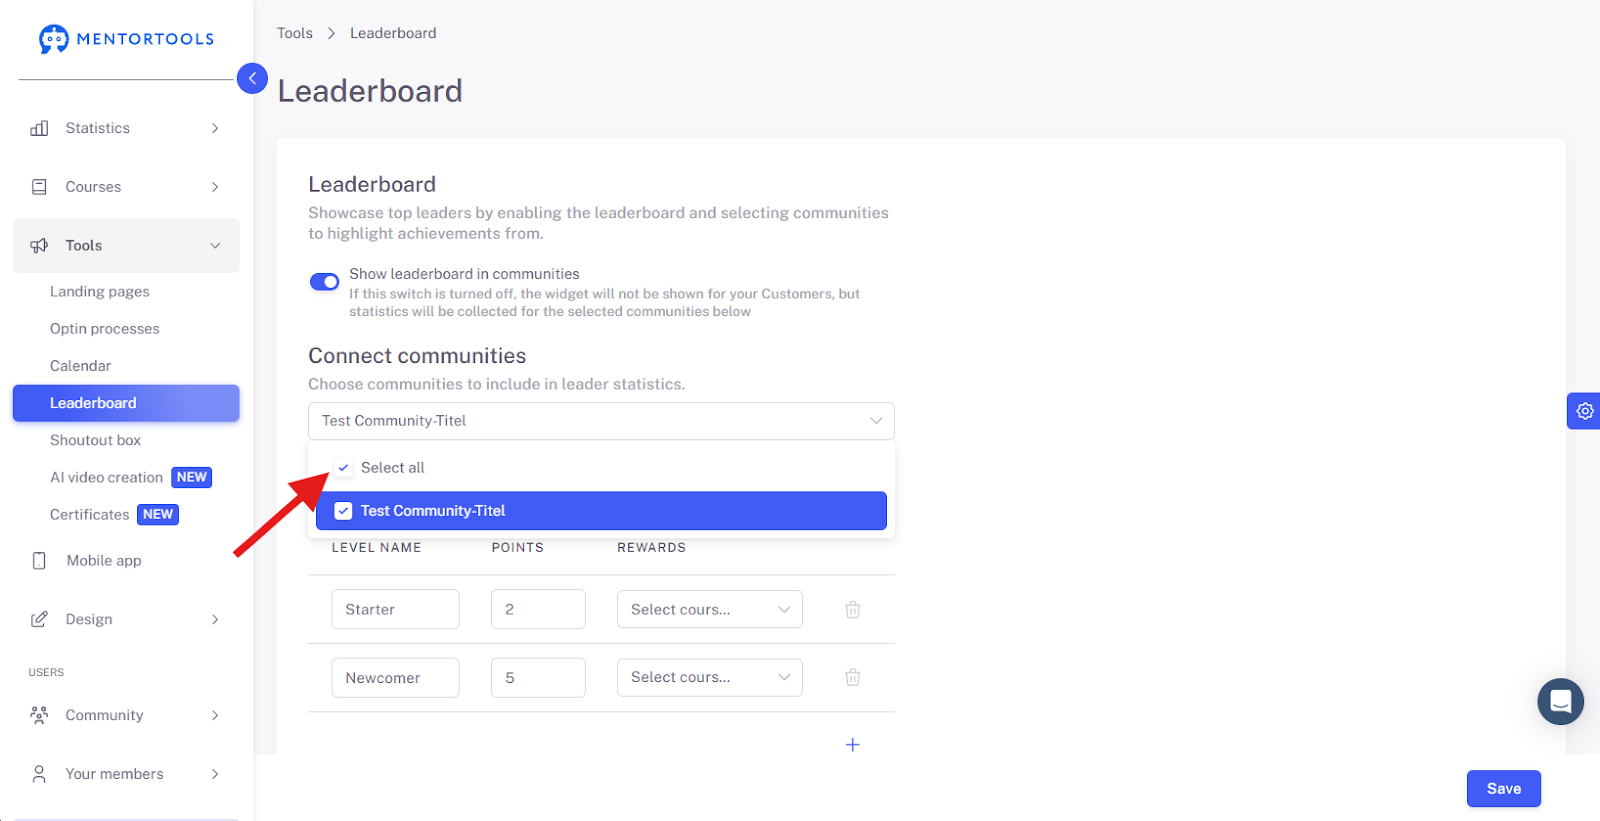
3. Select Communities
Choose the communities for which the leaderboard should be active.
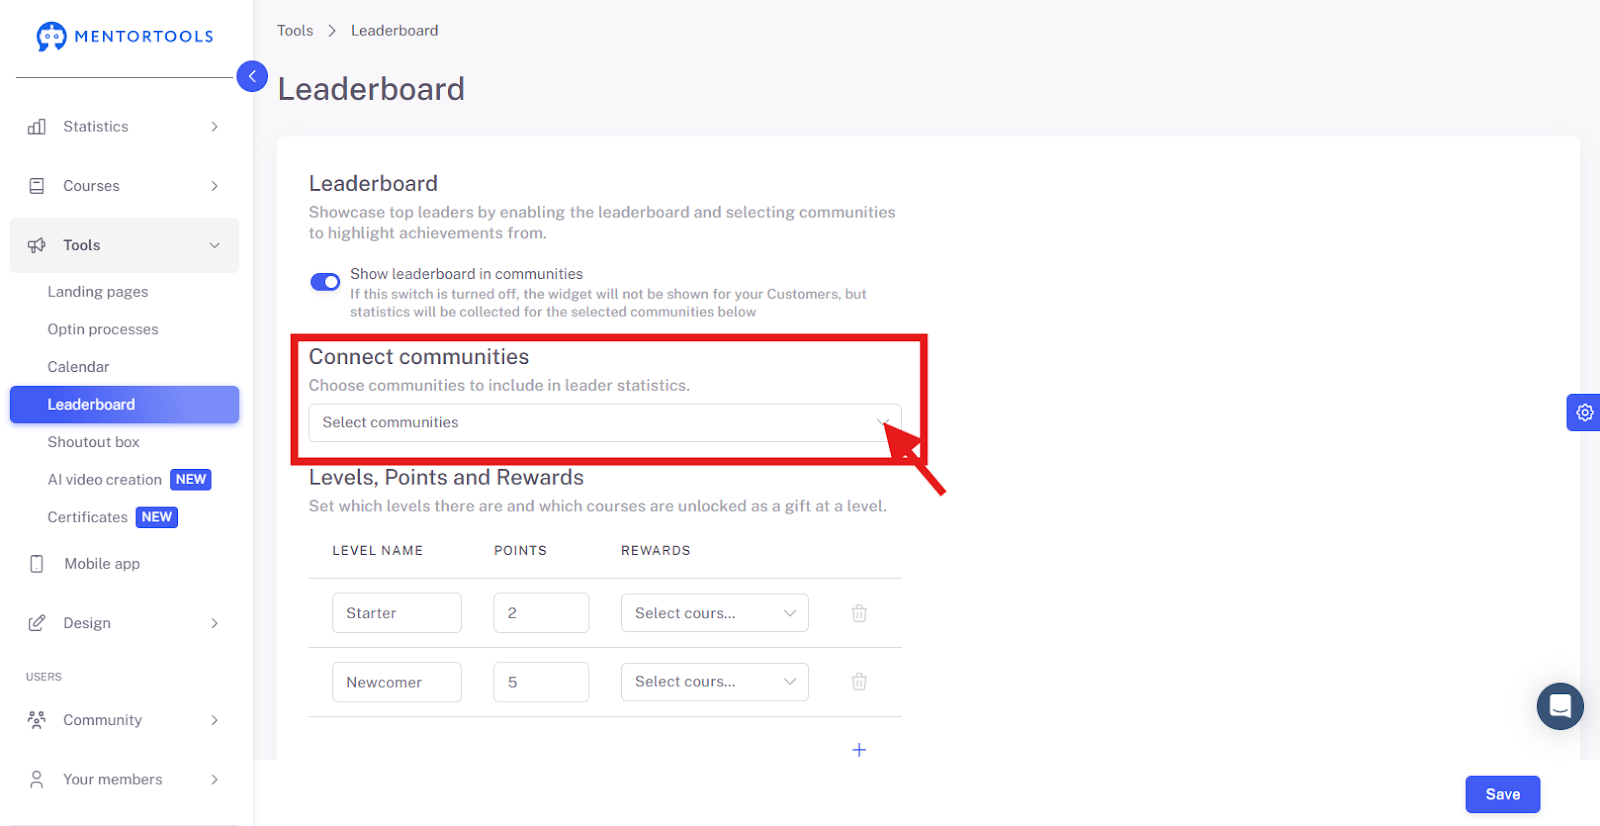
You can select all or specifically activate certain groups.
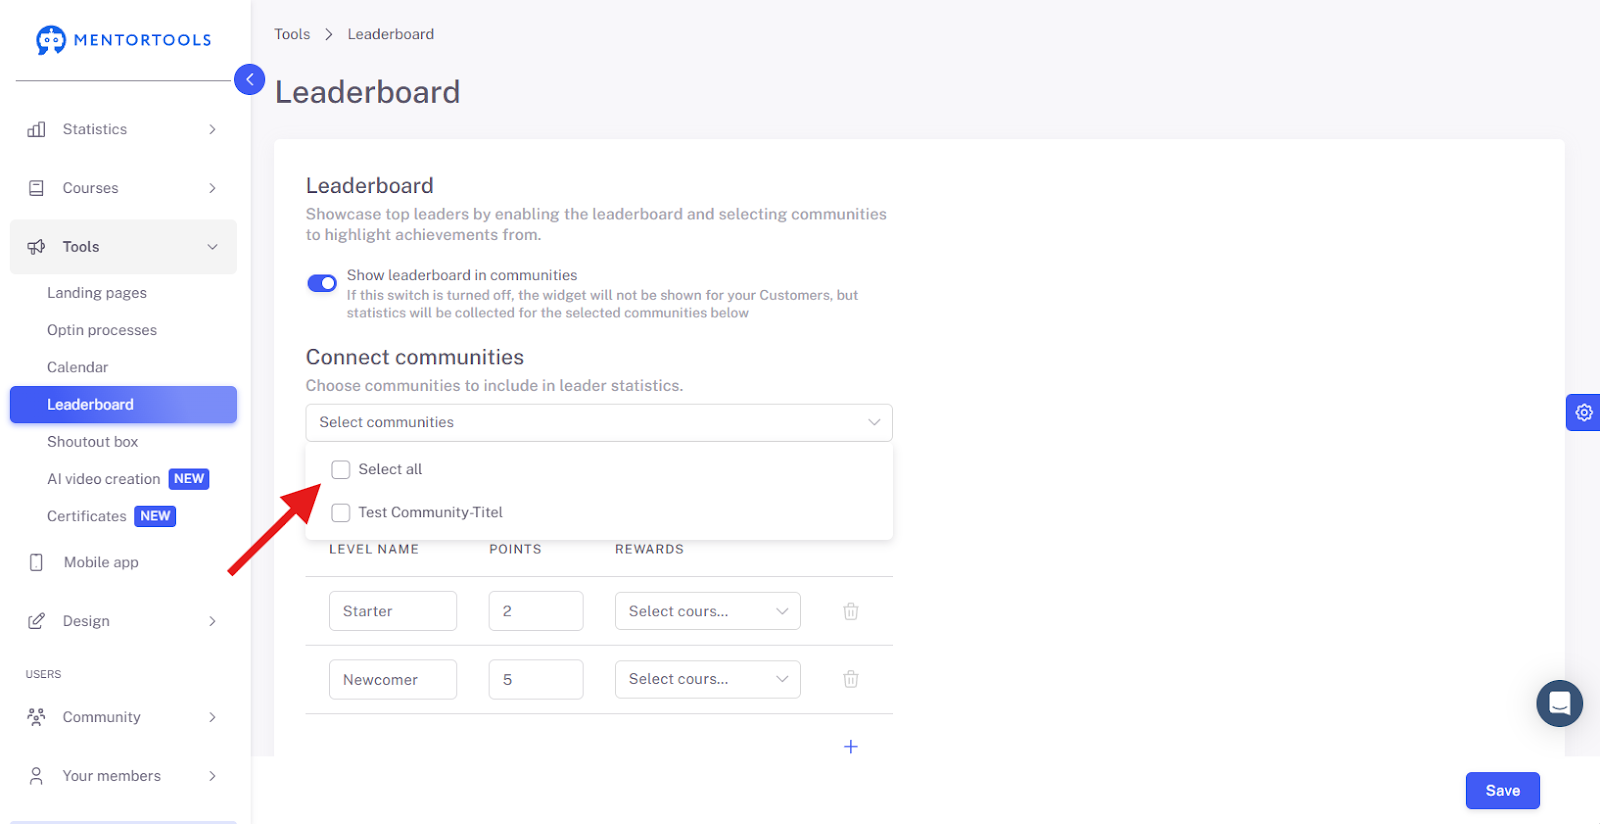
Then, toggle the switch to "On" or "Off" to confirm your selection.
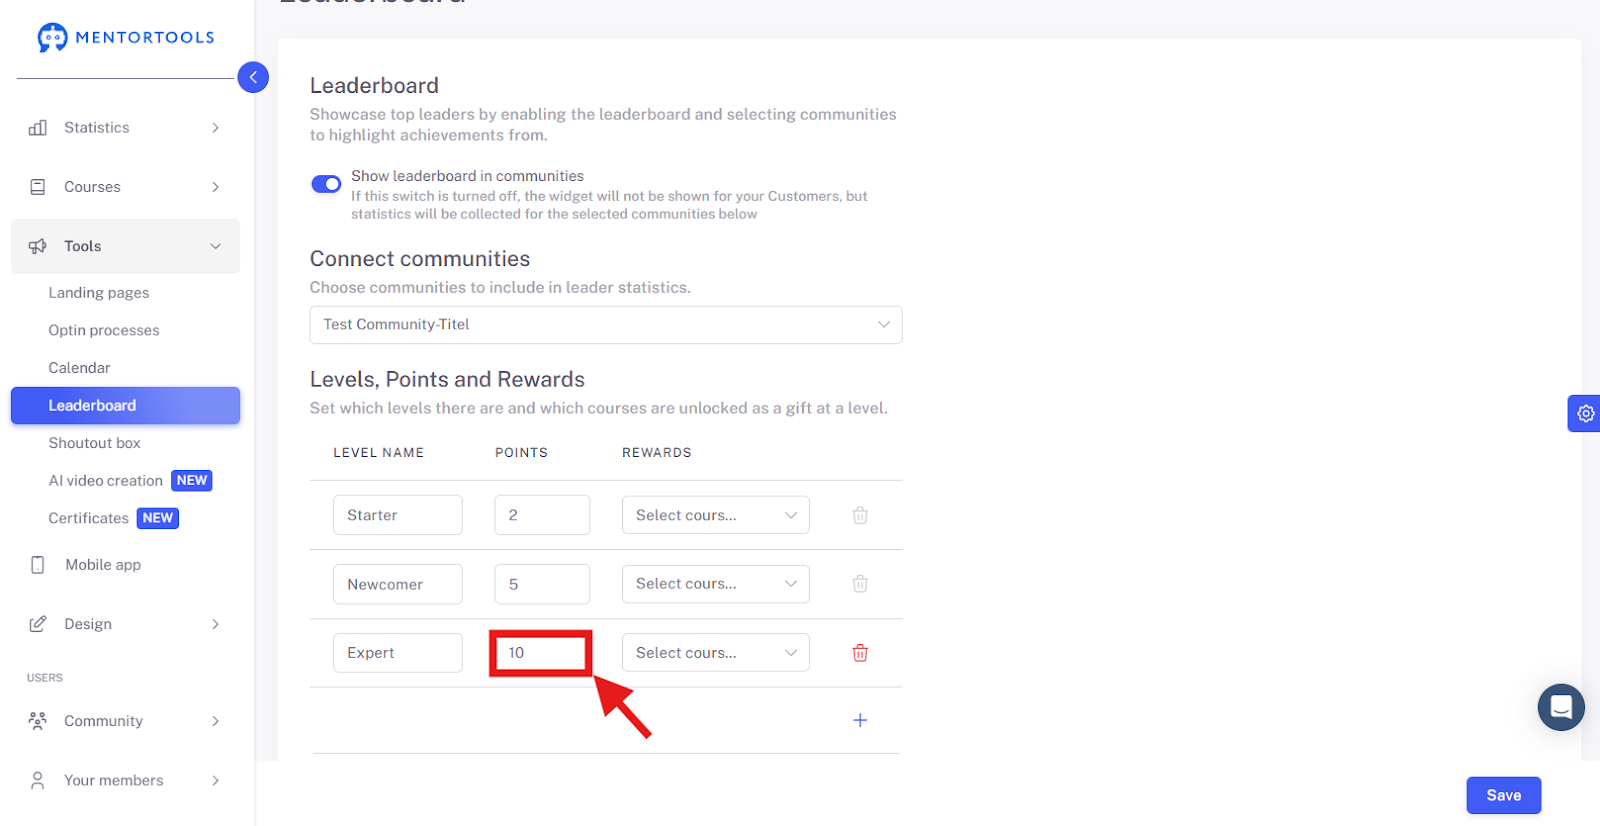
4. Set Levels & Points
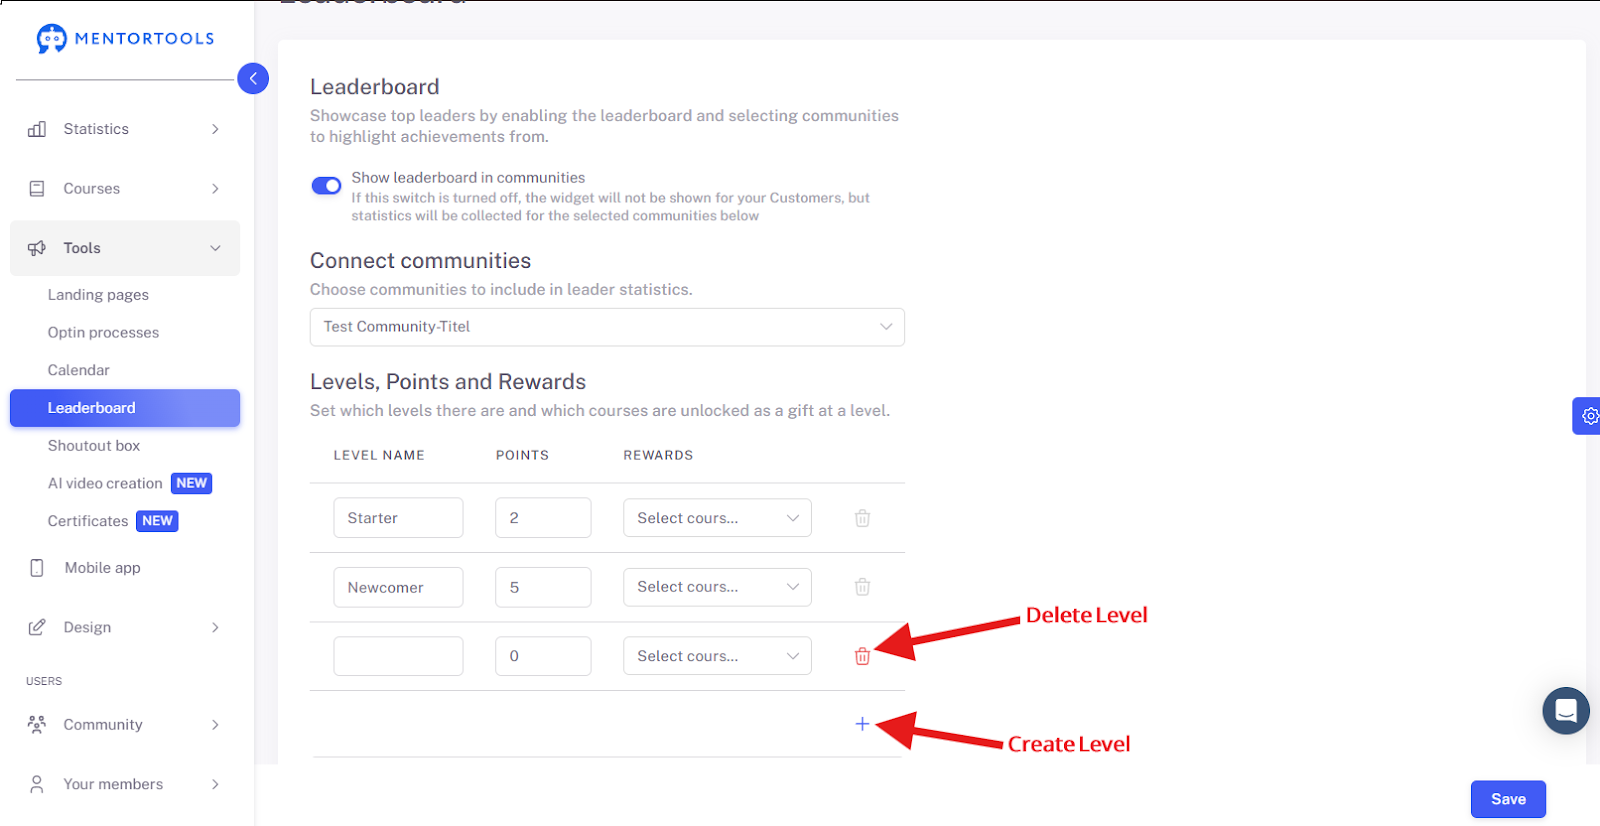
Enter level names for your leaderboard (e.g., "Expert").
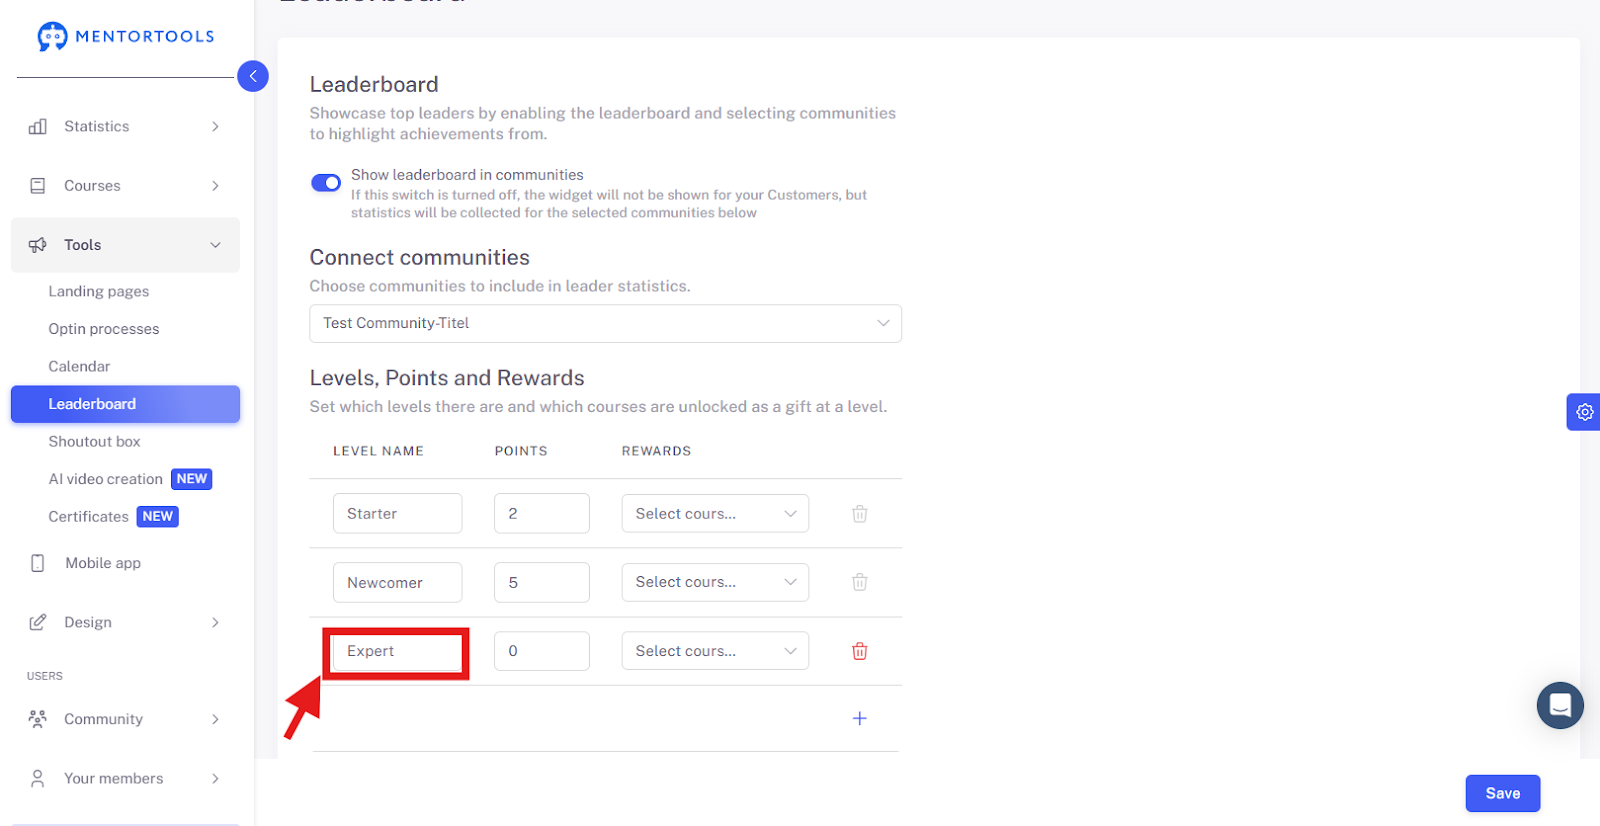
Then, determine the point value for this level.
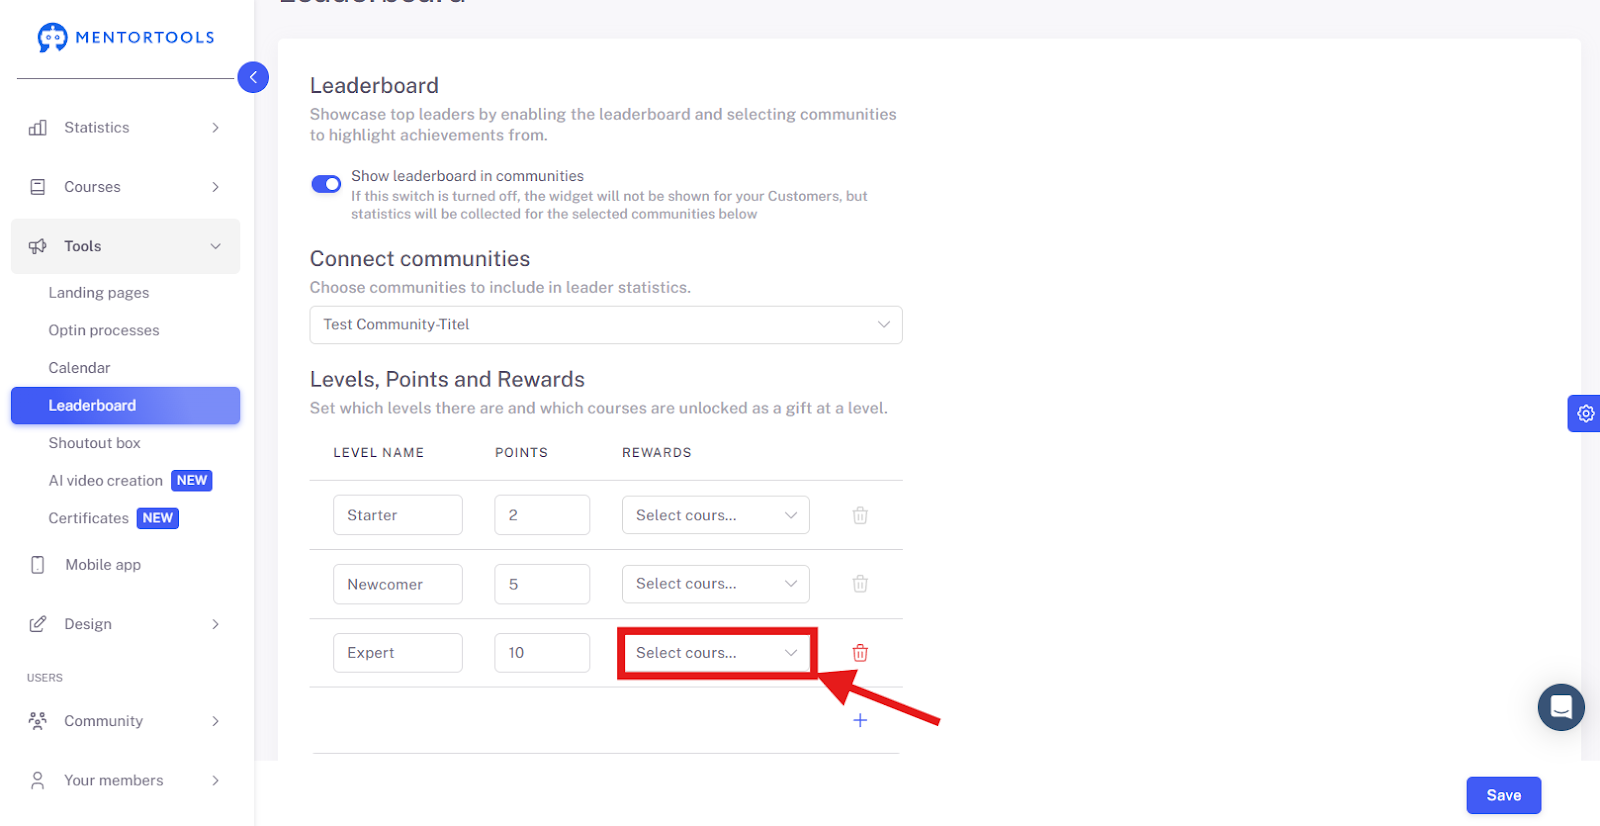
5. Assign Courses
Select the courses for which the leaderboard should apply.
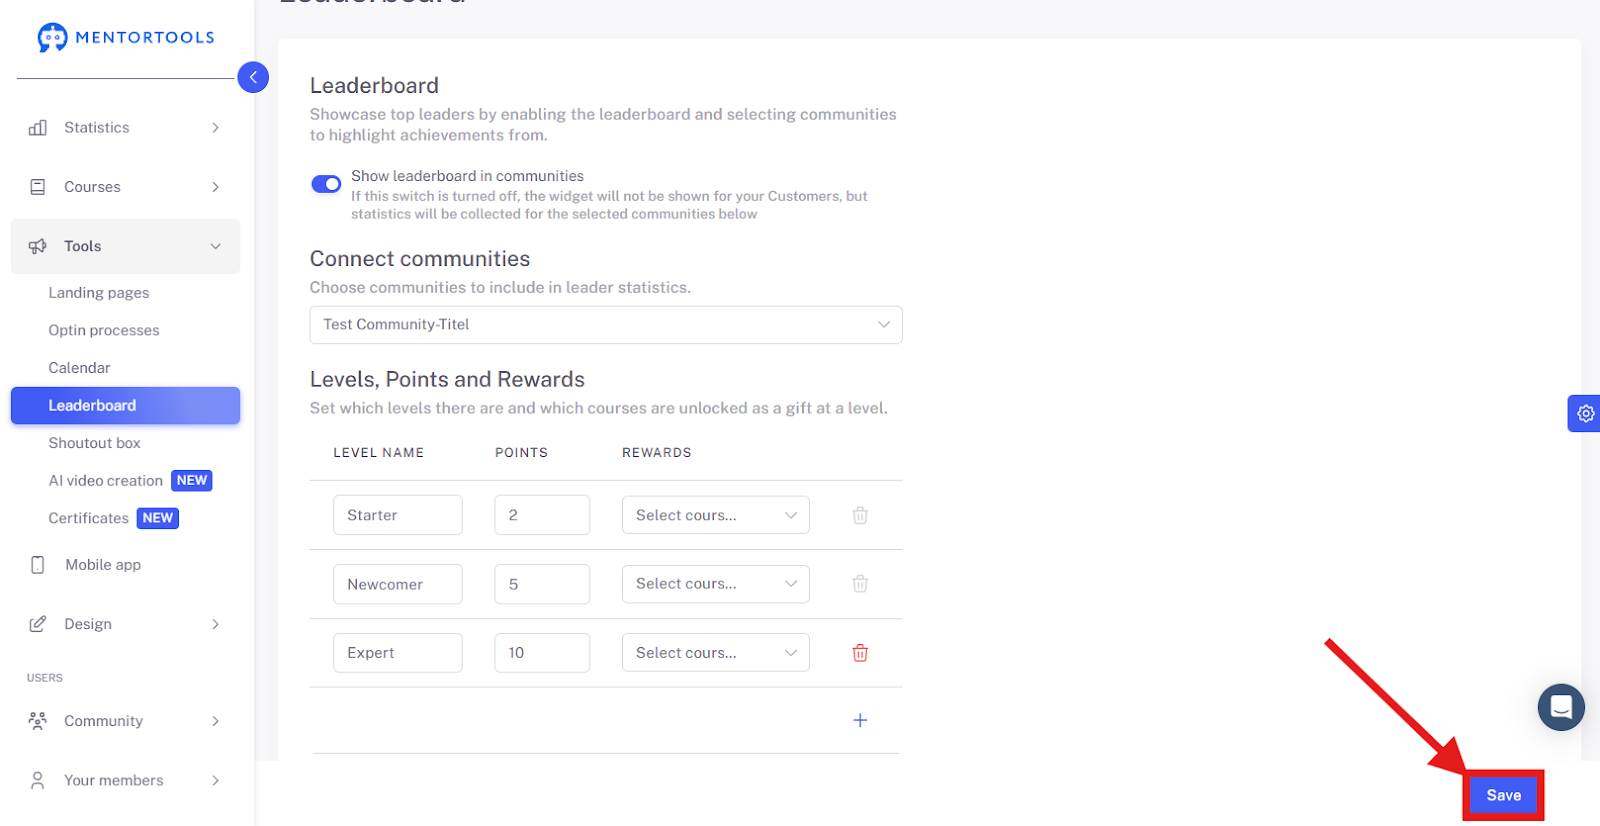
6. Save Changes
Save all your settings by clicking on "Save".
Summary
With the leaderboard in Mentortools, you can:
Motivate participants with points & levels.
Activate community-based ranking.
Specifically enable courses for gamification.
Increase progress and engagement.