Submodules – Creating Submodules
With the help of submodules, you can make the structure of your courses clearer, organize content better, and thus significantly improve your participants' learning experience. Here, you will learn step-by-step how to create a new submodule in Mentortools and use it effectively.
Last updated 10 months ago
Creating a Submodule
To create a new submodule in your online course, follow these steps:
Go to "Courses"
In your online academy, go to "Courses" in the side menu.

Go to "Overview"
To display the list of all your courses, then go to "Overview".

Select a Specific Course
Choose a specific course in which you want to create a new submodule. By clicking on "Modules," all existing modules in this course will be displayed.
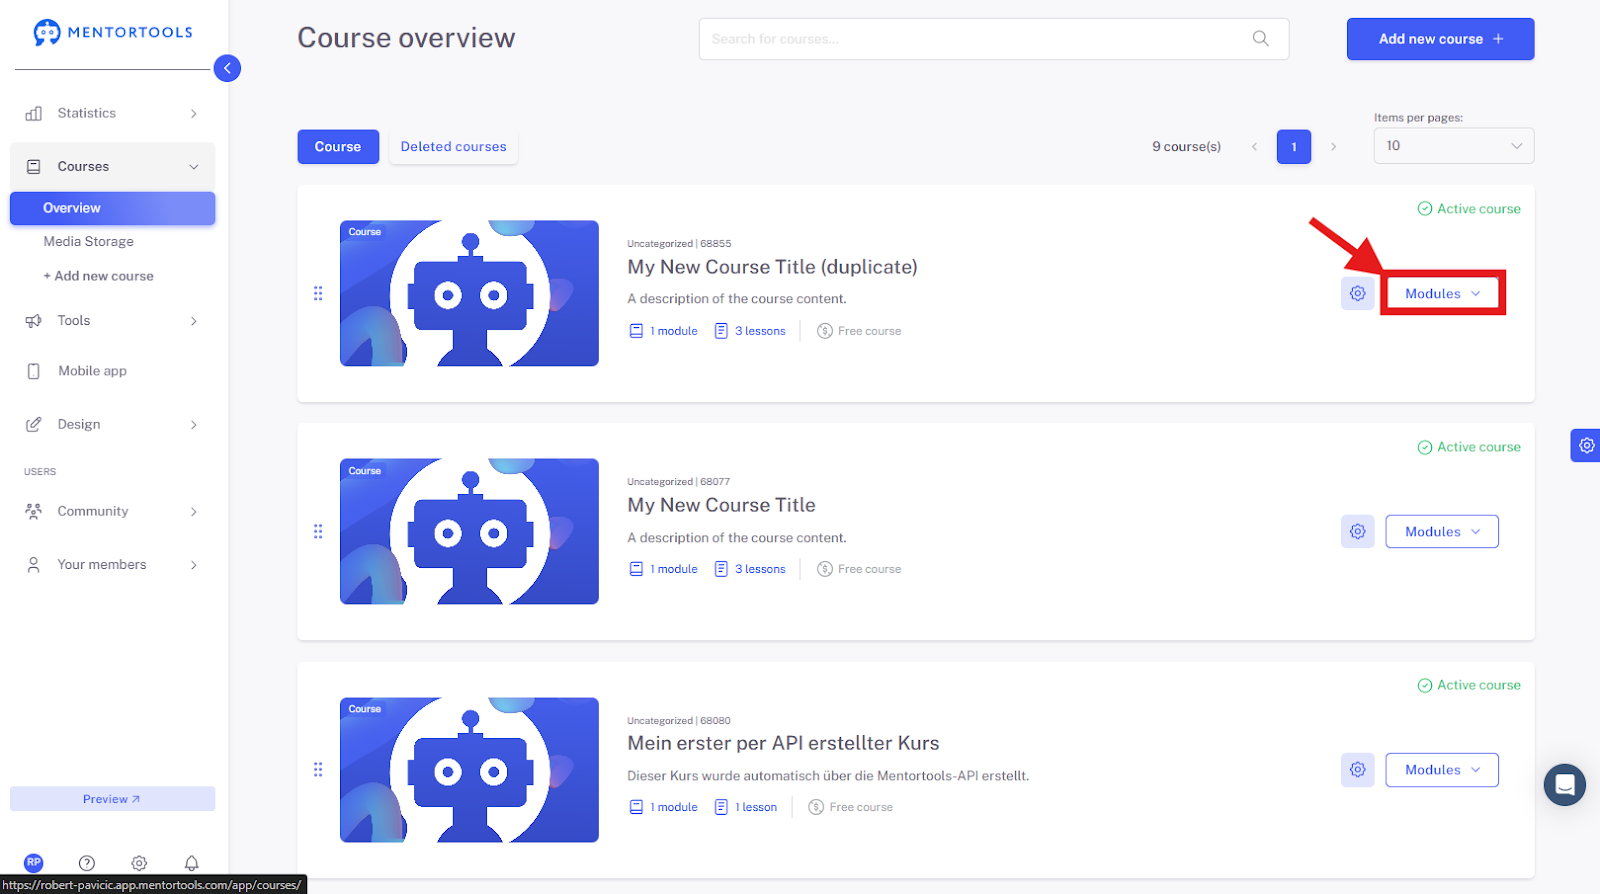
Select a Specific Module
Find the specific module to which you want to add a new submodule and click on "Content."
Creating a New Submodule
If you want to add a new submodule, click on "Content" to the right of the module to display all the lessons/quizzes/submodules in this module.

Name of the Submodule
First, you need to enter the name of your new submodule.

Type of Element
Then, in the dropdown menu next to the name, select the type of element you want to add to the module. You can add the following elements to the module: submodule, lesson, or quiz.
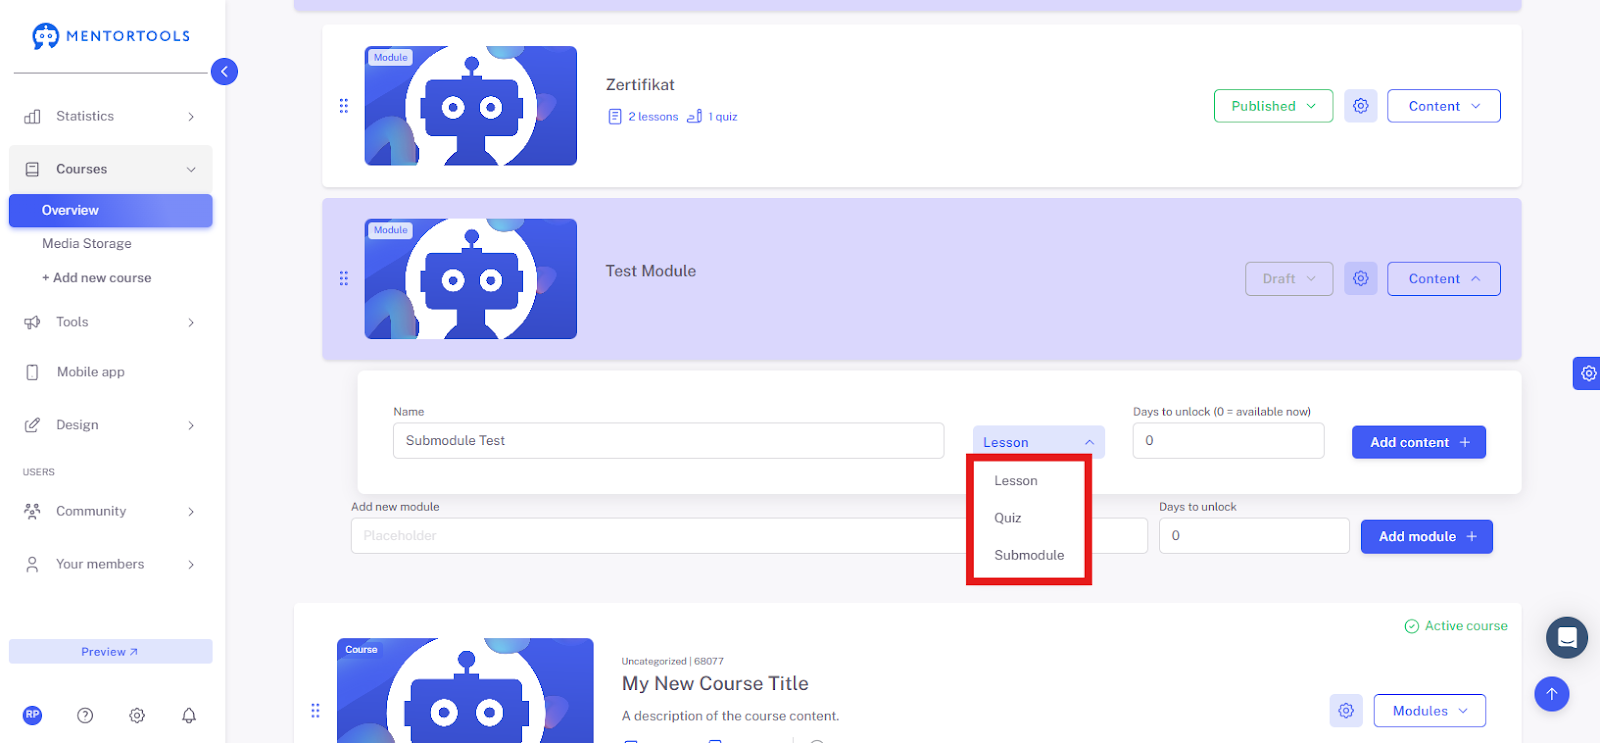
To add a submodule, therefore, select the "Submodule" option.

Days Until Release
You can also set the days until the submodule is released—how many days after the course access the submodule will be available to your customers. For example, if you set 10 days until the submodule is released, this submodule will be available to your customer 10 days after the course starts / they purchase the course / their registration in your membership area. If you leave a zero ("0") here, the submodule will be immediately accessible.
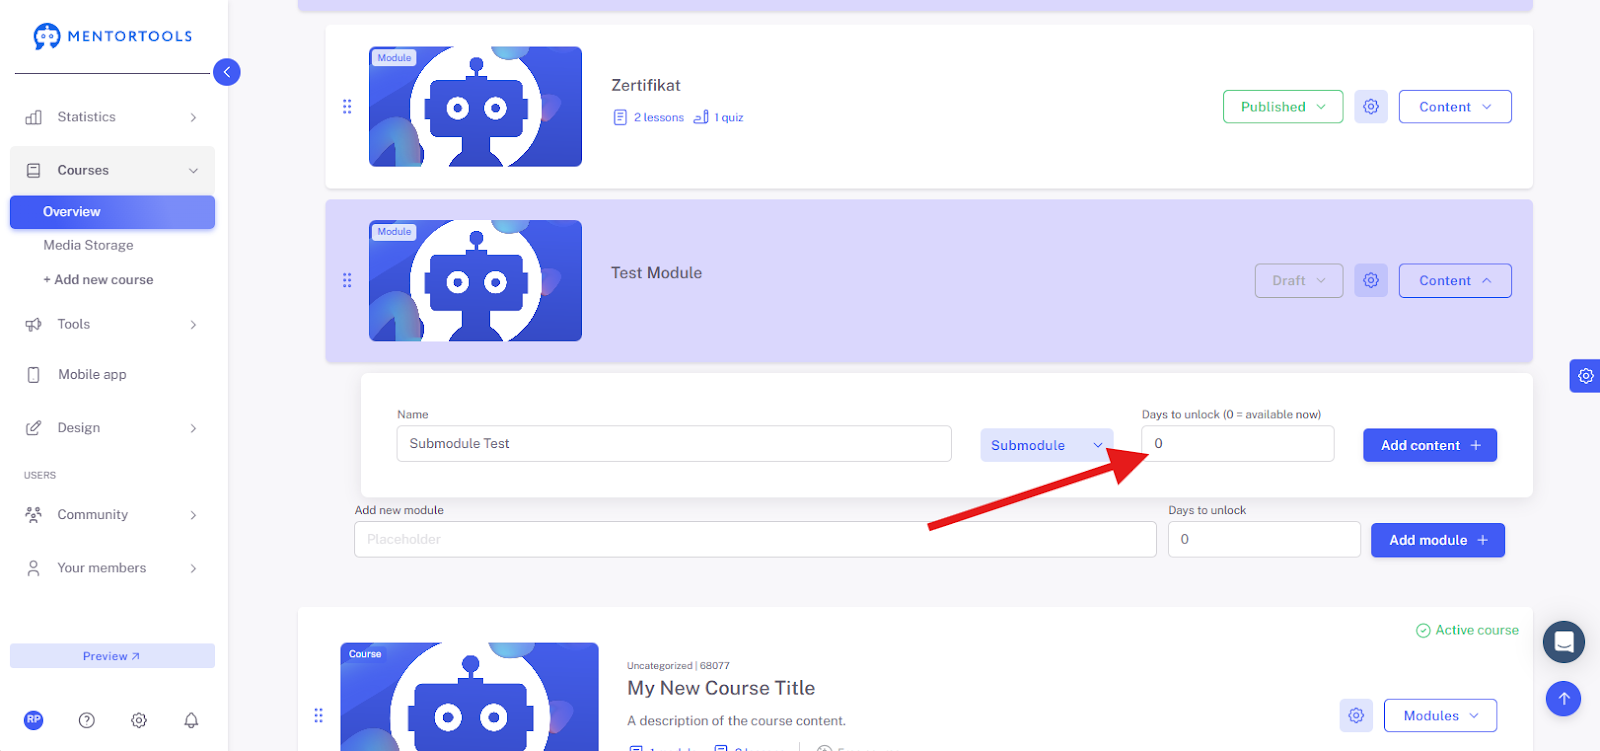
Creating the Submodule
Finally, click on "Add content +" to create the new submodule.

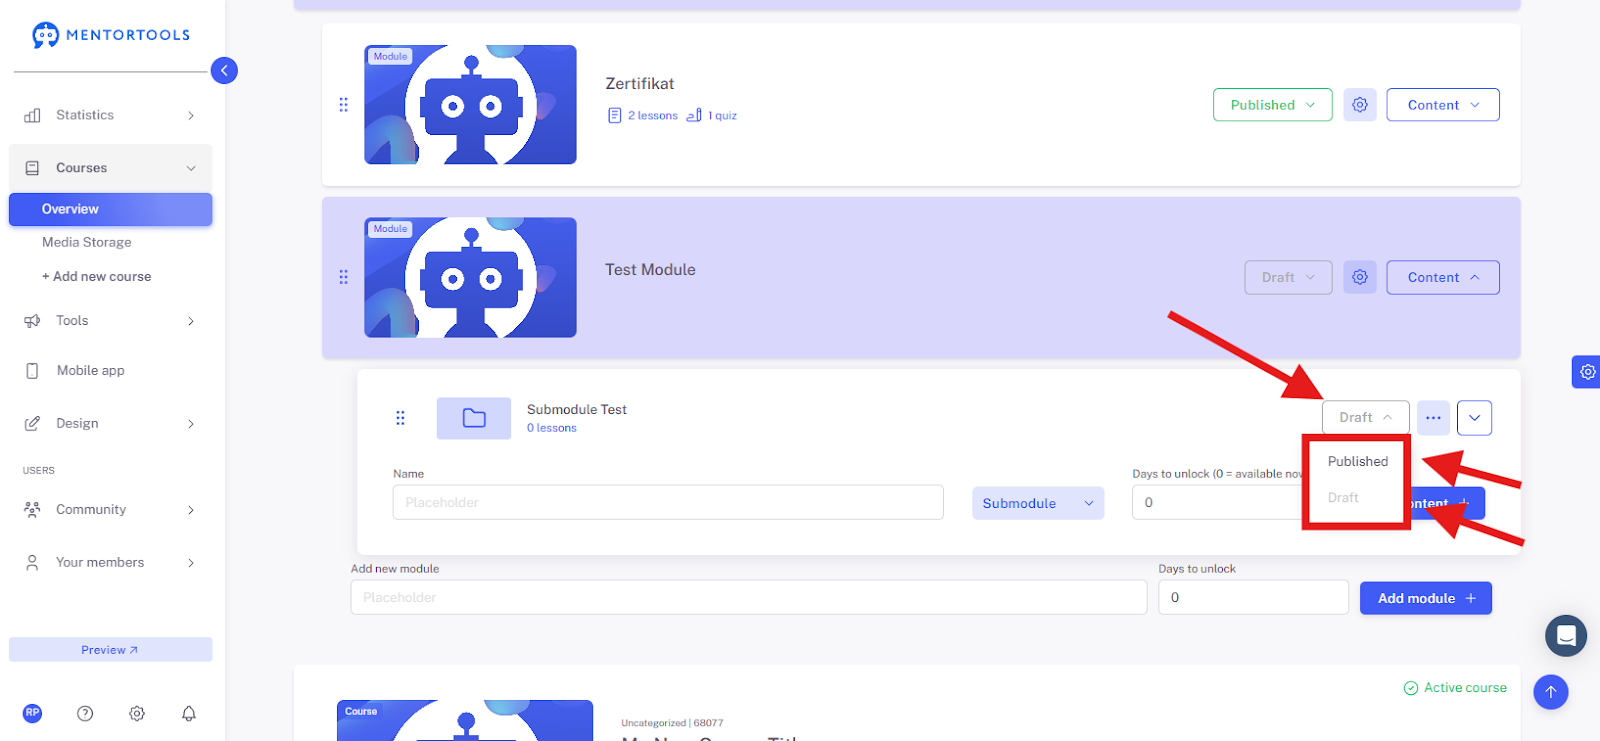
The submodule will then be created within the respective module.

Setting the Visibility of the Submodule
After you have created the new submodule, set its visibility for customers. If you leave the submodule in "Draft" mode (the default setting), the submodule will not be displayed in your online course. You can leave the submodule as a draft if, for example, you are still working on it and do not want it to be temporarily visible to your customers. If you want the submodule to be visible to your customers in the course, set the submodule to "Published."
Changing the Order of the Submodules
With the "drag & drop" function, you can change the order of the submodules within a module at any time. If you want to change the order of the submodules, simply click on the three dots on the far left next to the submodule, drag it, and release. This way, you can adjust the order of the submodules.

Adding Lessons and Quizzes to the Submodule
Now you can directly add lessons and quizzes to the newly created submodule.
To add a new lesson/quiz to the submodule, click on the arrow to the right of the submodule to display its content.

If you want to add a lesson, enter its name, select the "Lesson" option in the dropdown menu, set the days until release, and click on "Add content +".

If you want to add a quiz, enter its name, select the "Quiz" option in the dropdown menu, set the days until release, and click on "Add content +".

Within the respective submodule, you can move existing lessons/quizzes with the "drag & drop" function—by grabbing the lesson on the left side (3 dots) and moving it.

You can also copy lessons/quizzes from another submodule/module/course into this submodule by using the "Copy" function.
Tips for Using Submodules in Mentortools
Use submodules to logically subdivide extensive courses, for example, by weeks or thematic units.
Pay attention to clarity: Too many submodules and too much subdivision can appear confusing.
Combine submodules with a gradual release of content to specifically manage the participants' progress in the course.